


TABLE OF CONTENTS
Alarm Technology & Key Product Features
. . . . . . . . . . . . . . . . . . . . . . . . . .2
Alarm Limitations and Functions
. . . . . . . . . . . . . . . . . . . . . . . . . . . . . . . . . . .2
Installation Instructions
. . . . . . . . . . . . . . . . . . . . . . . . . . . . . . . . . . . . . . . . . . .3
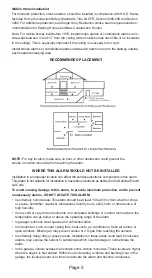
Where This Alarm Should Be Installed . . . . . . . . . . . . . . . . . . . . . . .3
Where This Alarm Should Not Be Installed . . . . . . . . . . . . . . . . . . . .5
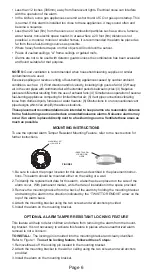
Mounting Instructions . . . . . . . . . . . . . . . . . . . . . . . . . . . . . . . . . . . . .6
Tamper Resistant Alarm Locking Feature . . . . . . . . . . . . . . . . . . . . . 6
Industry & Agency Recommendations
. . . . . . . . . . . . . . . . . . . . . . . . . . . . . .7
Alarm Operation
. . . . . . . . . . . . . . . . . . . . . . . . . . . . . . . . . . . . . . . . . . . . . . . . .7
Normal Operation . . . . . . . . . . . . . . . . . . . . . . . . . . . . . . . . . . . . . . .7
Trouble Signal . . . . . . . . . . . . . . . . . . . . . . . . . . . . . . . . . . . . . . . . . .7
Alarm Reset . . . . . . . . . . . . . . . . . . . . . . . . . . . . . . . . . . . . . . . . . . . .8
Quick Find® Alarm Origination . . . . . . . . . . . . . . . . . . . . . . . . . . . . .8
Silence Feature . . . . . . . . . . . . . . . . . . . . . . . . . . . . . . . . . . . . . . . . .9
Testing Instructions . . . . . . . . . . . . . . . . . . . . . . . . . . . . . . . . . . . . . . .9
Alarm & Battery Deactivation
. . . . . . . . . . . . . . . . . . . . . . . . . . . . . . . . . . . . . .9
What To Do If Alarm Sounds—Carbon Monoxide Detected
. . . . . . . . . . . .10
What You Should Know about Carbon Monoxide . . . . . . . . . . . . . .10
Symptoms of CO . . . . . . . . . . . . . . . . . . . . . . . . . . . . . . . . . . . . . . .10
Required CO Alarm Levels . . . . . . . . . . . . . . . . . . . . . . . . . . . . . . . .10
Response to CO Alarm Sounding . . . . . . . . . . . . . . . . . . . . . . . . . .10
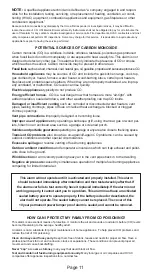
Potential Sources of CO . . . . . . . . . . . . . . . . . . . . . . . . . . . . . . . . . . 11
What To Do If Alarm Sounds—Smoke Detected
. . . . . . . . . . . . . . . . . . . . . .12
How Can I Protect My Family from Fire . . . . . . . . . . . . . . . . . . . . .12
Develop An Escape Plan . . . . . . . . . . . . . . . . . . . . . . . . . . . . . . . . .12
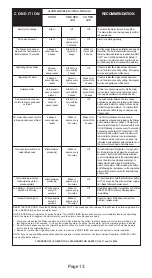
Quick Reference Guide
. . . . . . . . . . . . . . . . . . . . . . . . . . . . . . . . . . . . . . . . . .13
Troubleshooting Information . . . . . . . . . . . . . . . . . . . . . . . . . . . . . .13
Warranty
Alarm Returns . . . . . . . . . . . . . . . . . . . . . . . . . . . . . . . . . . . . . . . . .15
Repairs and Service . . . . . . . . . . . . . . . . . . . . . . . . . . . . . . . . . . . .15
Regular Maintenance . . . . . . . . . . . . . . . . . . . . . . . . . . . . . . . . . . . .15
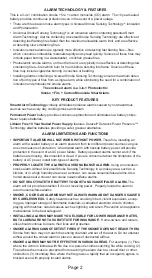
PLEASE READ AND SAVE!
THANK YOU for purchasing this 3-in-1 Photoelectric Smoke + Fire + Carbon Monoxide
Smart Alarm . This tamper-proof alarm does not require battery changes . This alarm
contains a 10 year permanent power sealed battery to provide continuous protection-
-even in the event of a power outage . The sealed battery will last for approximately 10
years . This manual includes important information regarding where to install the alarm,
how to operate, maintenance, testing and product features . It also includes tips and
information which could help protect you and your family .
MODEL
MPC322S
Summary of Contents for MPC322S
Page 14: ...Page 14...