3a: Setting up the Futura Pro Remote:
•
Will the Futura Pro Remote be used with a Gate Controller Unit (GCU) or a Dual Frequency Gate
Controller Unit (DFGCU) as the gate activator?
NOTE: If activating an Echo remote directly
to a GCU/DFGCU, there can be NO other Primary Gate Access Unit in the network.
No: Go to Step 4.
Yes:
Press the Learn button on the GCU/DFGCU once, until the LED lights up solid, and
release.
-
Within 5 seconds, on the Futura Pro Remote press the
large
button, button
2
and button
4
at the same time, for
1 second,
until the LED lights up,
and
release
.
-
The LED on both units will double blink, 3 times, and the remote will beep, indicating
success.
-
Proceed to
Step 3b.
3b: Setting up the Futura Pro Remote:
•
Will you be using more than 1 Futura Pro Remote?
No: Go to Step 3c.
Yes: NOTE:
Before starting this step, please make sure you disconnect power to the
GCU/DFGCU. On the additional Futura Pro Remote, press the
large
button, button
2
and
button
4
at the same time, for
1 second,
until the LED lights up,
and
release
.
-
Within 5 seconds, on the main Futura Pro Remote (the one activated to the
GCU/DFGCU), press the
large
button only, 1 time.
-
The LED on the additional unit will double blink, 3 times, and the LED on the main unit
will blink twice, indicating success.
-
For any additional remotes please repeat
Step 3b
for each unit that will be used.
-
Proceed to
Step 3c
.
3c: Setting up the Futura Pro Remote:
•
Will you be using more than 1 GCU/DFGCU with your Futura Pro Remote(s)?
No: Go to Step 6.
Yes: NOTE:
This will allow up to (4) gate controllers to be activated independently by
each of the 4 buttons based on their controller ID# (1-4).
Setting the Gate Controller ID (1-4)
If you are using more then one Gate Controller, the additional units must have their ID set.
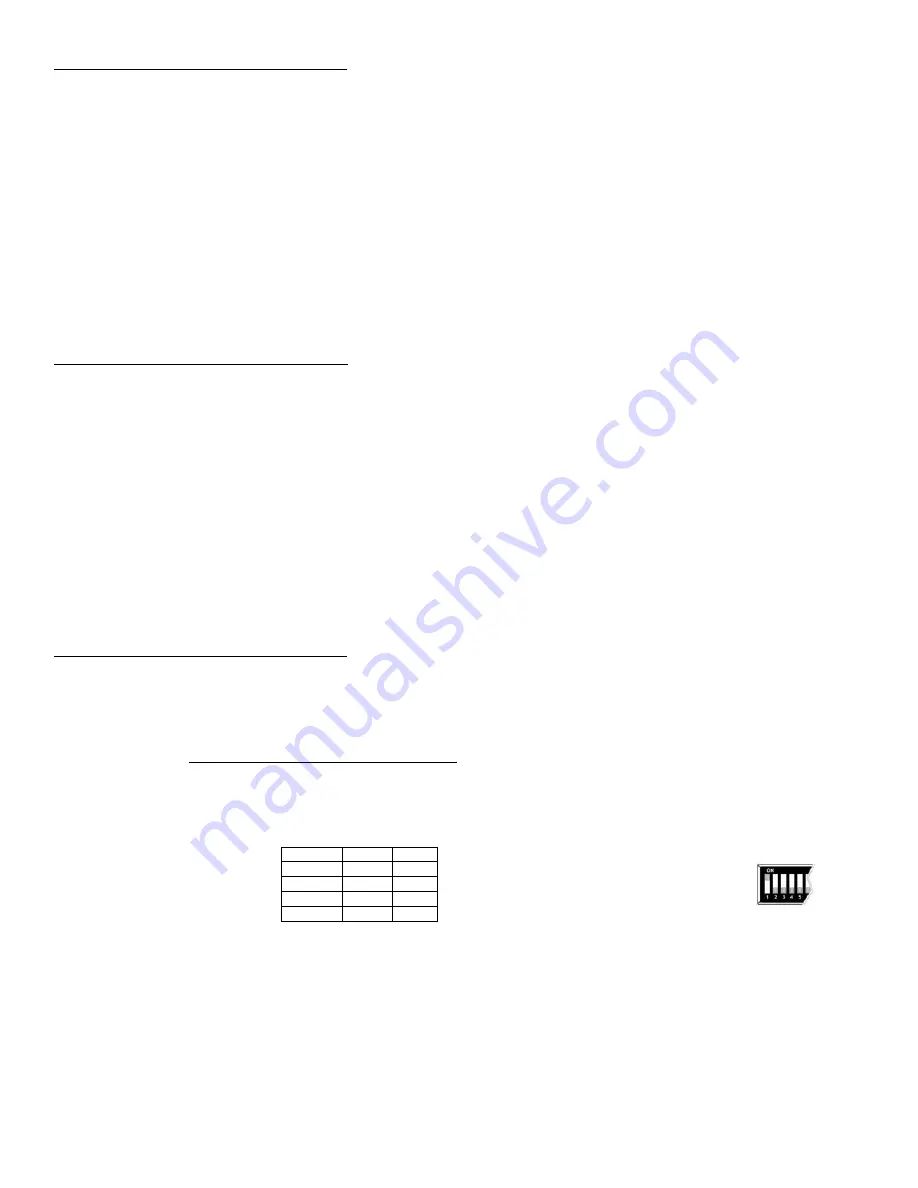
The Gate Controller ID is set by changing dipswitches #1&2 in the Gate Control Unit (see
picture below)
2
GCU ID
SW1
SW2
1
off off
2
on off
3
off on
4
on on
Example:
The dipswitches for Gate
Controller #2 would look like this:
Proceed to
Step 6
.


