background image

Summary of Contents for M-25XPB(C)

Page 1: ...M 25XPB C M 35B C M 408 M 508 PUBLICATION NO 200550 REVISION 3 AUGUST 2015 Westerbeke Corporation Myles Standish Industrial Parle 150 John Hancock Road Taunton MA 02780 7319 U S A Website www westerbeke com JS j Member National Marine Mamifacturen Association ...

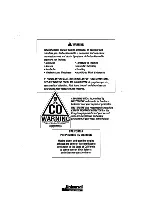
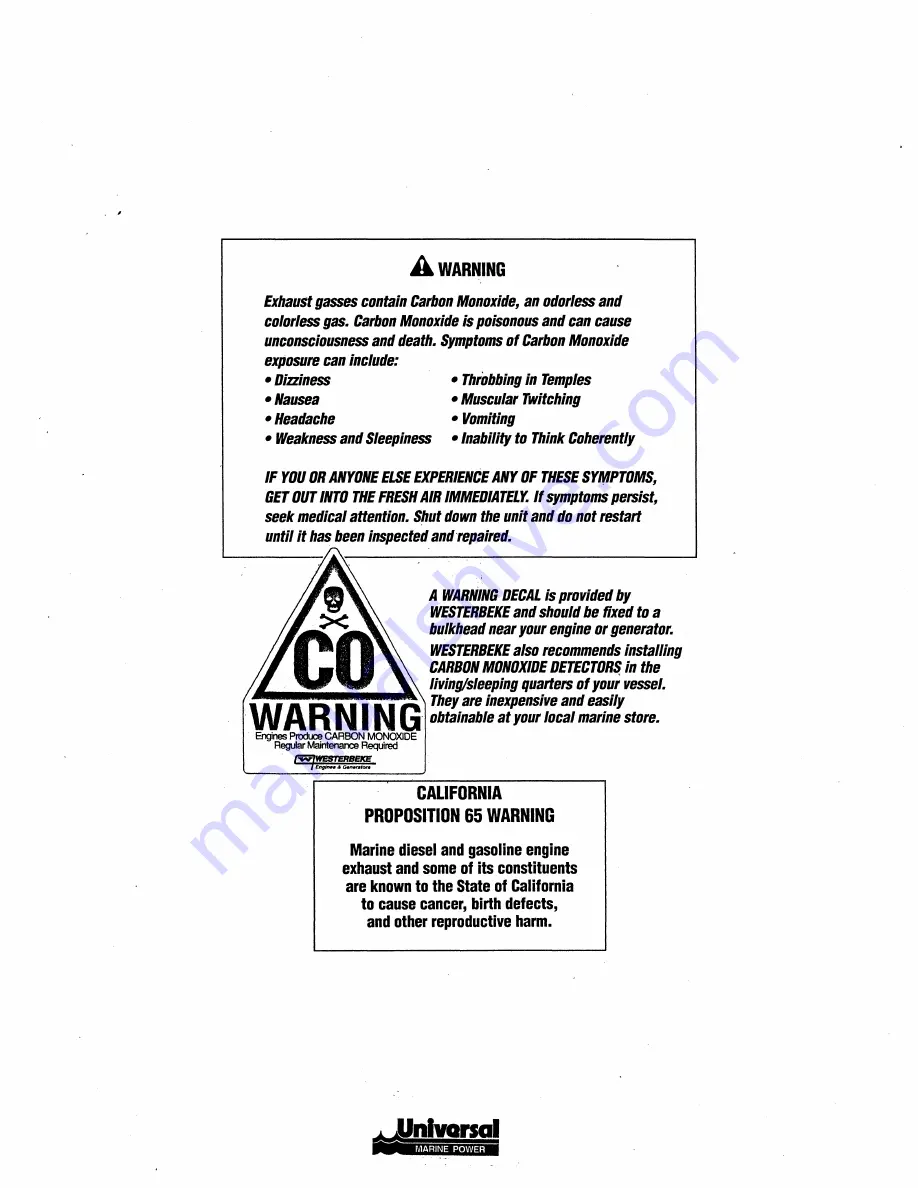
Page 2: ...ttention Shut down the unitanddo notrestart until it has been inspectedandrepaired A WARNING DECAL Isprovidedby WESTERBEKE andshouldbe fixed to a bulkheadnearyour engine orgenerator WESTERBEKE also recommends installing CARBONMONOXIDE DETECTORS in the living sleeping quarters ofyoui vessel They are inexpensive and easily WARNING obtainable atyour local marine store Engfrles Produce CARBON MONOXIDE...

Page 3: ...other potential sources of spilled fuel or fuel vapors Use a suitable container to catch all fuel when removing the fuel lines or fuel filters Do not operate with the air cleaner silencer removed Backfire can cause severe injury or death Do not smoke or permit flames or sparks to occur near the fuel sysfe J eep t11e compartment 8lld the et gine clean and free of debris to minimize the chances of f...

Page 4: ... eyes inadvertently when removing electrolyte caps TOXIC EXHAUST GASES A WARNING Carbon monoxide CO is a deadlygas Ensure that the exhaust system is adequate to expel gases discharged from the engine Check the exhaust system regularly for leaks and make sure the exhaust manifold water injected elbow is securely attached 11 Be sure the unit and its surroundings are well ventilated Run blowers when ...

Page 5: ...ENERATOR INSTALLATIONS Preparations to install an engine should begin with a thor ough examination of the American Boat and Yacht Council s ABYC standards These standards are a combination of sources including the USCG and the NFPA Sections of the ABYC standards of particular interest are H 32 Ventilation for boats using diesel fuel H 33 Diesel Fuel Systems P 1 Installatiion ofExhaust Systems for ...

Page 6: ...sel s various operating conditions install a siphon break NOTE A siplton break requires periodic inspection and cleaning to ensure proper operation Failure to properly maintain a siphon break can result in catastrophic engine damage Consult the siphon break manufacturerfor proper maintenance EXHAUST SYSTEM The exhaus t system s hose MIJST o celtified for marine use Con11gated Marine Exhaust Hose i...

Page 7: ...2 Changing the Fluid 34 Engine Cooling Circuit 14 Gear Shifting 34 Raw Water Pump 15 Changing the Raw Water Impeller 15 Raw Water Intake Strainer 16 Daily Operation 35 Control Cables 35 Maintenance 35 Thermostat 16 Transmission Troubleshooting Chart 36 Heat Exchanger 16 HBW Transmission 37 Engine Oil Change 17 Shaft Couplings 37 Remote Oil Filter 18 Shift Lever 37 Fuel System 19 Air Cleaner Silenc...

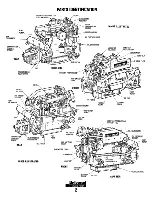
Page 8: ...MP ZINC RIGHT SIDE COOLANT PUMP SHEAVE OIL FILL RAW WATER PUMP b __COOLANT DRAIN FUEL FILTER ALTERNATOR M 50BILLUSTRATED OIL FILTER FRONT COOLANT DRAIN FLEXIBLE MOUNT 4 Unlvarsal 56 M 1 1 M W3 W 2 FLEXIBLE MOUNT M 40BILLUSTRATED AIR FILTER SILENCER MANIFOLD PRESSURE CAP OIL PAN COOLANT DRAIN MANIFOLD PRESSURE CAP COOLANT FILL ALTERNATOR MANIFOLD I D NAME PLATE LEFT SIDE START MOTOR OIL DRAIN HOSE ...

Page 9: ...our website www westerbeke com and register your products warranty on line You should receive a Customer Identification card in the mail within 60 days of registering If you do not please contact the factory and have your model number serial number and in service date available PRODUCT SOFTWARE Product software tech data parts lists manuals brochures and catalogs provided from sources other than U...

Page 10: ...ORDERING PARTS Whenever replacement parts are needed always provide the engine model number and engine serial number as they appear on the silver and black identification nameplate located on the manifold You must provide us with this infor mation so we can identify your engine In addition include a complete part description and part number for each part needed see the separately furnished Parts C...

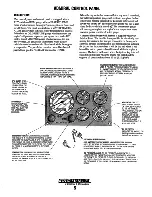
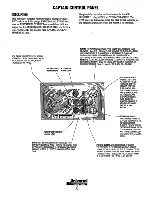
Page 11: ... buzzer to the four pin connection on the engine s electncal harness The installer is also responsible for installing the buzzer in a location where it will be dry and where it will be audible to the operator should it sound while the engine is running The buzzer will sound when the ignition key is turned on and should silence when the engine has started and the engine s oil pressure rises above 1...

Page 12: ...ARM WILL EMIT A PULSATING SIGNAL THE ALARM WILL ALSO SOUND IFTHE COOLANT TEMPERATURE IN THE FRESHWATER COOLING CIRCUIT RISES TO 210 F 99 C IN THIS EVENT THE ALARM WILL EMIT ACONTINUOUSSIGNAL NOTE THE ALARM WILL SOUND WHEN THE KEY SWITCH IS TURNED ON THIS SOUNDING IS NORMAL ONCE THE ENGINE STARTS AND THE ENGINE S OIL PRESSURE REACHES 15 psi 1 1 kg em THE ALARM WILL SILENCE TEST BunDN WHEN PRESSED T...

Page 13: ... and not be extended if synthetic oils are used NOTE The infomwtion above supersedes all statements regarding synthetic oil For recommended oil viscosity see the following chart Operating Temperature Oil Viscosity Above 68 F 20 C SAE lOW 40 or 15W 40 41 68 F 5 20 C SAE lOW 40 or 15W 40 Below 41 F 5 C SAE lOW 40 or 15W 40 ENGINE COOLANT UNIVERSAL recommends a mixture of 50 antifreeze and 50 distill...

Page 14: ...Look for loose or missing parts disconnected wires unattached hoses and check threaded connections D Check the fuel supply and examine the fuel filter separator D Check the coolant level in the plastic recovery tank and at the manifold bowls for contaminants D Check the transmission fluid level NOTE Refer to the specifications pages in this manualfor fuel oi and transmission types and quantities C...

Page 15: ...t this from happening by closing the raw watersupply through hullshut off draining the exhaustmuffler and correcting the cause ofthe excessive engine cranlcing Engine damage resulting from raw water entryis nota warrantable issue the owner operatorshouldkeep this in mind Once the engine starts check instruments for proper oil pressure and battery charging voltage NOTE Never attempt to engage the s...

Page 16: ...ted rpm are signs of an overload 6 During the next 25 hours the engine may be operated at varying engine rpms with short runs at full rated rpm Avoid prolonged idling during this break in period 10 Breaking in a new engine basically involves seating the piston rings to the cylinder walls This cannot be accomplished by long periods of running at idle nor by early running at full rpm Idle running ma...

Page 17: ...es etc Check for water discharge with the exhaust NOTE Should engine fail to start wait 30 seconds repeat the above procedure and PREHEAT longer 6 Allow a few minutes for the engine to warm at a comfortable high idle 1400 1500 rpm then reduce the rpm to the normal idle position shift into gear and get underway A CAUTION When shifting the transmission always reduce the engine rpm to idle then shift...

Page 18: ... then every 250 hours or once ayear Carefully inspect for leaks Check that the exhaust hoses are properly attached and that the securing clamps are tight Check the integrity mounting security of the water injected exhaust elbow Check all connections are secure proper travel and lubricate with WD 40 Initial change then every 250 hours or once ayear Initial change then every 250 hours or once ayear ...

Page 19: ...heck and adjust injection opening pressure and spray conditions Drain flush and re fill the cooling system with appropriate antifreeze mix Adjust valves Incorrect valve clearance will result In poor engine performance Check solenoid and motor for corrosion Remove and lubricate Clean and lubricate the starter motor pinion drive Remove from engine remove cover and inspect cam and wear plate Replace ...

Page 20: ... cap Flush the system with fresh water then start the refill process See the Parts Identification photos in this manual for locations NOTE The petcock on the heat exchanger can also be used to help drain engine coolant AwARNING Beware of the hotengine coolant Wear protectivegloves To Refill With Coolant With the engine running in idle slowly pour clean premixed coolant into the manifold NOTE Open ...

Page 21: ...head screws that hold the housing to the cover 5 Remove the impeller cover exposing the impeller 6 Pull the impeller off the shaft Observe that the key on the shaft is not lost GASKET HOUSING WEAR PlATE 7 Check the cam and inner wear plate for wear Replace as needed 15 A CAUTION If any of the vanes have broken off the impeller they must be found to prevent blockage in the cooling circuit They ofte...

Page 22: ...nc Anode REPLACE CLEAN REUSE A zinc anode or pencil is located in the raw water cooling circuit within the heat exchanger The purpose of the zinc anode is to sacrifice itself to electrolysis action taking place in the raw water cooling circuit thereby reducing the effects of electrolysis on other components of the system The condition of the zinc anode should be checked monthly and the anode clean...

Page 23: ...e used oil filter you may find it helpful and cleaner to punch a hole in the upper and lower portion of the old filter to drain the oil from it into a container before removing it This helps to lessen spillage NOTE Do notpunch this hole without first loosening the filter to make certain it will come off An automotive filter wrench should be helpful in removing the old oil filter Place some paper t...

Page 24: ... 3 4 TURN ARER THE D RING CONTACTS THE BASE NOTE Westerbeke is not responsiblefor engine failure due to incorrect installation ofthe Remote Oil Filter A CAUTION It is vital to install the oil lines co ectly If the oil flows in the reverse direction the by pass valve in the filter assembly will prevent the oil from reaching the engine causing an internal engine failure If there is no oilpressure re...

Page 25: ...e the preheat circuit This activates the fuel which draws fuel into the engine fuel system and drives air out via the fuel return If the high pressure injector lines need to be bled loosen the injector line nut at each injector open the throttle and crank the engine over until fuel spurts from the nut and line Then secure the nuts and start the engine as normal NOTE Do not attempt this procedure o...

Page 26: ...y prime the system and the engine should start NOTE The cartridge contains fuel Take care not to spill it during disassembly Perform the PRIMING THE FUEL YSTEM after replacing the spin onfilter FUEL FILTER BLEED SCREW FUEL WATER SEPARATOR A primary fuel filter of the water separating type must be installed between the fuel tank and the engine to remove water and other contaminants from the fuel be...

Page 27: ...ctions are clean and tight to the battery posts and to your engine GLOW PLUGS The glow plugs are wired through the preheat solenoid When PREHEAT is pressed at the control panel this solenoid should click on and the glow plug should begin to get hot Inspection To inspect the plug remove the electrical terminal connec tions then unscrew or unclamp each plug from the cylinder head Thoroughly clean ea...

Page 28: ...y when working on the engine electrical system Checking for Proper Voltage If you suspect the alternator has failed perform the following tests with the engine off 1 Using a voltmeter connect the voltmeter red wire clip to the output terminal B 2 Connect the voltmeter negative wire to any ground on the engine 3 Check the battery voltage It should read 12 to 13volts 4 Check the voltage between the ...

Page 29: ...two additional instrument sendors are assembled to the engine to provide data for the panel gauges refer to the illustra tions below REMOVE THE PLUG AND SCREW IN THE SENDER THERMOSTAT HOUSING PLUG ATTACH THE SPARE WIRE FROM THE HARNESS BUNDLE co orcodedyeflow REMOVE THE PLUG AND INSTALL THE OIL TEMP SENDER NOTE Denotes oilpressure afann circuit resisterPN039806 offthe preheat sofenoi I tenninal NO...

Page 30: ... acontinuous rating of 175 amps at 12 VDC will normally serve this function but aswitch must never be used to IZ VDC IAT KET I 0 Pl l PREHEAT SWITCH ITAITEit LIFT PUMP FUlL CWIIll r 1 e 1 1 O P IUDtl LAlOP TUT ADMIRAL PANEL CAPTAIN PANEL HITSUBISHI 50 AMP ALT 114 LT BLU 114 PI IlK make the starter circw t 1 51 AMP ALTERNATOR STANDARD ALTERNATOR ON THE PRESTOLITE 72 AMP ALI me lcI Hd l Dr 8ZB Dr 1 ...

Page 31: ...ould not be used to make or break this circuit tl4 LT BLU t14 GRA NOT USED 114 PINK 110 RED 114 BRN PRESIOL I IE 72 AMP ALI 110 RED 19 0 z 0 C Q 0 0 z _o z z l o J z u z u u l o J l o J u __ __ 1 N N __ 0 N N I I I CD CD I I l o J l o J z z l o J __ _ _ _ I E 0 0 _ 0 0 0 z _ _ z u 0 0 __ __ 0 __ __ _ __ __ z I __ __ 0 Q_ u z z z _ 1 z __ __ 0 0 z z __ 1 0 _ __ __ 0 _ 4 Unlvarsal MARINE POWER 25 OI...

Page 32: ... TEIN OF KETSWITCH I TSWITCM STARTER SOLENOID r l STARTER I I I t 1 M I I I L___J PREHEAT SOLENOID r l GLOWPLUGS I I I I s I I L___J RESISTOR IK 1 ZW TO THE TEIN OF THE ALARM BUZZER TO TN p TERN OF THE ALARM BUZZER 26 ALTERNATOR TO TNE s TO THE s TUN OF TEIII OF TN TACH W T GUAG LIFT PUMP p r WATER TEMP SENDER WATER TEMP TO THE t TERII OF TH ALAHII BUZZER SWITCH TO THE TACH GROUND ...

Page 33: ...ed following the engine s firing order FIRING ORDER 3 CYLINDER MODELS 4 CYLINDER MODELS 1 2 3 1 3 4 2 Adjust the valves beginning with Cylinder 1 Rotate the crankshaft slowly and observe the operation of the valves for Cylinder 1 Watch for the intake valve to open indicating the piston is on its intake stroke the piston is moving down in the cylinder Continue to rotate the crankshaft slowly and lo...

Page 34: ... mechanical oil pressure gauge in its place After warming up the engine set the engine speed at idle and read the oil pressure gauge OIL PRESSURE 7 psi 49 KPal at idle speed SENDER AND SWITCH TORQUE 9 13 l Ib 1 2 1 8 m kg FUEL INJECTORS OIL GALLERY M 508 SHOWN In case of severe vibrations and detonation noise have the injectors checked and overhauled by an authorized fuel injection service center ...

Page 35: ...noid and connection to engine ground stud Check battery cable connections 5 Check solenoid 1 Check connection at solenoid 2 Check switch with ohmmeter 3 Check that 12 volts are present at starter solenoid activation connection 4 Check connection to starter solenoid and connection to engine ground stud Check battery cable connections 5 Check battery charge state 1 Check that fuel valves are open 2 ...

Page 36: ... or loose belts tighten replace 2e Air leak in system run engine and open cooling system petcocks heat exchanger manifold etc to bleed air Add coolant as needed Exhaust smoking problems 1 Blue smoke 1 Incorrect grade of engine oil 1a Crankcase is overfilled with engine oil oil is blowing out through the exhaust 2 White smoke 2 Engine is running cold 2a Faulty injector or incorrect injector timing ...

Page 37: ...located 3 Low resistance leak to ground 3 Check all wires for temperature rise to locate the fault 4 Faulty alternator 4 After agood battery charging disconnect alternator at output If leakage stops Remove alternator and bench test Repair or replace ALARM BUZZER SOUNDING 1 Resistor shorting 1 Check resistor 1000 ohm resistor found between preheat Oil pressure normal solenoid I terminal and ground ...

Page 38: ...crankshaft pulley retaining nut or using a strobe type tach read the front crankshaft pulley rpm at idle 2 Adjust the tachometer using an 2mm Allen head wrench 5 64 2mm through the calibration access hole in the rear of the tachometer Zero the tach and bring it to the rpm indicated by the strobe or hand tach verify rpm at idle and at high speed Adjust the tach as needed NOTE Current model tac_home...

Page 39: ...xpansion tank will now serve as a check and systemfill point The plastic coolant recovery tank is not used when the remote expansion tank kit is installed since this tank serves the same function HEATER ABOVE THE ENGINE THERMOSTAT HOUSING NOTE The remote expansion tank is for filling and the expansion of coolant Water heater coolantflow need not go through the tank The pressure cap on the engine s...

Page 40: ...uid and refill the transmission with new fluid to full make on dipstick Run the engine and shift the trans then shut down and check fluid level NOTE When changing the fluid take care not to_lose the drain plug sealing washer The drain plug will leak without this sealing washer AWARNING Neverpull out the dipstick while the engine is running Hot fluid will splash from the dipstick hole This ould cau...

Page 41: ...e contaminated by water or the gear box suffers major mechanical damage the gearbox must be thoroughly flushed out and re filled with fresh fluid to the correct specifications NEWAGE TRANSMISSIONS LTD has distributors around the world Listed here are those in the United States Atlantis Marine Gear Supply Inc 418 Boston Street Topsfield MA 01933 Tel 978 887 0001 Fax 978 887 5599 Harbor Marine Trans...

Page 42: ...aring Worn or damaged Operating control cable 4 Unlvarsal sa N f PIY M3 M 36 Verification Remedy 1 Increase idling speed 1 Inspect replace coupling if necessary 2 Check alignment with feeler gauge 3 Remove check pitch balance and weight 1 Compare engine and transmission data 2 Inspect seals 0 rings drain plug check for fluid leaks 1 Check installation remove sharp bends and turns 2 Replace 1 Remov...

Page 43: ...not impeded by restricted movability ofthe cable or rod linkage by unsuitably positioned guide sheaves too small a bending radius or other restrictions In order to mount a supportfor shift control cable connections use the two threaded holes located above the cable bracket mounted on the gear housing Refer to the WESTERBEKE parts list SHIFT LEVER The transmission is suitable for single lever remot...

Page 44: ... leak without this sealing washe1 A WARNING Neverpull out the dipstick while the engine is running Hot fluid willsplash from the dipstick hole This could cause severe burns LOCKING THE PROPELLER Locking of the propeller shaft by an additional brake is not required use the gear shift lever position opposite your direction of travel for this purpose Never put the gear shift in the position correspon...

Page 45: ...t of your regular routine and change the fluid every 300 operating hours Periodically inspect the transmission and the cooler for leaks and corrosion Lubricate the cable connections Lay up Winterize Storage requires special care Follow these procedures D Drain water from the transmission oil cooler and replace with a proper mixture of antifreeze coolant NOTE This operation will normally occur when...

Page 46: ...is broken bent or 2 Check the cable reattach or replace unattached Cable radius is too severe Shift lever is binding against cover plate 3 Detach the shift cable and operate the lever by hand Clearance should be 0 02 in O Smm Output coupling is not turning 1 Transmission needs professional attention Propeller shaft is not turning 2 The coupling bolts are sheared or the coupling is slipping Output ...

Page 47: ...ration 5 Pump out fluid to the maximum and mark on dipstick Fluid and water mixed shifts hard 1 Damage to fluid cooler 1 Replace cooler and flush transmission and hoses 2 Selector control linkage 2 Refer this manual Slow engagement 1 Selector control 1 Refer this manual 2 Low fluid level 2 Add fluid 3 Linkage 3 Adjust refer this manual No movement of the boat 1 Selector control 1 Consult service s...

Page 48: ...l pressure and make sure there are not leaks Stop the engine check oil level and add oil as needed to bring level to dipstick full mark A CAUTION Do not leave the engine s old engine oil in the sump over the lay up period Engine oil and com bustion deposits combintrto produce harmful chemicals which can reduce the life11f the engine s internalparts FUEL SYSTEM Top off your fuel tanks with No 2 D S...

Page 49: ... charged or that they will be subjected to severe environmental conditions remove the batteries and store them in a warmer more compatible envi ronment A WARNING Leadacidbatteries emit hydrogen a highly explosive gas which can be Ignitedbyelectrical arcing orlighted tobacco products Do notsmoke or allowan open flame near the batterybeing serviced Shut offall electrical equipment In the vicinity to...

Page 50: ...son oil No 2 SAE J 313 Cetane 45 or higher grade of diesel accoording to ASTM D975 Transmission Specifications Refer to the TRANSMISSION SECTION in this manual COOLING SYSTEM Description Operating Temperature Fresh Water Pump Raw Water Pump Raw Water Row Rate Coolant Capacity M3 2DB M 25XP8 M 358 M 4118 M 508 Description type Fuel Nozzle Type Fuel Injection Pump Fuel Fuel Lift Pump Fresh water coo...

Page 51: ...for more extensive off shore cruising KIT A Impeller Kit Heat Exchanger Gasket Fuel Filter Fuel Filter with Gasket Oil Filter Belt Zinc Anodes 45 UNIVERSAL RECOMMENDS CARRYING ENOUGH SPARE ENGINE OIL YQUR BRAND FOR AN OIL CHANGE AND A GALLON OFPRE MIXED COOLANT KITB Impeller Kit Oil Filter Water Pump Repair Kit Zinc Anodes Heat Exchanger Gasket Thermostat Kit Complete Gasket Kit Injector Fuel Filt...

Page 52: ...5 M30 46mm 402 545 568 770 1103 1495 1571 2130 1 8 590 800 660 895 910 1234 14 660 895 990 1342 M33 51 mm 546 740 774 1050 1500 2035 2139 2900 M36 55mm 700 950 992 1345 1925 2610 2744 3720 SEALANTS LUBRICANTS GASKETS SEALANTS Oil based PERMATEX 2 and ifs HIGH TACK equivalent are excellent all purpose sealers They are effective in just about any joint in contact with coolant rav water oil or fuel A...

Page 53: ...x 28 35 Grams g x 035 Ounces Pounds lb x 454 Kilograms kg x 2 205 Pounds PRESSURE Pounds Per Sq In psi x 6 895 Kilopascals kPa x 145 psi Inches of Mercury Hg x 4912 psi x 2 036 Hg Inches of Mercury Hg x 3 377 Kilopascals kPa x 2961 Hg Inches of Water H20 x 07355 Inches of Mercury x 13 783 H20 Inches of Water H20 x 03613 psi x 27 684 H20 Inches of Water H20 x 248 Kilopascals kPa x 4 026 H20 TORQUE ...

Page 54: ......

Page 55: ......

Page 56: ...1210 200550 8 2015 ...

Reviews: