Removing the UPG 1U Adjustable Toolless Rails
1.
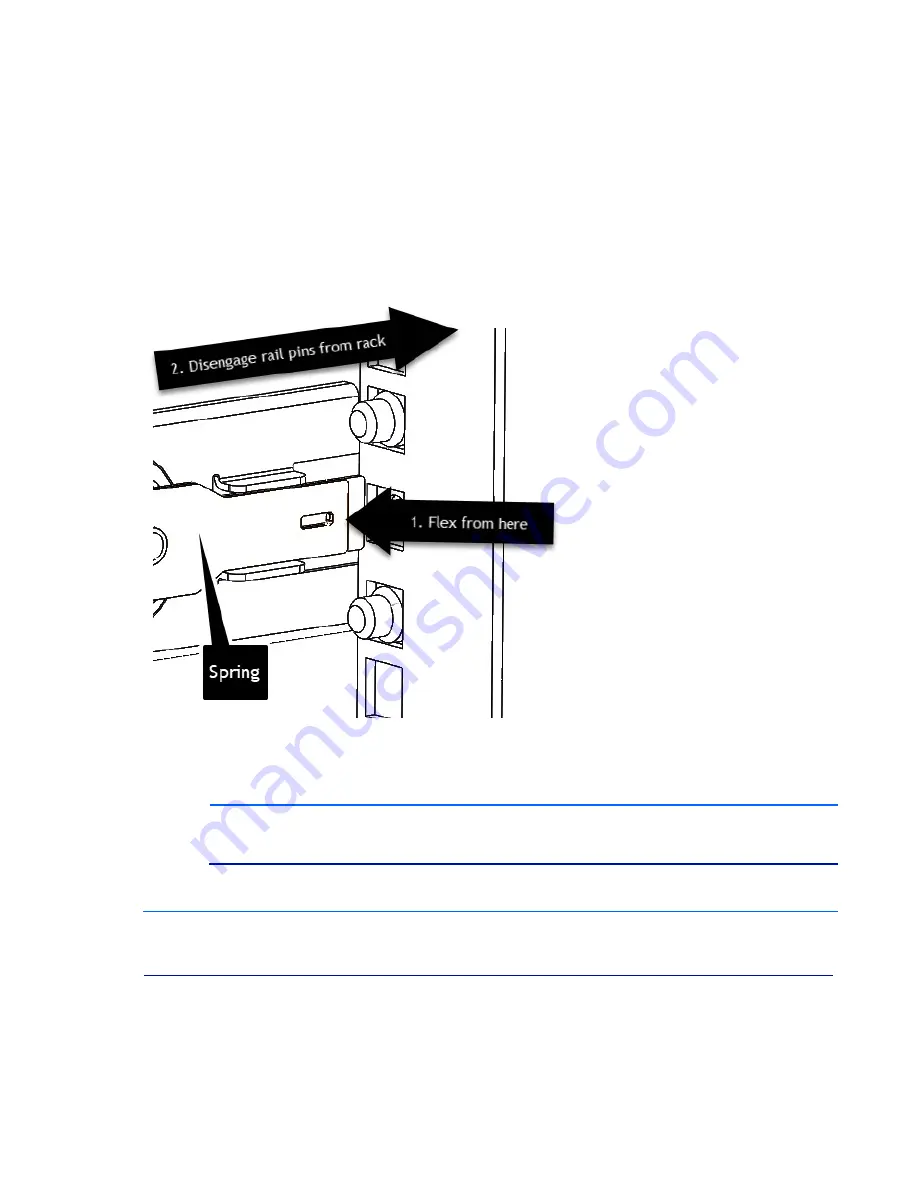
Locate the spring.
2.
Place your hand on the outside of the UPG 1U Adjustable Toolless Rail so that you can move the spring
release.
3.
Gently flex the spring release toward the inside of the rack (1) while moving the UPG 1U Adjustable
Toolless Rail in direction shown (2).
Front & Rear
4.
Repeat the previous steps for the other UPG 1U Adjustable Toolless Rail.
HINT
:
In some cases, the rack has equipment above and below the specific U space
designated for the console. In that case, one can install console on slide/rail asm, install
brace rail/CMA asm, attach CMA to console and route the cables through CMA.
NOTE
:
If you cannot gain access to the spring release from the outside of the UPG 1U Adjustable Toolless
Rails, a tool might be required to unlock the spring release from the inside of the UPG 1U Adjustable
Toolless Rail using a flat screwdriver that fits in the slot.


