

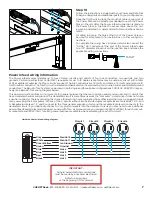

© UPLIFT Desk
• 800-349-3839 • 512-614-3152 • info@upliftdesk.com • upliftdesk.com
6
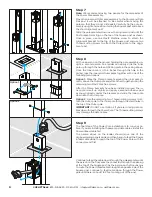
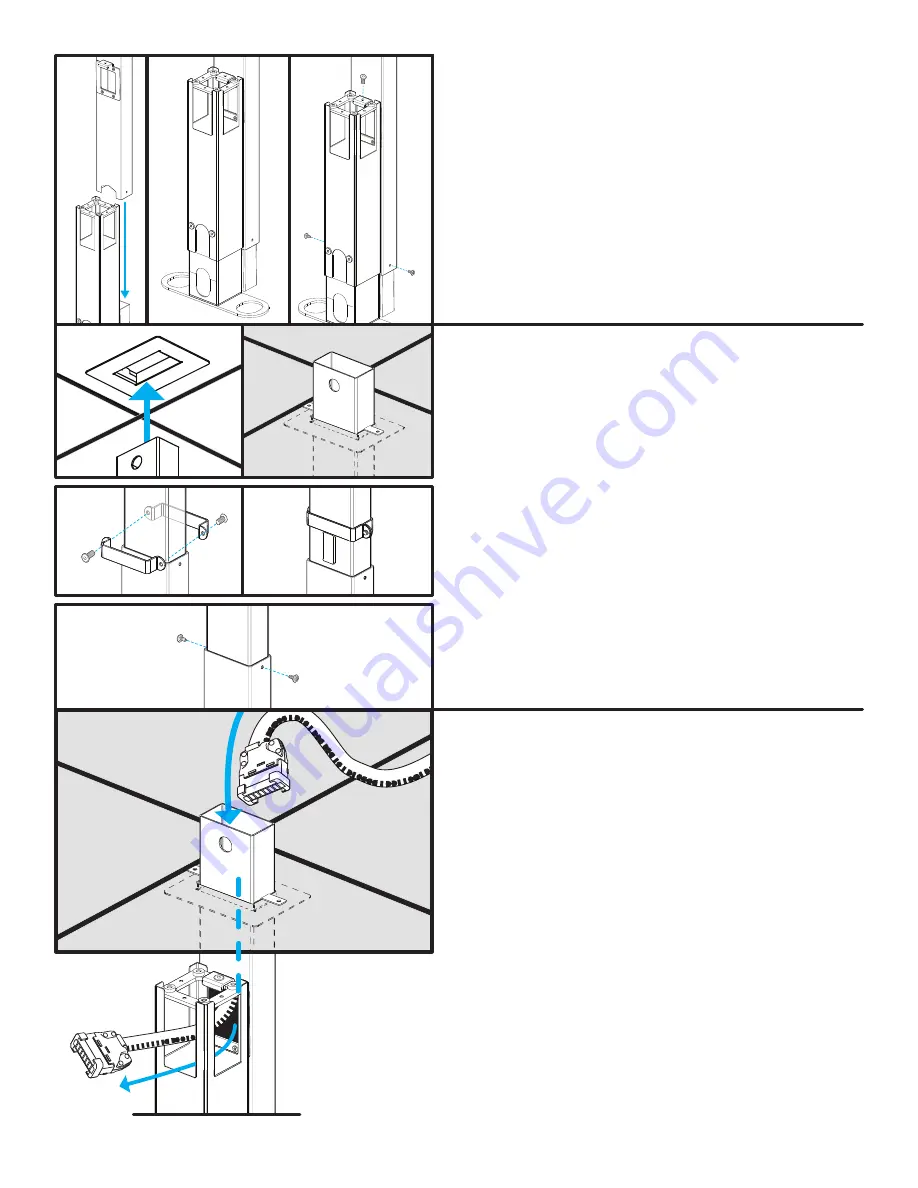
Step 8
With one person on the ground holding the pole assembly up-
right, a second person on a ladder can slowly slide the Inner
pole up through the hole and Ceiling plate in the ceiling above.
Once the Inner pole is 4 to 6 inches through the hole in the
ceiling, lock the Inner and Outer poles together with one of the
following two options:
Option 1:
Place the Clamp brackets around the Inner pole di-
rectly above the Outer pole and attach them together using the
remaining two M5x12 Machine screws.
After the Clamp brackets have been installed around the In-
ner pole, raise it up slightly and apply a second Adhesive pad
as shown directly under the brackets and slide the Inner pole
down into the Outer pole.
Option 2:
Use the remaining two Thread-cutting screws to at-
tach the Outer pole to the Inner pole through the small holes in
the top of the Outer pole.
IMPORTANT:
Do NOT use Option 2 if you are running data ca-
bles down through the Power Pole. The Thread-cutting screws
may damage the data cables.
Option 1
Option 2
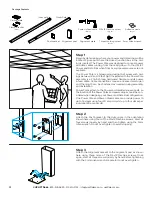
Step 7
Note:
We recommend using two people for the remainder of
the Power Pole assembly.
Move the Inner and Outer pole assembly to the Power and Data
Rail post it will be attached to. Be careful when moving the
poles so that they do not slide apart. Carefully tip the pole as-
sembly upright and position it along the Square post and above
the short Alignment post.
Slide the pole assembly down over the Alignment post until the
Post bracket is resting on the top of the Square post as shown.
Once in place, use one M5x12 Machine screw to attach the
Alignment bracket to the top of the Square post and use two
Thread-cutting screws to attach the Outer pole to the Align-
ment post.
Step 9
The final step of the Power Pole installation is to run your ca
-
bles. If you are installing both power and data cables, install the
Power infeed cable first.
The person above on the ladder should move one of the
dropped ceiling panels aside and then begin to feed the Power
infeed cable down through the top of the Power Pole with the
connector end first.
Continue to feed the cable down through the pole assembly until
the person on the floor sees the connector through the opening
at the top of the Square post. As the person on the floor begins
to route the Power Infeed cable through the opposite side of the
Square post, continue to feed cable down through the Power
pole until there is about 1 to 2 feet coming out of the post.


