1
OUT
IN
TREND
TREND
MIN
MIN
MINIMUM
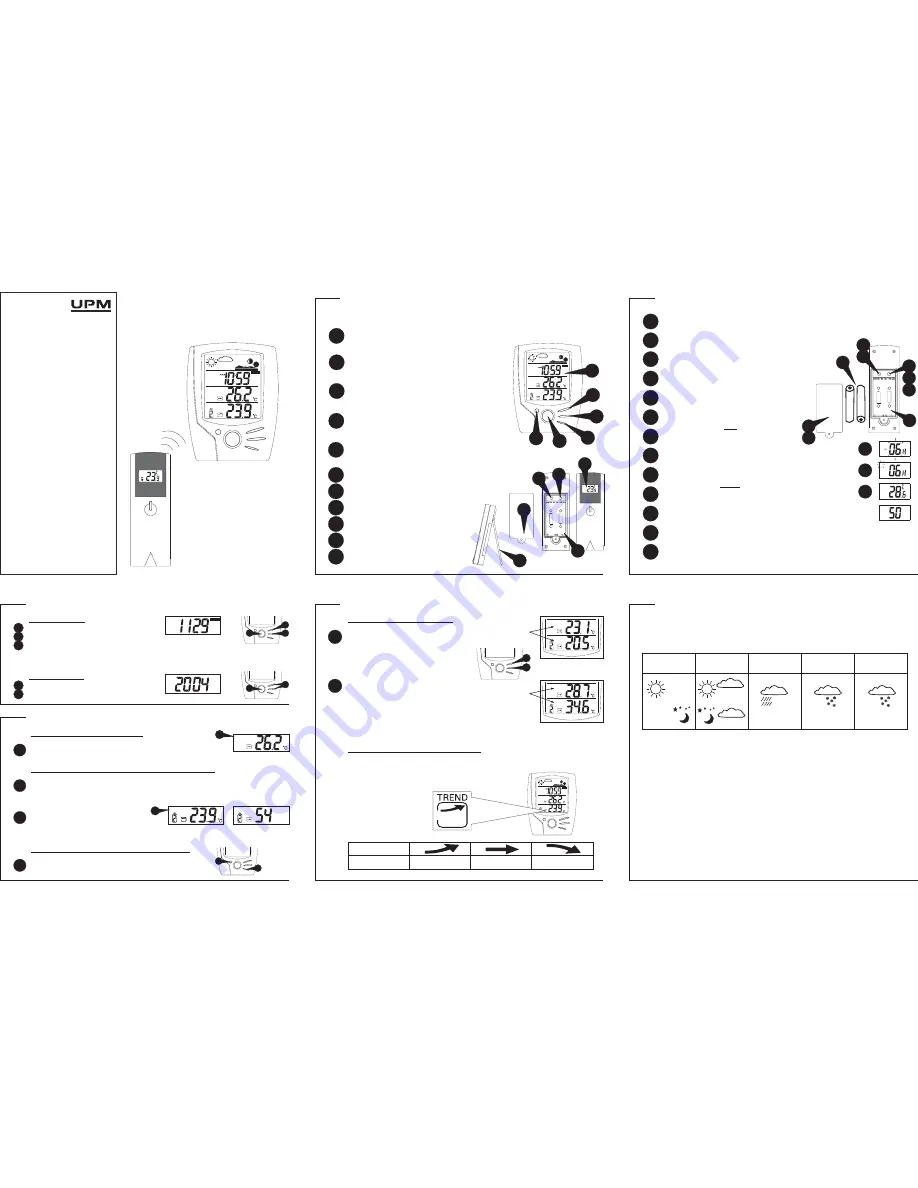
SETTING UP THE TRANSMITTER
GETTING STARTED
button placement
1
2
3
4
5
MINUTE/-/MIN:
shows minimum
temperature; adjusts clock, alarm, date &
year and temperature alarm values
ALARM/( C/ F):
toggles between
, 12 and
24 hour format, Alarm 1 & 2 on and off; disables
upper & lower temperature alarms
°
°
° °
C and F
CHN:
scrolls through remote channels (1 to 4);
scrolls through local and remote channels (1 to 4)
in (upper & lower) temperature alarm mode
HOUR/+/MAX:
shows maximum
temperature; adjusts clock, alarm, date &
year and temperature alarm values
MODE/SNOOZE:
scrolls through Clock 1&2,
Alarm 1&2, Date & Year, and (Upper & Lower)
Temperature Alarm Mode; snooze for alarm
1
2
3
5
4
9
WD633 + WT440H
Wireless Weather Station
WD633
Receiver
Congratulations on your purchase of this
weather station set, WD633 + WT440H.
Please take the time to read and
understand this manual so you can begin
to enjoy the convenience and features this
product has to offer.
WT440H
Transmitter
OWNER’S
M A N UA L
Main Display Unit WD633
* dual clock and dual alarm
* calendar (date/day/month/year)
* local temperature display
* receives and displays temperature and
humidity from up to 4 remote transmitters
via RF technology of 433MHz
* minimum/maximum temperature memory
* temperature and humidity trend indicator
* local/remote temperature alarms
* weather icons
* moon phase symbols
* user-selectable C or F
* battery type: 2 x AA
Remote Transmitter WT440H
* drip-proof design with LCD screen
* temperature display in user-selectable
C or F
* humidity display
* transmission range: up to 40 metres in
open area
* table stand or wall mountable
* battery type: 2 x AA
°
°
°
°
MOON PHASE
MONDAY
CLOCK1
OUT
IN
TREND
TREND
MOON PHASE
MONDAY
CLOCK1
OUT
IN
TREND
TREND
MOON PHASE
MONDAY
CLOCK1
OUT
IN
TREND
TREND
:
FEATURES
Date Setting
February will have either 28 or 29 days depending on the year setting.
:
Scroll to the Date mode using
.
Press
to set the month.
Press
to set the date.
NOTE: Weekday is automatically determined from the year/month/date setting.
MODE
HOUR/+/MAX
MINUTE/-/MIN
Year Setting
Scroll to the Year mode using
Press
or key to adjust the year.
MODE
+
-
:
.
CALENDAR SETTING
1
1
2
2
3
Remote (Outdoor) Temperature and Humidity
Local (Indoor) Temperature
Selecting C or F Temperature Display
°
°
TEMPERATURE & HUMIDITY DISPLAY
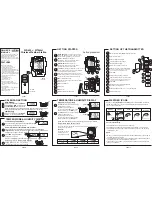
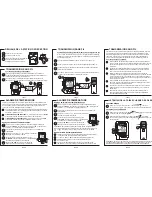
If the Learn Function is performed successfully (refer to the WIRELESS
TRANSMISSION section), the remote (outdoor) temperature and humidity will
display on the bottom of the LCD screen.
Press
to toggle between
Channels 1, 2, 3 and 4.
CHN
The local (indoor) temperature will display instantly after
batteries are inserted into the receiver.
Toggle between C and F by pressing
in either Clock 1 or Clock 2 mode.
°
°
C/ F
°
°
*
*
A
B
B
A
NOTE: The temperature and humidity data will
on the LCD screen.
alternate
Min and Max Temperature
Temperature and Humidity Trend
TEMPERATURE & HUMIDITY DISPLAY
A
B
The trend indicator shows the trend of the temperature and humidity in
the past half-hour interval.
Example:
The following trend
indicates that the
temperature is rising.
Arrow Indicator
Rising
Steady
Falling
Trend
Press
in Clock 1 mode to display
minimum temperature
The MIN symbol will appear.
MIN
.
To return to normal temperature and
humidity display, press
again.
MIN
To return to normal temperature and
humidity display, press
again.
MAX
Press
in Clock 1 mode to display
maximum temperature.
The MAX symbol will appear.
MAX
NOTE: Min/Max readings are automatically cleared daily at
00:00
Based on the
and
data collected from the remote
transmitter (Channel 1), the receiver will display the following weather
icons on the LCD screen.
temperature
humidity
WEATHER ICONS
About Freeze Warning:
NOTE:
!
!
!
The SNOW icon will blink to warn of 'freezing'.
Activated when Channel 1's temperature is between -1.9°C and 2.9°C.
The SNOW icon will appear solid if and when Channel 1's temperature
falls below -1.9°C.
!
!
!
When you first set up the weather station set, the weather icon shown on
the display will be CLOUDY.
The weather icon is based solely on the temperature and humidity data
collected from the remote transmitter Channel 1.
If Channel 1’s slot is empty, the weather icon shown on the display will
always be CLOUDY.
SUNNY
CLOUDY
RAIN
SNOW
FREEZE
WARNING
OR
OR
<flashing snow>
OUT
IN
TREND
TREND
MAX
MAX
MAXIMUM
*
*
Local Temperature
Date Setting
Year Setting
Remote Temperature
Remote Humidity
1
1
B
A
2
2
3
IN
TREND
OUT
TREND
%
TREND
OUT
MONDAY
MONTH
DAY
YEAR
PAGE 1
PAGE 10
PAGE 2
PAGE 11
PAGE 3
PAGE 12
6
7
8
9
C/F:
changes House Code and Channel Code;
selects °C or °F
SET:
activates SET function
Battery Compartment
LCD Screen
10
Battery Cover
11
Wall Mount Bracket & Table Stand
SET
C/F
-
AA
1
.5V
+
-
AA
1
.5V
+
7
6
11
10
9
8
Remove battery cover
Set up the transmitter(s)
setting up the receiver
before
2 AA size batteries (included)
1
*
Temperature and humidity will appear and
on the LCD screen
alternate
House code will blink for 8 seconds
2
3
4
5
6
7
8
9
10
Select House code (1-15) by pressing
C/F
Press
SET
Press
SET
Channel code will blink for 8 seconds
Select Channel code (1-4) by pressing
C/F
* If you have multiple transmitters for a single receiver,
set each transmitter to the
House code
same
* If you have multiple transmitters for a single receiver,
set each transmitter to a
Channel code
different
%
1
1
1
SET
C/F
-
AA
1
.5V
+
-
AA
1
.5V
+
5
9
4
7
6
8
10
11
2
Insert batteries into compartment,
observing proper polarity
Select temperature display in C or F by pressing
°
°
C/F
Replace battery cover
11
12
3
1
12
1
1


