9
-
When the wind gauge's batteries are low, the following symbol will display on
the receiver, under the wind speed display:
Setting the rain gauge sensor
The rain gauge is an individual sensor that transmits rainfall to the receiver and
measures the total rainfall and precipitation history.
1. To insert batteries into the rain gauge(see diagram G)
2. To view possible locations to install the rain gauge. (See diagram H)
3. To fasten the rain gauge with 2 screws (see diagram J)
Note: The rain gauge gathers precipitation, until it's inner "tipping bucket"
mechanism is full, then the bucket tips and the liquid is released. So place
the unit in a location where the water can be safely released. To obtain
accurate precipitation readings, there should be no obstacles (walls, trees, etc...)
close to the rain gauge. When the rain gauge’s batteries are low, the following
indicator will display on the receiver under the rain fall display:
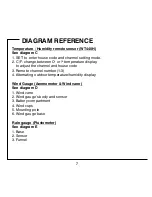
Setting the temperature / humidity remote sensor
1. Remove the detachable cover at the back of the unit.
2. Use a screwdriver to open the battery door, located at the back of the unit.
3. Insert 2 AA batteries according to the indicated polarity.
4. Close the battery compartment and re-insert the screw. The remote sensor
will now display the outdoor temperature and humidity alternatively.
5. To toggle between
º
C/
º
F temperature display, press the
º
C/
º
F key.
(Diagram C [2])
TRANSMITTER SETUP

