Chapter 8 – Operation
42
SB47JRT – 0075522
Driving and Steering
A
Danger
The aerial platform can tip over if it becomes un-
stable. Death or serious injury will result from a tip-
over accident. Do not drive an elevated aerial plat-
form on soft, uneven, or sloping surfaces. Do not
drive the machine on grades that exceed 25 per-
cent.
For operation on grades up to 25 percent, it is recom-
mended that the main boom be near horizontal and the
jib elevated just enough to provide adequate ground clear-
ance. A 25 percent grade is a 0.76 m (30
″
) vertical rise in
3.05 m (10
′
) horizontal length.
Avoid driving with the platform over the front (steer) end of
the chassis. In this position the machine is difficult to
control because:
• drive and steer control movements and their result-
ing machine movements are reversed.
• when driving fast, sudden turns or stops produce more
severe reactions to platform occupants.
• more turning space is required to prevent the plat-
form from colliding with obstacles several feet be-
yond the path of the tires.
A
Warning
Death or serious injury can result from improperly
driving or steering the aerial platform. Read and
understand the information in this manual and on
the placards and decals on the machine before op-
erating the aerial platform on the job.
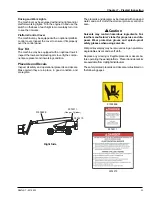
The blue and yellow arrows on the chassis indicate the
direction the chassis will move when the drive or steer
control is moved toward the corresponding color.
When the machine is in the stowed position, with the
booms centered between the rear wheels, the direction
of drive and steer control movement corresponds with the
direction of chassis movement.
When the turntable is rotated from the stowed position,
with the booms to either side of or in front of the chassis,
the direction of control movement does not correspond
with the direction of chassis movement.
To avoid confusion, always drive to the work area or move
between work areas with the turntable and booms in the
stowed position. After arriving at the work area, the booms
may be positioned to the side or the front of the chassis
for final positioning. Always look in the direction of move-
ment as indicated by the directional arrows on the chas-
sis.
Use the following procedure to operate the drive and steer
functions.
1. Determine the desired drive range for the specific driv-
ing conditions.
• Use high range when traveling across firm, flat,
level surfaces. High range can only be activated
when the booms are stowed. High range is for high
speed, low torque operation.
• Use low range for driving on loading ramps or other
steep grades and when safety considerations de-
mand slow deliberate machine movement. Low
range is for low speed, high torque operation.
2. Place the drive/boom selector switch in the drive po-
sition.
3. Step down on the platform foot switch.
4. Push the drive joystick forward to move the chassis
forward, the direction of the blue arrow. Pull the joy-
stick backward to move the chassis backward, the
direction of the yellow arrow. The drive speed is pro-
portional to the joystick position.
5. To stop drive motion, return the joystick to neutral.
6. Push the drive joystick to the right to steer to the
right, the direction of the yellow arrow. Push the joy-
stick to the left to steer to the left, the direction of the
blue arrow.
Note
The steering wheels are not self-centering. Set the steer-
ing wheels straight ahead after completing a turn.
7. After driving to the desired location, release the foot
switch, or push the emergency stop button to apply
the parking brakes.
Drive Speeds
The drive speed is proportional to the joystick position.
The farther the joystick is moved, the faster the travel
speed.
Always slow down and shift the drive system to low range
before traveling over rough terrain or any sloped surface.
Drive speed ranges are interlocked through a limit switch
that senses the main boom position. When the boom is
elevated, only the slowest drive speed will work regard-
less of the drive range switch position.
A
Warning
The potential for an accident increases when safety
devices do not function properly. Death or serious
injury can result from such accidents. Do not alter,
disable, or override any safety device.
Summary of Contents for SB47JRT
Page 1: ...SB47JRT Operator Manual Jan 08 PN 508361 000 SB47JRT ...
Page 2: ......
Page 6: ......
Page 13: ...Chapter 2 Specifications SB47JRT 0075522 7 Engine Oil Viscosity Cummins B3 3 Deutz F3L 2011F ...
Page 14: ...Chapter 2 Specifications 8 SB47JRT 0075522 ...
Page 30: ...Chapter 6 Controls 24 SB47JRT 0075522 ...
Page 44: ...Chapter 7 Prestart Inspection 38 SB47JRT 0075522 ...
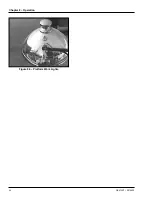
Page 50: ...Chapter 8 Operation 44 SB47JRT 0075522 Figure 8 6 Platform Work Lights ...
Page 58: ...Chapter 10 Emergency Operation 52 SB47JRT 0075522 ...
Page 64: ...Chapter 11 Troubleshooting 58 SB47JRT 0075522 ...
Page 66: ...Appendix A Glossary SB47JRT 0075522 ...
Page 67: ......


