2-10
SL26/30SL Work Platform
M
ACHINE
P
REPARATION
& O
PERATION
Section
2.12
4. Push the Control Lever to
FORWARD
or
REVERSE
for the desired direction of travel. If
the machine quits driving and the tilt alarm
sounds, immediately lower and re-level the plat-
form before attempting to elevate again.
Emergency Lowering
Note: The Emergency Lowering Valve is located
on the left hand side of the chassis through the
cutout in the control module cover.
1. Open the Emergency Lowering Valve by pushing
in and turning approximately 1/4 turn, the knob
will pop out disengaging detent (Figure 2-4).
2. Once the platform is fully lowered, be certain that
Emergency Lowering Valve is closed again. The
platform will not elevate if the Emergency Lower-
ing Valve has not been closed.
3. To close the Emergency Lowering Valve, push
the knob in and turn approximately 1/4 turn clock-
wise until the detent engages.
After Use Each Day
1. Ensure that the platform is fully lowered.
2. Park the machine on level ground, preferably
under cover, secure against vandals, children or
unauthorized operation.
3. Turn the Key Switch to
OFF
and remove the key
to prevent unauthorized operation.
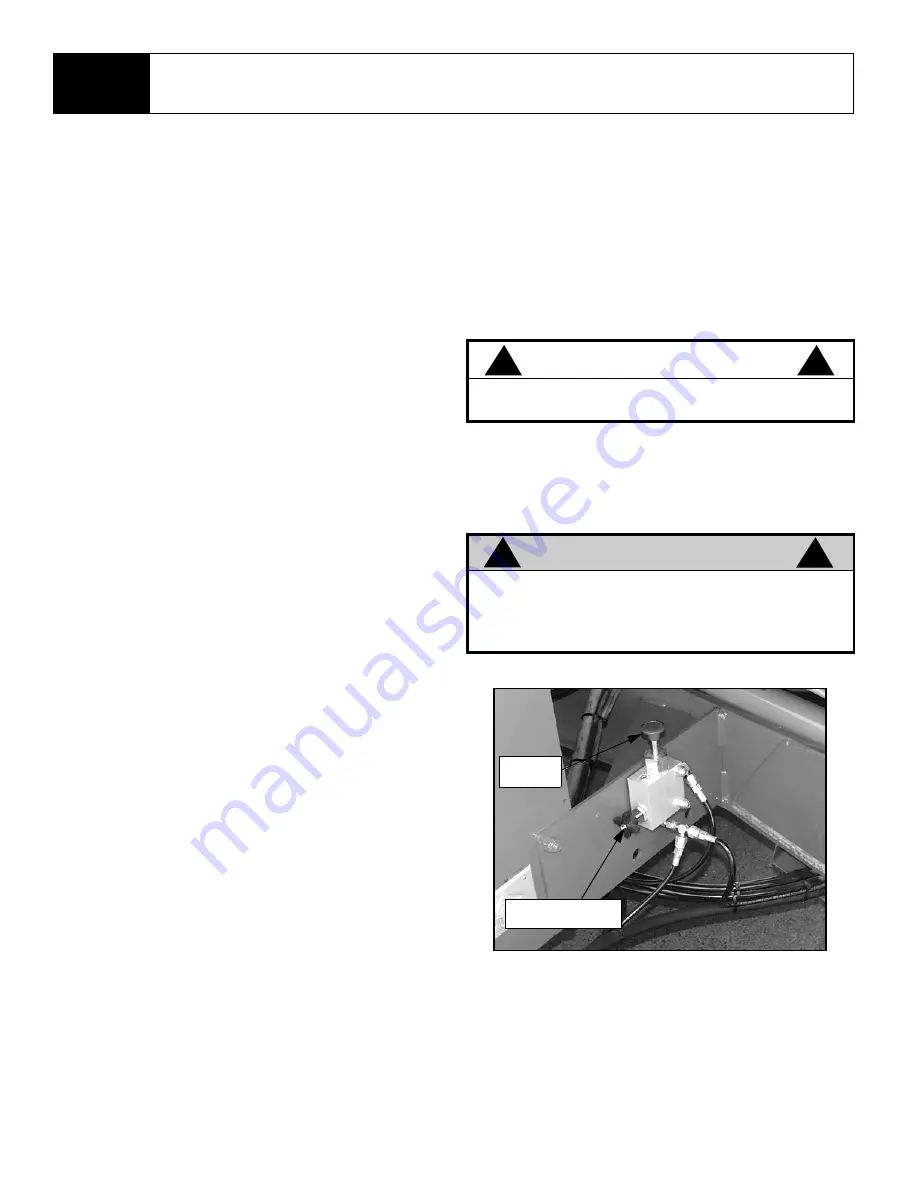
2.12 B
RAKE
R
ELEASE
P
UMP
(F
IGURE
2-5)
Perform the following only when the machine will not
operate under it’s own power and it is necessary to
move the machine or when towing the machine up a
grade or onto a trailer to transport.
1. Close the needle valve by turning the knob clock-
wise.
2. Pump the Brake Release Pump until the Parking
Brake Cylinder Rod clears the wheel rotor.
3. The machine will now roll when pushed or pulled.
4. Be sure to open needle valve and verify that the
cylinder rod has extended before the machine is
operated.
Figure 2-5: Brake Release Pump
C A U T I O N
!
!
Be careful not to over-pump the brake release
pump as damage to the brakes may result.
W A R N I N G
!
!
Never operate work platform with the Parking
Brake inoperative. Serious injury or damage
could result.
Never tow faster than .3 m/sec. (1 ft./sec.).
Pump
Needle Valve
Summary of Contents for SL26SL
Page 1: ...European Specification ...
Page 4: ...ii SL26 30SL Work Platform FORWARD NOTES ...
Page 12: ...1 4 SL26 30SL Work Platform INTRODUCTION SPECIFICATIONS Section 1 3 NOTES ...
Page 24: ...2 12 SL26 30SL Work Platform MACHINE PREPARATION OPERATION Section 2 13 NOTES ...
Page 48: ...4 6 SL26 30SL Work Platform TROUBLESHOOTING Section 4 2 NOTES ...
Page 54: ...5 6 SL26 30SL Work Platform SCHEMATICS Section 5 2 NOTES ...
Page 59: ...SL26 30SL Work Platform 6 5 ILLUSTRATED PARTS BREAKDOWN 6 1 NOTES ...
Page 63: ...SL26 30SL Work Platform 6 9 ILLUSTRATED PARTS BREAKDOWN 6 1 NOTES ...
Page 65: ...SL26 30SL Work Platform 6 11 ILLUSTRATED PARTS BREAKDOWN 6 1 ...
Page 67: ...SL26 30SL Work Platform 6 13 ILLUSTRATED PARTS BREAKDOWN 6 1 ...
Page 69: ...SL26 30SL Work Platform 6 15 ILLUSTRATED PARTS BREAKDOWN 6 1 ...
Page 71: ...SL26 30SL Work Platform 6 17 ILLUSTRATED PARTS BREAKDOWN 6 1 ...
Page 83: ...SL26 30SL Work Platform 6 29 ILLUSTRATED PARTS BREAKDOWN 6 1 ...
Page 85: ...SL26 30SL Work Platform 6 31 ILLUSTRATED PARTS BREAKDOWN 6 1 ...
Page 95: ...SL26 30SL Work Platform 6 41 ILLUSTRATED PARTS BREAKDOWN 6 1 ...
Page 97: ...SL26 30SL Work Platform 6 43 ILLUSTRATED PARTS BREAKDOWN 6 1 ...
Page 99: ...SL26 30SL Work Platform 6 45 ILLUSTRATED PARTS BREAKDOWN 6 1 ...
Page 101: ...SL26 30SL Work Platform 6 47 ILLUSTRATED PARTS BREAKDOWN 6 1 ...
Page 103: ......


