background image

5

Total Control

HDA-I/O

Owner’s Manual

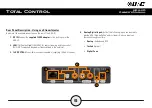
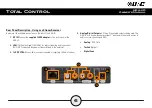
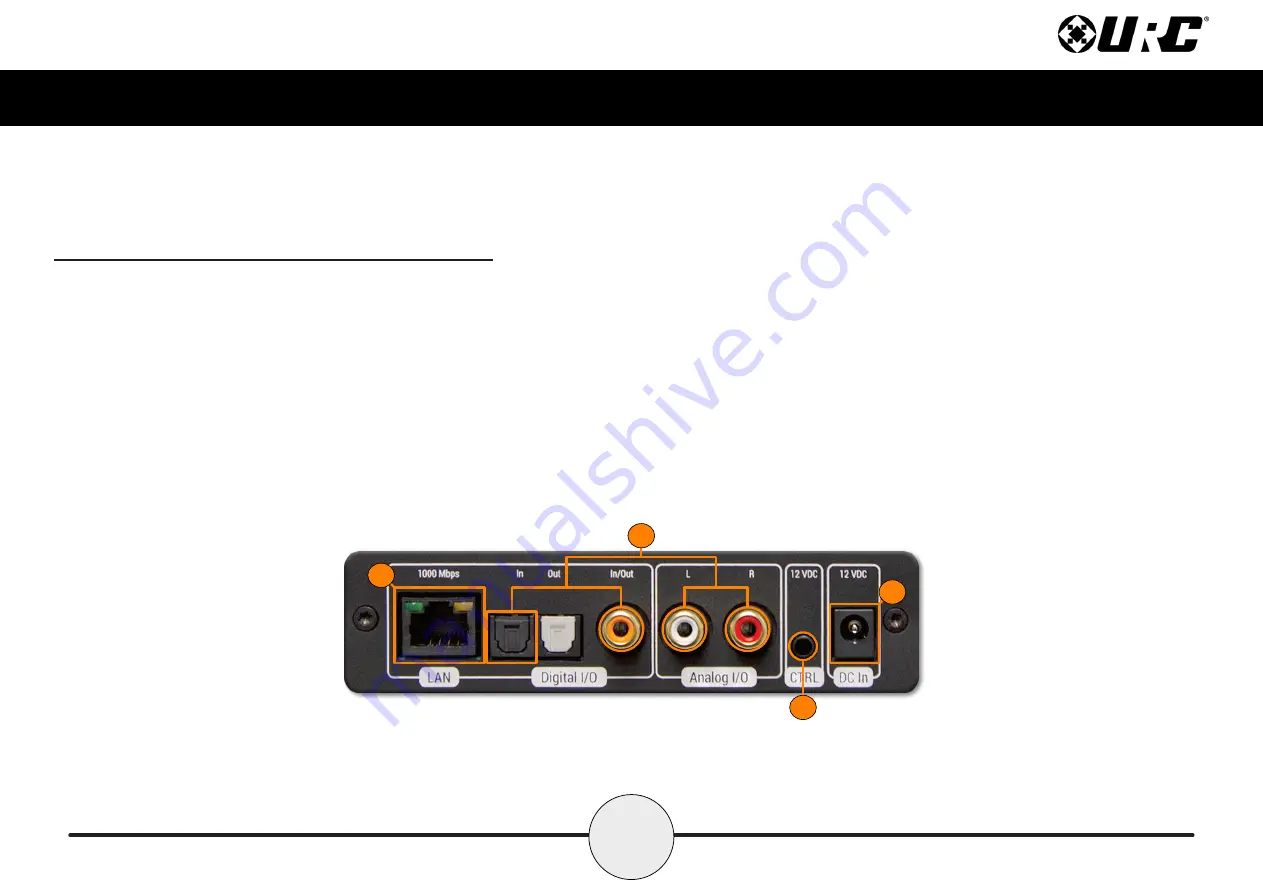
Rear Panel Description - Using as a Stream Injector

Below are the available connections on the rear of the HDA-IO:

1. DC IN:

Connect the

supplied 12VDC adapter

to this port to power the

HDA-IO.

2. LAN:

Full Duplex Gigabit LAN ONLY, for audio streaming and zone control

(Wi-Fi NOT supported, device must be hard-lined to the network).

3. 12 VDC CTRL:

Mono 3.5mm connector capable of supplying 150mA of current.

4. Analog/Digital Inputs:

Both of the following inputs can be used to

provide HDA “high-definition” audio streams. Only one input can
be in use at any given time.

Analog -

Unbalanced RCA

Toslink

(Optical)

Digital Coax

1

2

3

4

Summary of Contents for HDA-I/O

Page 1: ...HDA I O Owner s Manual Total Control HDA I O Owner s Manual ...

Page 2: ...e URC Home Page for product information owner s manuals and support contact information Contact Support Total Control is a URC product sold direct only For questions or assistance contact your Custom Installer Programmer My Installer Programmer Overview 1 Parts Pieces 2 Front Panel Descriptions 3 Rear Panel Description Using as a Stream Injector 5 Rear Panel Description Using as a Stream Receiver ...

Page 3: ...r transmit HDA audio streams over the local network HDA Audio Streams As a Stream Injector this device distributes any connected audio source to any available HDA controlled audio zone Source Sharing Any zone controlled via an HDA amplifier or I O device has access to the system s HDA Audio Streams Flexible Zone Linking When connected to a 3rd party audio device as a Stream Receiver the HDA I O ca...

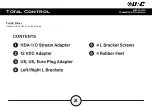
Page 4: ...2 Total Control HDA I O Owner s Manual Parts Pieces Included with the HDA I O are the following ...

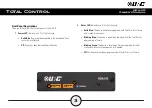
Page 5: ...has been removed from the device 2 Status LED Indicates one 1 of the following Solid Blue The device has been programmed with Total Control software and is ready for operation Blinking Blue The device is receiving a download from the Total Control programming software Blinking Green The device is receiving a firmware upgrade this light continues to blink until the update is fully applied Off The d...

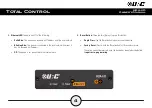
Page 6: ...the local network however it has not received an IP address Off The device is not connected to the local network 4 Reset Button There are two 2 ways to press this button Single Press Tap the Reset button to power cycle the device Factory Reset Press n hold the Reset button for 10 seconds or more This option cannot be reversed once the device has been factory defaulted it requires re programming 3 ...

Page 7: ... IO 2 LAN Full Duplex Gigabit LAN ONLY for audio streaming and zone control Wi Fi NOT supported device must be hard lined to the network 3 12 VDC CTRL Mono 3 5mm connector capable of supplying 150mA of current 4 Analog Digital Inputs Both of the following inputs can be used to provide HDA high definition audio streams Only one input can be in use at any given time Analog Unbalanced RCA Toslink Opt...

Page 8: ...N Full Duplex Gigabit LAN ONLY for audio streaming and zone control Wi Fi NOT supported device must be hard lined to the network 3 12 VDC CTRL Mono 3 5mm connector capable of supplying 150mA of current 4 Analog Digital Outputs All three 3 available outputs can be used The HDA IO as a stream receiver provides 3rd party audio zones with access to audio sources streaming via HDA Analog RCA Style Tosl...

Page 9: ...ll or secure vertical surface 1 Insert the supplied screws into the two 2 keyed slots on the L shaped bracket as displayed on the image at the right This L shaped bracket can be pre installed and the HDA IO amplifier can be inserted afterwards 2 Insert the supplied screws into the four 4 keyed slots for wall mounting Keyhole Diameter 0 48 12 5mm 1 2 ...

Page 10: ...8 Total Control HDA I O Owner s Manual 3 Assure that all screws have been installed securely 3 ...

Page 11: ...d to the network then connect the ethernet cable to an available LAN port on the local router Luxul preferred 2 Connect the ethernet cable from the previous step to any available LAN port on the HDA SW5 3 Connect another ethernet cable to an available LAN port on the HDA SW5 Network Switch 4 Connect the ethernet cable from the previous step to the ethernet port found at the rear of the HDA IO page...

Page 12: ...ectly from any URC interface For specific instructions on how to use these HDA modules please refer to the HDA User s Guide The following modules are supported by the HDA I O Multi Zone Amplifier Room Volume Module Room Zone EQ Module Volume Mixer Module Announcement Module Input Status Amplifier Status Zone Status Room Zone Status Amplifier Status Room Zone EQ Announcements Not all HDA modules ar...

Page 13: ...ll apply Federal Communication Commission Interference Statement This equipment has been tested and found to comply with the limits for a Class B digital device pursuant to part 15 of the FCC Rules These limits are designed to provide reasonable protection against harmful interference in a residential installation This equipment generates uses and can radiate radio frequency energy and if not inst...

Page 14: ...e Emission Immunity Power Declaration of Conformity Hereby Universal Remote Control Inc declares that this HDA I O is in compliance with the Essential requirements Warning The manufacturer is not responsible for any Radio or TV interference caused by unauthorized modifications to this equipment Changes or modifications not expressly approved by the manufacturer could void the user s authority to o...

Reviews: