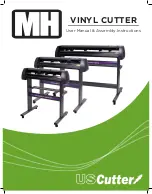
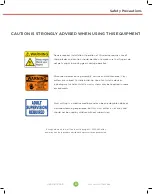
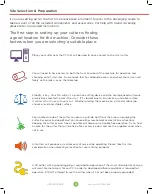
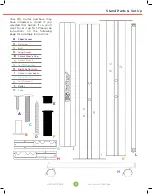
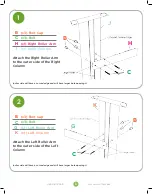
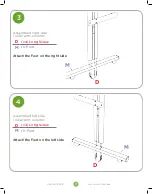
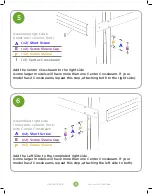
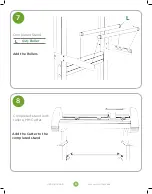
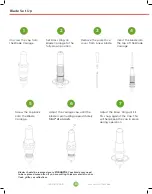
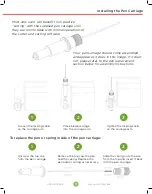
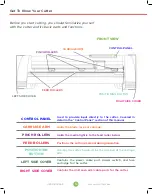
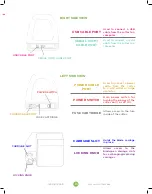
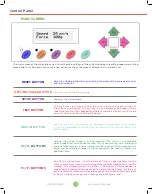
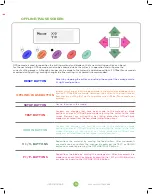
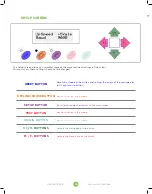
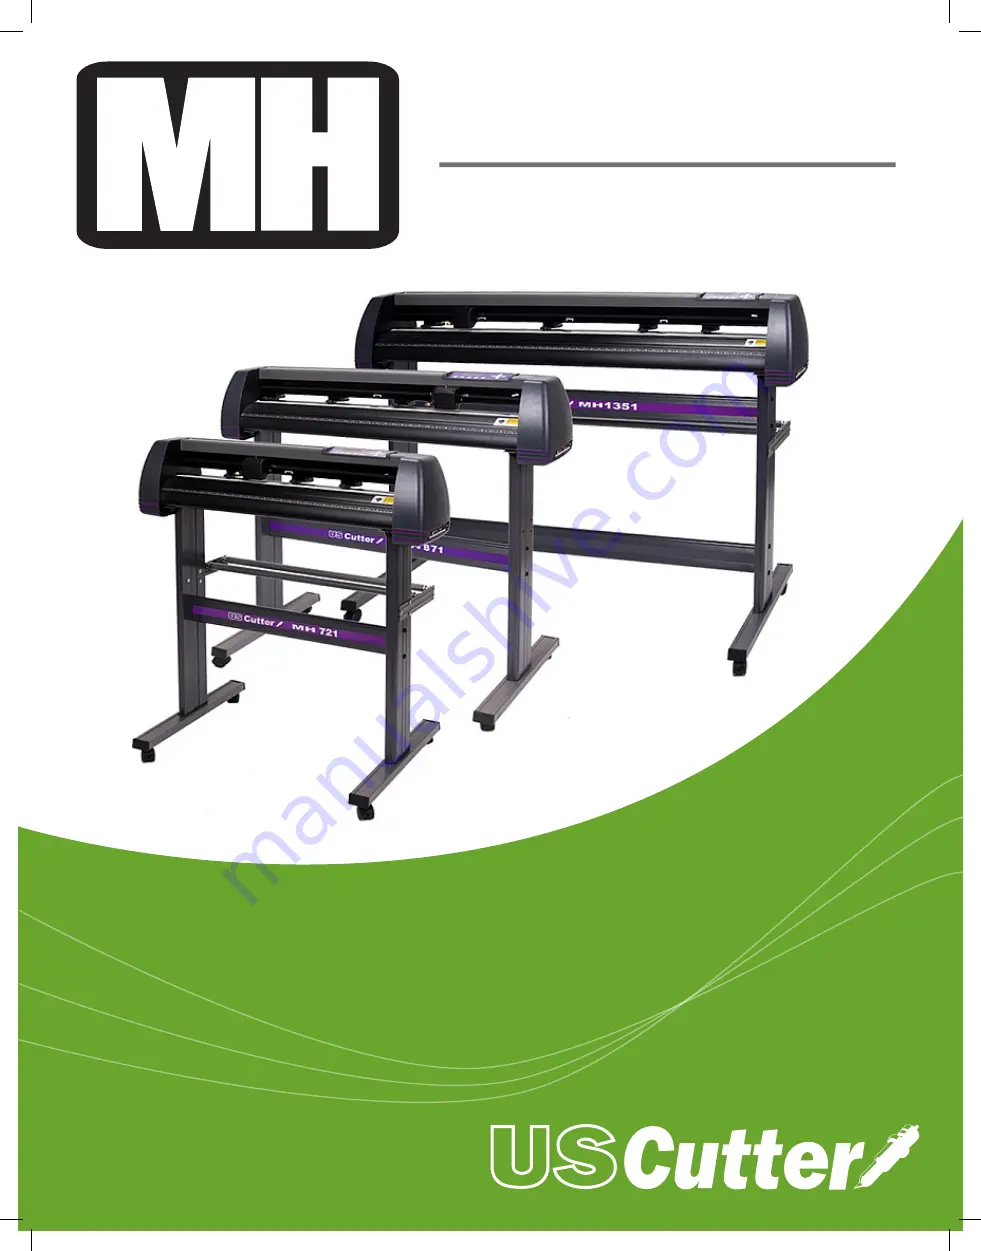
background image

VINYL CUTTER

User Manual & Assembly Instructions

Summary of Contents for MH Series

Page 1: ...VINYL CUTTER User Manual Assembly Instructions ...

Page 2: ...ooting 28 Care and Maintenance 29 Warranty Statement 30 Hardware Bundles Your new MH Vinyl Cutter and Plotter is your gateway into a world of possibilities From more industrial uses like custom signage vehicle decals and window graphics to hobby and art creation including wall and glass art and garment customization By mastering the use of this equipment and accompanying software understanding whi...

Page 3: ... power during assembly service and maintenance Vinyl cutters are subject to static build up Use of anti static devices including mats and anti static vinyl systems may be required in some environments Vinyl cutting is a creative medium and can be an enjoyable hobby or classroom learning experience but this vinyl cutter is not a toy and should not be used by children without supervision Except wher...

Page 4: ...o consideration when selecting a location for your cutting purposes Fans located inside of the cutter can draw in outside dust from the area surrounding the cutter Excessive buildup of dust can cause either mechanical or electrical malfunctions Keeping the cutter as dust free as possible will help ensure trouble free operation Try to find an area for the cutter that will be free of any excessive d...

Page 5: ...w Sleeve G Left Roller Arm H Right Roller Arm I Center Crossbeam J Right Column K Left Column L Roller M Foot A B C D G H I J K L M F E Your MH Cutter purchase may have included a stand if you selected that option If so you ll want to set it up first Please see instructions on the following page for assembly instructions ...

Page 6: ...rm to the outer side of the Right Column B J H C outer side will have a curved edge and will have larger hole openings 2 B x3 Bolt Cap C x3 Bolt G x1 Left Roller Arm K x1 Left Column Attach the Left Roller Arm to the outer side of the Left Column B K G C outer side will have a curved edge and will have larger hole openings ...

Page 7: ... 425 481 3555 3 D x4 Long Screw M 1 Foot Attach the Foot on the right side Assembled right side roller arm column M D 4 D x4 Long Screw M 1 Foot Attach the Foot on the left side Assembled left side roller arm column M D ...

Page 8: ...s 2 Crossbeams repeat this step attaching both to the right side Assembled right side roller arm column foot I F A E 6 A x2 Short Screw E x2 Screw Sleeve Cap F x2 Screw Sleeve Add the Left Side to the completed right side some larger models will have more than one Center Crossbeam If your model has 2 Crossbeams repeat this step attaching the left side to both Assembled right side roller arm column...

Page 9: ...9 www uscutter com 425 481 3555 8 Add the Cutter to the completed stand Completed stand with rollers MH Cutter 7 L x2 Roller Add the Rollers Completed Stand L ...

Page 10: ...rass Ring until it fits snug against the Cap This will help keep the cap in place during operation Set Brass Ring on Blade Carriage to the fully down position Remove the protective cover from a new blade Insert the blade into the top of the Blade Carriage 1 5 7 6 2 3 4 Blades should be replaced every 6 months Your blade may need to be replaced more often if you are cutting thicker material such as...

Page 11: ... pen and or spring as necessary Tighten the locking knob on the carriage arm Slide the spring onto the pen from the top and insert it back into the pen carriage 1 1 2 2 3 3 Most new users will benefit from practice cutting with the supplied pen carriage until they are comfortable with normal operations of the cutter and cutting software Your pen carriage should come assembled and appear as it does...

Page 12: ...e input directly to the cutter Covered in detail in the Control Panel section of this manual CARRIAGE ARM Holds the blade or pen carriage PINCH ROLLERS Holds the media tightly to the feed roller below FEED ROLLERS Positions the cutting material during operation POSITIONING BUTTON Used by the cutter to determine the location of the carriage arm LEFT SIDE COVER Contains the power cable port power sw...

Page 13: ...able from the cutter to a computer SERIAL COM CABLE PORT Used to connect a serial cable from the cutter to a computer RIGHT SIDE VIEW POWER SWITCH FUSE CARTRIDGE POWER CABLE PORT POWER CABLE PORT Used to connect a power cable from the cutter to a wall outlet or surge protector POWER SWITCH Main power switch for turning the power of the cutter on 1 or off 0 FUSE CARTRIDGE Allows access to the fuse ...

Page 14: ...l designs ORIGIN BUTTON Used to test z axis functionality by dropping the blade down if the carriage is functioning properly or to set a new origin point when the machine is in its offline mode V V BUTTONS Adjusts the cutting speed A cutting speed of 300 mm s is a reasonable default speed that can be used for most cuts When working with smaller and more detailed images a slower speed may be requir...

Page 15: ... mode was entered SETUP BUTTON Has no function in this mode TEST BUTTON Accepts any changes that have been made to the material or blade positions and exits Offline Pause mode returning the cutter to the main screen Resumes any cutting that was taking place when Offline Pause mode was entered from the new blade material positions ORIGIN BUTTON Accepts any changes that have been made to the materia...

Page 16: ...UTTON Resets by stopping the cutter and setting the origin of the carriage arm to its right most position OFFLINE PAUSE BUTTON Has no function in this mode SETUP BUTTON Exits Setup mode and returns to the main screen TEST BUTTON Has no function in this mode ORIGIN BUTTON Has no function in this mode V V BUTTONS Adjusts the Up Speed of the cutter F F BUTTONS Adjusts the Baud Rate of the cutter ...

Page 17: ...eenStar Layflat Classic or Main Tape GXF 775 45 Blade general 60 Blade reflective Oracal 651 or GreenStar Intermediate calendered for short term Oracal 751 or 951 cast for long term 45 MEDIA CARRIER MEDIA CARRIER MEDIA CARRIER 60 MEDIA CARRIER MEDIA CARRIER MEDIA CARRIER MEDIA CARRIER 60 The workhorse blade good for most vinyl materials 30 MEDIA CARRIER MEDIA CARRIER MEDIA CARRIER MEDIA CARRIER 60...

Page 18: ...orrect COM port is being used in your software setup but for most users the COM port will be COM1 Most current versions of Windows and the current VinylMaster release already have drivers pre loaded If howver you find you still need to install drivers go to www uscuttersupport com mh support page and select the driver that supports your older Windows version INSTALLING VINYL MASTER SOFTWARE Your M...

Page 19: ...ll on top of the stand rollers Release the pinch rollers release levers If you are going to cut from a scrap or single sheet instead of a roll then skip the next step on placing a vinyl roll All other steps will be the same 1 2 For heat press vinyl please flip the roll ...

Page 20: ...a single sheet instead of a roll the vinyl can also be feed from the front Adjust the pinch rollers so there is one roller located on each side of the vinyl and on models with 3 or more rollers one roller near the center Avoid lowering a pinch roller to the gap between the two feed rollers 3 4 ...

Page 21: ...555 Leave a gap of between 1 2 1 1 2 from the edge of the roller and the edge of the vinyl on both sides Engage the Pinch Rollers by pushing down on the Pinch Roller Release Levers 5 6 If the cutter is not already on turn it on now ...

Page 22: ...djust the vinyl to where you want to make your cut to start by using the Up and Down arrow keys on the control panel Now adjust the blade to where you want your cut to start by using the Left and Right arrow keys If you would like to change the position of where the cut will be made 1 2 3 ...

Page 23: ... right area of the design Please leave enough room to the left of and behind the starting location to finish your cut If you would like to make other adjustments to the pressure speed or other settings you can do so now If you are setting up for your first cut with the machine then the default values should be a good starting point If you make any adjustments to your cutter make sure that you retu...

Page 24: ...the material roll and adjust the pinch rollers Remember to make sure the top roller is placed so that there is a bottom roller called the grit roller beneath it Remember to line the material up so that it is moving straight through the feed area and resist the temptation to run the material close to the edge of the cutter feed area or you increase the risk of a mis feed that will wrinkle your viny...

Page 25: ...eters per second small intricate designs DECREASE CUT SPEED large simpler designs INCREASE CUT SPEED FORCE PRESSURE This setting determines how hard the blade comes down onto the material outer square won t weed INCREASE FORCE blade digging too far into carrier DECREASE FORCE weeds easily with a lightly scored carrier PERFECT Test Cut ...

Page 26: ...h your fingers while the release button of the Blade Carriage is pressed Adjust the blade depth of the Blade Carriage page 10 and Force setting on the cutter page 14 until you are getting solid uniform cuts Start with a blade depth of around 1 64th of an inch and a pressure setting of 100g and try an increased pressure setting before attempting to increase the blade depth Slashes are made across t...

Page 27: ...groove in strip or too much blade is exposed friction build up Part of the blade is dragging on its side during turns Offset setting is incorrect Dull blade or blade holder isn t secured properly in slot Replace the cutting strip or decrease the blade depth Clean the inside of the blade holder by coating the blade with WD40 and moving it in and out of the blade holder Clean off any debris that com...

Page 28: ... will develop small cuts and abrasions and it may happen quickly if you are creating decals or other projects where the blade will cut through the liner of the media Blade holders will gather small bits of material in them Over time this accumulated debris can prevent the blade from moving smoothly over the cut media Occasionally removing the blade holder cap and cleaning out the debris will help ...

Page 29: ...hipping are eligible for a flat rate ground shipping label at the market rate Items determined to be defective within first 30 days or improperly shipped will receive this label free of charge The customer may choose their own shipping method as long as tracking information is communicated to and acknowledged by USCutter Items should be returned in their original packaging Items returned in other ...

Page 30: ...ueegees for only 25 99 Sign Shop In a Box Good sign shops start from small packages This comprehensive starter kit includes all the materials tools application tapes and a sample of media options to start making signs banners and magnets and apply them in the field Includes an array of applicators and squeegees for different situations knives blades fluids tapes banner blanks 55 big ruler self hea...

Page 31: ...for only 2 sign Oracal 651 24 x 5 Yard Starter Pack 12 Colors Get 12 24 x 5 yd rolls of Oracal 651 in all the most popular colors This is rated as a 6 year outdoor vinyl that will hold up in most environmental conditions for long term signage and banners It has a gloss finish and is relatively thin for easy weedability For applications with contours requiring conformability check out Oracal 751 or...

Page 32: ...any means including photocopying recording or other electronic or mechanical methods without the prior written permission of the publisher except in the case of brief quotations embodied in critical reviews and certain other noncommercial uses permitted by copyright law For permission requests write to USCutter 7945 NE 65th St Suite 200 Redmond WA 98052 Copyright 2019 USCutter ...

Reviews: