


24
www.uscutter.com
425.481.3555
1
2
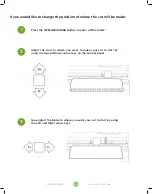
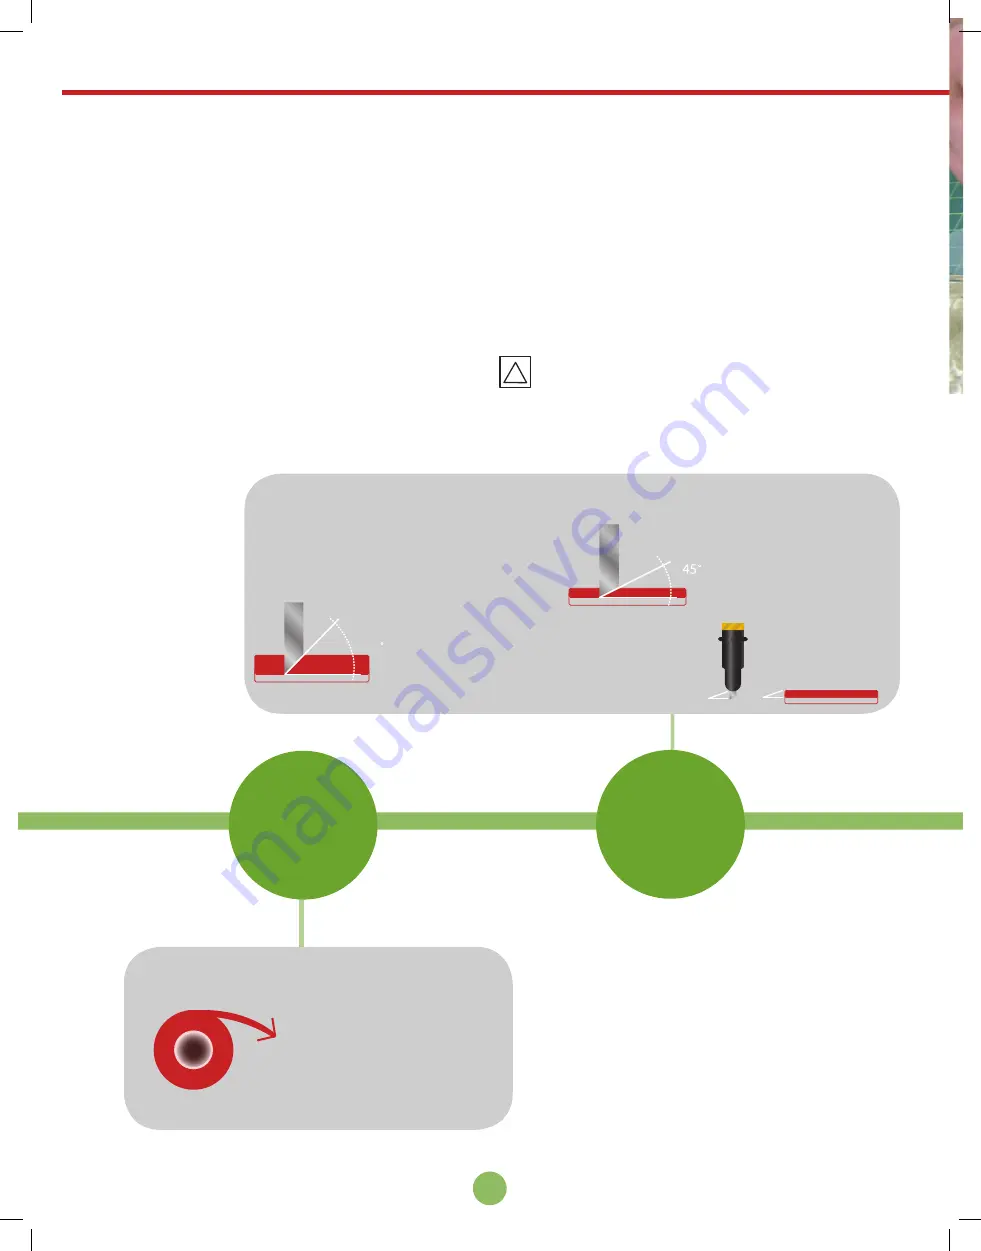
LOAD MATERIAL
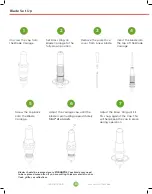
CHOOSE BLADE
For thin and regular sized
media, use a 45
o
blade.
Load the blade so
that the length of
the blade shown
is not longer than
the media is thick.
For thicker materials, such as
Siser StripFlock, Siser Glitter, and
Hexis CutFlex 600 Reflective,
a 60
o
blade is needed.
Most vinyl products are
loaded from over the top.
MEDIA
CARRIER
B
L
A
D
E
MEDIA
CARRIER
B
L
A
D
E
MEDIA
CARRIER
60
MEDIA
CARRIER
B
L
A
D
E
MEDIA
CARRIER
B
L
A
D
E
MEDIA
CARRIER
60
MEDIA
CARRIER
B
L
A
D
E
MEDIA
CARRIER
B
L
A
D
E
MEDIA
CARRIER
60
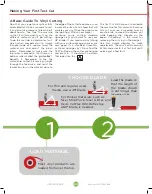
Making Your First Test Cut
A Basic Guide To Vinyl Cutting
Now that you’ve got your system fully
assembled let’s take a moment to test
it and also take moment to learn a bit
about how to “fine tune” the machine
so that it will do quality cuts on the
different materials you’ll be cutting.
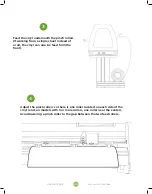
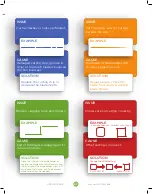
To do this we’ll do a standard test cut,
which when competed will a simple
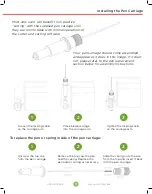
triangle inside of a square. Load the
material roll and adjust the pinch
rollers. Remember to make sure the
top roller is placed so that there is a
bottom roller (called the “
grit roller
”)
beneath it. Remember to line the
material up so that it is moving straight
through the feed area, and resist the
temptation to run the material close to
the edge of the cutter feed area or you
increase the risk of a mis-feed that will
wrinkle your vinyl. (See the graphic on
the top of pg. 21 for an example.)
Assuming you’re cutting standard
signage vinyl, you’ll want to use your
45
°
blade. If you received vinyl along
with your cutter package, chances are
very good it’s a standard GreenStar
or Oracal signage vinyl. Now, find the
TEST button on the cutter control pad
and press it. It should cut a pattern
that looks like this:
This Test Cut will help you to calibrate
the machine for this material. Examine
this cut and use a weeding tool or
exacto knife to weed the square out
while keeping the triangle on the
paper. (“Weeding” is the word for
removing the cut vinyl in the design.)
Use this simple diagram to make
adjustments. There’s a certain amount
of trial and error to it at first, but you’ll
quickly get a feel for it.


