setting up your remote control
1.
for your VCR, TV, and cable box
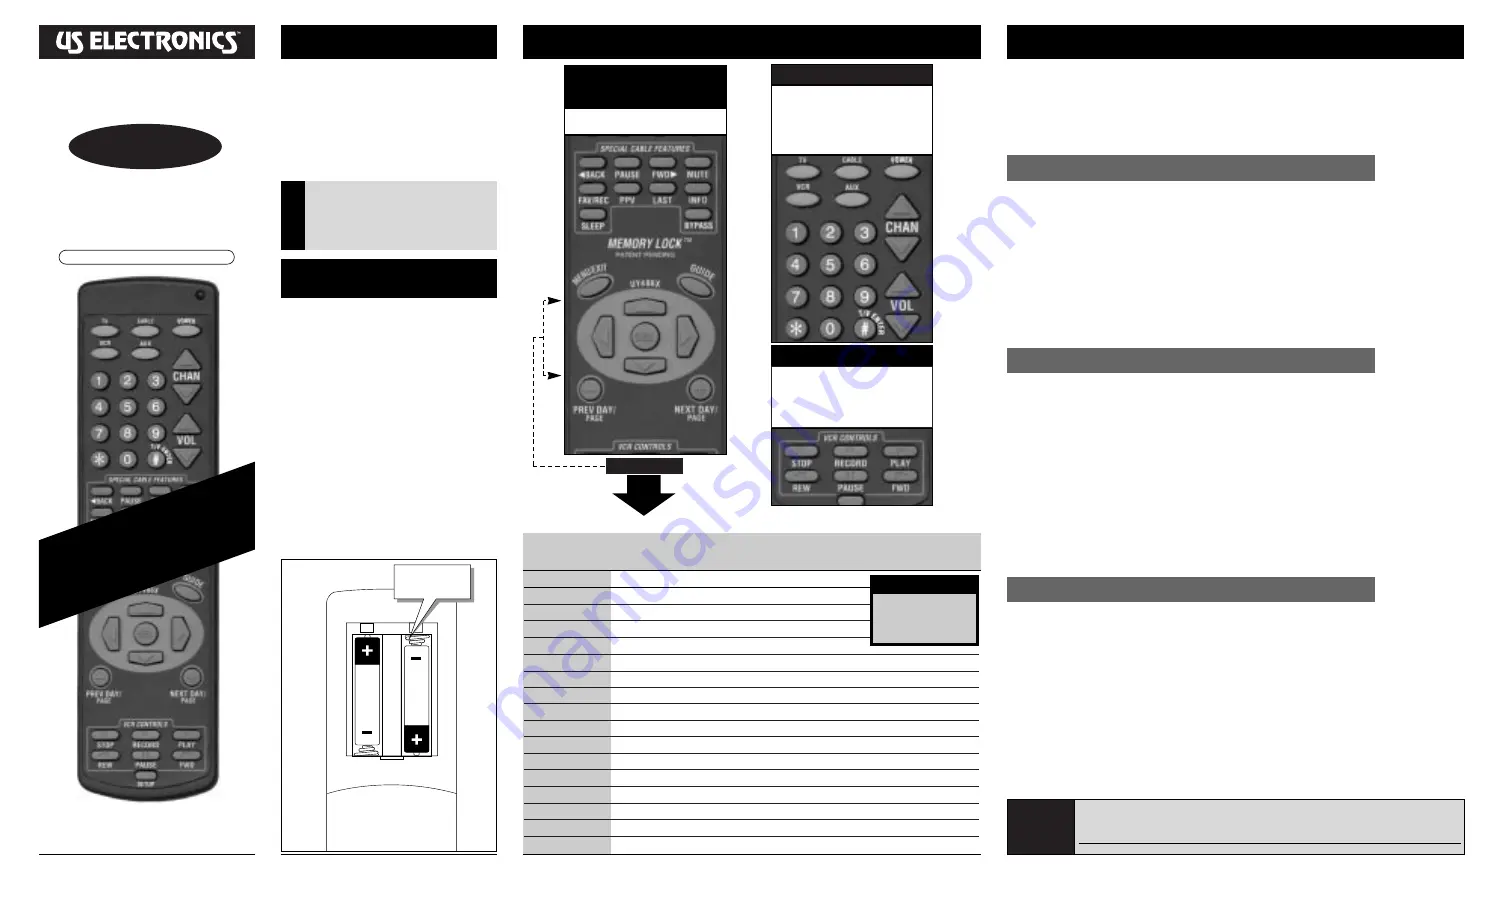
button functions
before you begin
T/V ENTER
finalizes channel selection on some TVs and VCRs
BACK
moves video-on-demand playback backward
PAUSE
temporarily stops video-on-demand playback
FWD
moves video-on-demand playback forward
MUTE
turns volume off
FAV/RECORD
cycles through favorite channels/program guide record function
PPV
displays pay-per-view options
LAST
recalls the last channel that was viewed
INFO
displays channel and program information
SLEEP
accesses sleep timer functions
BYPASS
bypasses the converter (channels will be changed through the TV)
MENU/EXIT
displays the main on-screen display menu/exits out of menus
GUIDE
displays the program guide
CURSOR KEYS
navigate through on-screen menus (see the highlighted section above)
SEL
chooses the highlighted item in the menu
PREV DAY/PAGE
moves the program guide or menu backward by one day or page
NEXT DAY/PAGE
moves the program guide or menu forward by one day or page
© 1998 US Electronics Components Corp. All rights reserved
Part Number USE17388, Version 1.2
9804
Install two
AAA alkaline batteries
as shown here
If you have a TV with a remote control, we
recommend that you plug its power cord
directly into a wall outlet if available (your
cable installer may select an alternate setup).
Make sure to set your TV to channel 2, 3, or 4
as directed by your cable company.
Before you can program or operate the remote
control, you must install two AAA Alkaline
batteries.
Step 1
Remove the battery compartment cover on the
back of your remote control.
Step 2:
Check battery polarity carefully,and
install the batteries as shown in the
illustration below.
Step 3:
Replace the battery compartment cover.
installing batteries
The chart below shows the functions of special keys for your cable box and program guide.
See the cable box manual for further details.
MORE
INFO
Helpful
Hint
I
N
F
O
Press the
[DEVICE]
button,then the
[SETUP]
button on the remote.
Enter the 3-digit device code for your brand of device listed in the charts on the other side of this
manual by pressing the appropriate buttons on the numeric key pad.
Press the
[SETUP]
button again to save the code.The red indicator light at the upper right-hand corner
of your remote will flash 3 times if these steps were followed correctly.
Press the
[POWER]
button to test the code you‘ve entered. The device should turn ON or OFF each
time the
[POWER]
button is pressed. If the device doesn’t turn ON and OFF, repeat this setup
procedure with the next code listed for the device.
3.
for an auxilliary device (optional)
2.
for a digital music terminal (optional)
The red
[AUX]
button allows you to control a or a second TV or VCR if you aren’t using it for a digital
music terminal. To do this, you need to setup the
[AUX]
button so it functions like a second
[TV]
or
[VCR]
button.
Press the
[SETUP]
button,then the
[MENU]
button on the remote.
Now, press the
[AUX]
button, and then the button that you want the
[AUX]
button to emulate (either
the
[TV]
or
[VCR]
button), then press the
[SETUP]
button. The red indicator light at the upper right-
hand corner of your remote will flash 3 times if these steps were followed correctly.
The
[AUX]
button can now be programmed to control the specific device. Follow the instructions above
in step 1 and press the
[AUX]
button any time you are told to press the
[DEVICE]
button.
vcr controls
These keys operate standard VCR functions.
Operating Note:
Press the
[RECORD]
button
(or the
[EPG RECORD]
button) twice to start
recording on your VCR.
device/number keys
• Device keys select what device the buttons
on the remote will operate.
• Number keys allow you to enter the
channel you want to view.You will also use
them to setup the remote.
cable box
function keys
See the chart below for a description
of the key functions.
Memory Lock
™
is an exclusive technology
that saves the device codes that are
programmed into the remote, even when
the batteries are removed.
MEMORY L
OCK
™
featuring
Cursor Keys
Before you get started, find the red buttons labelled
[VCR]
,
[TV]
, and
[CABLE]
at the top of the remote
control. In this section we’ll refer to each of these buttons as a
[DEVICE]
buttons. Each time you see
[DEVICE]
button in the in this section, press the appropriate button for the device that will be operated
by the remote (TV, VCR, Cable Box, etc.). Next, find the
[SETUP]
button at the bottom of the remote
control. Once you are familiar with the location of the buttons,continue below.
Press the
[AUX]
button,then the
[SETUP]
button on the remote.
Enter the 3-digit device code for your type of digital music terminal by pressing the appropriate buttons
on the numeric key pad.
Jerrold DCR1000
.............................000
Scientific-Atlanta DMX
..................002
Press the
[SETUP]
button again to save the code.The red indicator light at the upper right-hand corner
of your remote will flash 3 times if these steps were followed correctly.
Press the
[AUX]
button again to test the code you‘ve entered.The device should turn ON or OFF each
time the
[POWER]
button is pressed. If the device doesn’t turn ON and OFF, repeat this setup
procedure with the next code listed for the device.
w w w . u s e l e c t r o n i c s . c o m
US Electronics provides these function descriptions as a general guide to allow you to become more familiar with your cable box. Refer to your cable box manual for descriptions of specific functions.
8600X™ is a trademark of Scientific-Atlanta
The setup code for the Scientific-Atlanta
8600X
™
series cable box is:
006
NOTE
Depending on the configuration
of your cable box,certain
functions listed here may or may
not be functional.
▲
▲
User’s Guide
for the
UY486X
4-in-1 Remote Control
featuring Memory Lock
™


