background image

The Remote Access Server that I dial does not have a hunt
group, and I need to dial two phone numbers to get a 128
Kbps connection. How do I do this?

In the phone number section of your dialing program type both phone
numbers separated by &. (for example, 5551212&5551213) Then
complete your connection as usual.

If you are using Dial-Up Networking in Windows 95 or 98, turn off
Use area code and Dialing Properties. There is not a check mark in
the box next to the item when it is turned off. If you are using Dial-Up
Networking in Windows NT 4, turn off Use Telephony dialing
properties
.

When I call to other ISDN equipment using a terminal
program (such as Hyperterminal), I can’t send or receive
data.

V.120 or Asynchronous 128K must be used if you are using your ISDN
TA with a terminal program.

Open ControlCenter and click the Configuration Manager icon.
Verify that “V.120 Rate Adaption” or “Asynchronous 128 Kbps” is
selected in the “Outgoing Calls” drop-down menu. Note: The device
that you are connecting to must be using the same protocol that your
ISDN TA is using.

If your ISDN TA will also be receiving calls in a terminal program,
click the Advanced Configuration button. Click the Data tab. Then
verify that “V.120 Rate Adaption” or “Asynchronous 128 Kbps” is
selected in the “Incoming Call Protocol” drop-down menu.

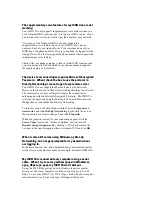
How do I program the SPIDs for my ISDN TA without using
the ControlCenter software?

You can initiate SPID Wizard from a terminal program.

Open your terminal software (such as Hyperterminal). Then type
AT*Zx,y,z and press return.

Type this command without any spaces and let x equal your area code,
y equal the first telephone number (Directory Number) for your ISDN
line, and z equal the second telephone number for your ISDN line. The
telephone numbers are provided by your telephone company when you
order ISDN service.  The SPID Wizard will try to configure your ISDN
TA for your ISDN line using the telephone number information.

How do I program the SPIDs and other ISDN line
information for my ISDN TA without using the
ControlCenter software or the SPID Wizard?

Open a terminal program, such as Hyperterminal.

To set your switch protocol, type AT*W=n and press Enter. Type the
number that corresponds to your switch type in the place of n, using the
list below as reference.

Summary of Contents for 3CP3468

Page 1: ...sing Asynchronous 128K and Advanced Asynchronous 128K Using Your ISDN TA on a Leased Line Returning Your ISDN TA s Settings to the Factory Defaults Setting SPIDs Telephone Numbers and TEIs Manually 6 Voice Features Supported Voice Features Enabling Voice Features Advanced Voice Configuration 7 Getting Online with Your ISDN TA Windows 95 or 98 Windows NT 4 0 Macintosh Other Operating Systems 8 Dial...

Page 2: ...isters Appendix C Connect Messages Appendix D Specifications ISDN Terminal Adapter Specifications RS 232 Port Pin Specifications Nine Pin to 25 Pin Serial Cable Specifications Macintosh Serial Cable Pin Specifications Appendix E Glossary Appendix F Copyright Information Appendix G Regulatory and Warranty Information ...

Page 3: ...8 Kbps with the highest reliability and error free performance possible With compression and a high speed serial port it can reach transmission speeds of up to 230 4 Kbps And using USB these speeds can be even higher ISDN TA Features Your 3Com U S Robotics ISDN TA features the following Easy Installation and Use AutoSPID enables the ISDN TA to download Service Profile ID and telephone number infor...

Page 4: ...rs dialed for both voice and data calls Voice Features Dynamic Voice Override allows you to place or receive voice calls while a Multilink PPP or Advanced Asynchronous 128 K transmission is active Two analog ports for attaching telephone equipment such as touch tone telephones fax machines or analog modems to the ISDN line Support for a variety of supplementary voice services such as Call Waiting ...

Page 5: ...ation See the chapter Ordering ISDN Service for more information An available RJ 45 or RJ 11 outlet ISDN configuration information supplied by your telephone company when you order ISDN service A computer that meets the system requirements described in the next section System Requirements For IBM compatible PC users a straight through RS 232 modem serial cable with one 25 pin male end and one end ...

Page 6: ...r NT Windows 98 with Service Pack 1 is required to use USB 8 MB RAM 2 MB hard drive space plus space for a Web browser if you don t already have one installed Double speed CD ROM drive Available serial or USB port An Apple Macintosh must have 68030 processor PowerPC recommended System 7 1 or higher System 8 1 with System Enabler 1 0 or System 8 5 is required to use USB 8 MB RAM 16 MB recommended D...

Page 7: ...ng as power is supplied to the unit B1 Lights green when there is a data or voice transmission on B channel 1 B2 Lights green when there is a data or voice transmission on B channel 2 SD Lights green when information is being transmitted from the computer to the ISDN TA RD Lights green when information is being transmitted from the ISDN TA to the computer DTR Lights green when an application is co...

Page 8: ... serial port on your ISDN TA is shown in the illustration of the back panel above It is labeled RS 232 You must provide the serial cable If you are using a Macintosh you will need a serial cable with one 25 pin male end and one mini DIN eight pin male end If you are using an IBM compatible PC look at the back of your computer to determine what sort of serial cable you should use The serial port on...

Page 9: ...USB Cable Your ISDN TA came with a USB cable To connect your ISDN TA to your computer using USB your computer must use an operating system that supports USB CDC modem devices such as Windows 98 with Service Pack 1 or later The USB port on your computer is labeled USB or It is very narrow and rectangular To verify that you are using Windows 98 with Service Pack 1 and that USB is enabled 1 Click Win...

Page 10: ...wn in Figure 2 4 2 Insert the rectangular end of the cable into the port labeled USB or on the back of your computer Figure 2 4 Connecting the USB cable Connecting the ISDN Cable Your ISDN TA comes with an RJ 45 to RJ 11 ISDN cable Before you connect the cable notice the difference between its two ends The RJ 45 end of the cable is larger than the RJ 11 end of the cable To install the ISDN cable 1...

Page 11: ... ISDN TA and use them on your ISDN line even while you are online Note To find out how to set up supplementary services for these analog devices such as Call Waiting or Caller ID see the chapter Voice Features To install an analog device 1 Insert one end of a standard phone cable RJ 11 into one of the ports on the back of the ISDN TA labeled with the picture of a telephone as shown in Figure 2 6 Y...

Page 12: ...e that came with your ISDN TA to the power connector on your ISDN TA s back panel as shown in Figure 2 7 Note Use only the power cable with adapter that came with your ISDN TA 2 Connect the transformer end the end with the adapter block into a surge protected standard wall outlet Figure 2 7 Connecting the Power Cable ...

Page 13: ...he System Properties screen appears click the General tab Your version is listed under System Windows 95 A 1 When your computer starts up it recognizes your ISDN TA and the New Hardware Found screen appears as shown in Figure 3 1 Figure 3 1 New Hardware Found Windows 95 A 2 Insert the Connections CD ROM that came with your ISDN TA Then click Driver from disk provided by hardware manufacturer 3 Whe...

Page 14: ...ws searches your 3 5 inch floppy drive then your CD ROM drive for the proper files When it finds them they are copied to your computer 4 Click Finish Windows 98 Note If you are using USB your ISDN TA may install transparently without running the Add New Hardware Wizard described below 1 When your computer starts up it recognizes your ISDN TA and the Add New Hardware Wizard appears Click Next 2 Whe...

Page 15: ...onnections CD that came with your ISDN TA Then click the drop down menu below Specify a location and select the letter name of your CD ROM drive Click Next Figure 3 4 Select location to search 4 A screen appears telling you that the drivers have been found Click Next When the screen telling you that the drivers have been installed appears click Finish Windows NT ...

Page 16: ...es screen appears Click the Add button When the Install New Modems screen appears click Next If you do not have other modems or ISDN devices installed on your computer the Install New Modems screen appears Click Next 4 Windows detects your ISDN TA but calls it a Standard Modem Click the Change button 5 The screen shown in Figure 3 5 appears Click the Have Disk button Figure 3 5 Have Disk screen 6 ...

Page 17: ...iles for your ISDN TA to your computer Fill out the information requested on the Location Information screen shown in Figure 3 7 Click Next Then click Finish Figure 3 7 Location Information screen Installing ControlCenter Once the drivers for your ISDN TA are installed you can install the ControlCenter software ...

Page 18: ...ROM drive on your desktop Follow the onscreen instructions to install the Connections CD 4 Once the Connections CD is installed the ControlCenter installer starts automatically When the ControlCenter Welcome screen appears as shown in Figure 3 8 click Next Note If you want to reinstall ControlCenter after this initial setup insert the Connections CD When the introductory Connections screen appears...

Page 19: ...ill be able to find the program in the Windows Start menu If you click Next the icons are placed in a default folder To choose a different location click a folder in the Existing Folders list to select it then click Next 7 When the Setup Complete screen appears you are given the option of viewing the ControlCenter Readme file and opening the ControlCenter software Select the options you want by cl...

Page 20: ...re ready to make a connection using your ISDN TA No other configuration may be necessary If AutoSPID is unsuccessful It only works with certain types of telephone company equipment ControlCenter s SPID Wizard shown in Figure 4 1 appears asking you to enter your area code and the telephone numbers for your ISDN line The telephone numbers are provided by your telephone company when you order your IS...

Page 21: ...ted Note The settings described in this section have established defaults that appear in ControlCenter Changing these defaults could alter your ISDN TA s performance Changing the Protocol used for Outgoing Calls To change the protocol your ISDN TA uses to make outgoing calls 1 Click the Configuration Manager icon on the left side of the ControlCenter screen The screen shown in Figure 4 2 appears ...

Page 22: ...idth Allocation Internet Access PPP 64 Kbps Using this setting your ISDN TA transmits data on only one B channel Internet Access PPP 128 Kbps Using this setting your ISDN TA transmits data on both B channels It does not use Dynamic Bandwidth Allocation but you can use analog devices connected to your ISDN TA Note The second B channel stays connected at all times V 120 Rate Adaption V 120 is a stan...

Page 23: ...of the engaged B channels any time you initiate a call using an analog device connected to your ISDN TA The data transmission continues on the other B channel and you can place your analog call When you hang up the B channel that was dropped automatically resumes the data transmission along with the other B channel Note Using AO DI you can use devices on both your Analog Device Ports at the same t...

Page 24: ...er of your ISDN line s telephone numbers The device will ring whenever the telephone number assigned to the port that it is plugged into is dialed You can also disable incoming calls to the Analog Device Ports To adjust your Analog Device Ports settings 1 Click the Configuration Manager icon on the left side of the ControlCenter screen 2 Find Telephone Number Assignment in the Voice Port section T...

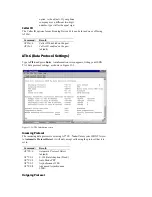
Page 25: ...ata calls They do not affect calls to your ISDN TA s Analog Device Ports Figure 5 1 ControlCenter Data tab Incoming Data Calls To set the options in the Incoming Calls section 1 Click the Incoming Call Protocol drop down menu Then click one of the options to select what sort of calls your ISDN line will accept Note When set to a protocol your ISDN TA will accept only calls made using that protocol...

Page 26: ...2 Click the Telephone Number Assignment drop down menu to select which of your ISDN line s telephone numbers will be answered as data calls To prevent your ISDN TA from accepting any incoming calls click the Telephone Number Assignment drop down menu then click No Incoming Calls Outgoing Data Calls The Outgoing Calls section allows you to set what protocol your ISDN TA uses to make data calls at w...

Page 27: ...our B channels click Automatic Rate Detect To force the data call to be made at 56 Kbps click Fix 56Kbps Rate To force the call to be made at 64 Kbps click Fix 64Kbps Rate Adjusting Your ISDN TA s PPP Settings To adjust your PPP settings 1 Open ControlCenter 2 Click the Configuration Manager icon 3 Then click the Advanced Configuration button Be sure that Internet Access PPP is selected in the Out...

Page 28: ...tion Makes a PPP connection on both of your ISDN line s B channels using Dynamic Bandwidth Allocation and compresses the data being transferred if necessary For more information on Dynamic Bandwidth Allocation see the next section in this chapter Using Dynamic Bandwidth Allocation Note If you will be using AO DI PPP must be set to MultiLink PPP with Dynamic Bandwidth Allocation Compression Mode Cl...

Page 29: ...fix Any long distance prefix that must precede the phone number returned by the server during BACP BAP negotiation should be typed in this text box Using Dynamic Bandwidth Allocation Dynamic Bandwidth Allocation DBA monitors the data traffic on the B channels of your ISDN line When traffic is light DBA turns off one of the B channels When traffic is heavy it turns that B channel on again In this w...

Page 30: ...e in use before this channel is turned on Threshold to Drop B channel Use the slide bar to adjust what percentage of this channel must be in use before it is turned off Note The settings for the first B channel can only be adjusted if AO DI is enabled For more information on AO DI see the next section Using Always On Dynamic ISDN Always On Dynamic ISDN AO DI is a dial up service designed to optimi...

Page 31: ...he B channel phone numbers and negotiate bandwidth allocation During an AO DI connection both Analog Device Ports can be used Your ISDN TA can also accept one AO DI call Benefits of AO DI include Since the D channel is always available it can provide Always On connectivity This is ideal for applications such as email push technologies such as Pointcast and other applications that require a permane...

Page 32: ...n Note This code may be set automatically by the telephone company switch that your ISDN line uses Also you will not need to enter any code if your service provider or other online service is in your calling area For more information talk to your phone company s ISDN representative when you order your line 6 When you order your ISDN line with AO DI service you are given a third telephone number th...

Page 33: ...ary click D channel 1 B channel If you want AO DI to be able to engage both B channels when necessary click D channel 2 B channels Using Asynchronous 128K and Advanced Asynchronous 128K Asynchronous 128K data protocol mode bonds your ISDN line s two B channels together It is a 3Com proprietary channel aggregation method for achieving speeds up to 128 Kbps Asynchronous 128K is similar to hardware B...

Page 34: ...ne s B channels are brought up to provide data speeds up to 128 Kps or higher with compression Once the data transfer is complete the connection over the B channel is dropped and you remain connected over the D channel All of this happens automatically without user intervention Because B channels are brought up only when needed to boost data throughput B channel connection costs can be reduced sig...

Page 35: ... leased line is a constant dedicated ISDN connection between you and an online service It must be set up with your telephone company Leased lines are often used by small businesses scattered across multiple locations They are also frequently used to connect employees to their corporate networks They can be set up with one or two B channels However your ISDN TA will not support analog devices when ...

Page 36: ...rolCenter screen 6 To connect to the device or service at the other end of your leased line type ATD and press Enter Returning Your ISDN TA s Settings to the Factory Defaults Using ControlCenter you can return your ISDN TA s settings to several different default modes To reset your ISDN TA 1 Open ControlCenter 2 Click the Configuration Manager icon Then click the Advanced Configuration button 3 Cl...

Page 37: ...our ISDN TA s basic settings with software flow control turned on Factory Default with ISDN Settings Resets your ISDN TA s basic settings with hardware flow control turned on This option also resets your ISDN protocol parameters but does not affect the SPIDs and telephone numbers that you set the switch type or the supplementary voice services settings Factory Default without ISDN Settings Resets ...

Page 38: ...menu labeled Switch Protocol Type 4 Enter your area code in the Area Code text box in the Directory Numbers section Then enter one of your telephone numbers in the Telephone Number 1 DN1 text box Enter your other telephone number in the Telephone Number 2 DN2 text box Note If you ordered a type of ISDN service not discussed in the chapter Ordering ISDN Service you may have a different number of te...

Page 39: ...ific TEIs leave Automatic Assignment set in the drop down menus If you were provided with specific Terminal Endpoint Identifiers for your telephone numbers select Fixed Assignment from the TEI for Telephone Number 1 DN1 and TEI for Telephone Number 2 DN2 menus in the Terminal Endpoint Identifier TEI section Then type the TEI for each telephone number in the text boxes next to TEI drop down menus ...

Page 40: ...lls forwarded to turn the forwarding feature on and to turn it off They are established by your phone company Caller ID Your ISDN TA is capable of generating the signal necessary for Caller ID Thus if you have Caller ID service established for your ISDN line your Caller ID box or Caller ID telephone will display the telephone numbers that call you and the time that they call Message Waiting Indica...

Page 41: ...ementary voice services on an analog phone connected to your ISDN TA first remember that you must have the proper ISDN service These features are only supported on if you use the National ISDN Ordering Codes to set up your ISDN service For more information on your ISDN service see the chapter Ordering ISDN Service These features must also be enabled on your ISDN TA using its ControlCenter software...

Page 42: ...for each Analog Device Port are listed Be sure that each voice service that you want to use is selected A check mark appears in the box when it is selected Also be sure any code that activates the service is correct in the text box next to Enable Note These codes are set to commonly used defaults but particular codes are provided by your phone company ...

Page 43: ...odify button When the screen changes click the Advanced Configuration button 4 Click the Voice tab The screen shown in Figure 6 1 appears It lists a series of parameters for each of your ISDN TA s Analog Device Ports The following settings can be changed from this screen Telephone Number Assignment Use the drop down menu under each Analog Device Port heading to set the telephone number for that po...

Page 44: ...lume of incoming audio on the Analog Device Port for example the voice coming over your telephone Transmit Volume Use this slide bar to set the volume of outgoing audio on the Analog Device Port for example your voice being sent from the telephone Advanced Call Features See the Enabling Voice Features in ControlCenter section of this chapter for information about this setting Dynamic Voice Overrid...

Page 45: ...nection you must also configure Dial Up Networking for your ISDN TA Installing Dial Up Networking To install Dial Up Networking 1 Click Windows Start select Settings and click Control Panel 2 Double click the Network icon The Network screen shown in Figure 7 1 appears If Dial Up Adapter appears in the list of network components go to the next section of this chapter Installing Dial Up TCP IP Suppo...

Page 46: ...s click the Windows Setup tab as shown in Figure 7 2 Figure 7 2 Add Remove Programs Properties screen 5 Double click Communications in the list labeled Components 6 When the Communications screen appears as shown in Figure 7 3 click the box next to Dial Up Networking to select it A check mark appears in the box when it is selected 7 Click OK Then click OK again 8 Follow the onscreen directions to ...

Page 47: ...gure 7 1 appears If TCP IP Dial Up Adapter appears in the list of network components go to the next section of this chapter Connecting to Your Service Provider If TCP IP Dial Up Adapter does not appear in the list of network components go to step 3 3 If Dial Up TCP IP is not installed click the Add button beneath the list of components on the Network screen 4 When the screen shown in Figure 7 4 ap...

Page 48: ...s select Microsoft by clicking it Then select TCP IP from the Network Protocols list 6 Click OK Then follow the onscreen instructions to finish installing Dial Up TCP IP support Figure 7 5 Select Network Protocol screen Connecting to Your Service Provider To create an icon that allows you to connect to your Internet Service Provider and the Internet ...

Page 49: ...t to give your connection a distinctive name type it in the text box where My Connection appears This name will appear with the connection s icon when you use it in the future Then click Next Figure 7 6 Make New Connection screen 4 When the screen shown in Figure 7 7 appears type the phone number provided by your Internet Service Provider or other online service Then click Next followed by Finish ...

Page 50: ...k this icon Then click Properties 6 Click the Server Types tab 7 When the screen shown in Figure 7 8 appears click the boxes next to the following items to turn them off Log on to network NetBEUI IPX SPX Compatible Note The check marks in the boxes disappear when an item is turned off Then click OK 8 To connect to your service provider double click your connection icon in the Dial Up Networking sc...

Page 51: ...eated on the Dial Up Networking screen to make your connection To change these settings 1 Click Windows Start select Programs and Accessories and click Dial Up Networking 2 Right click the icon you created for your connection Then click Properties 3 Click the Server Types tab 4 Click the TCP IP Settings button 5 On the screen shown in Figure 7 9 set the IP address and the names server address If y...

Page 52: ...on properties screen To open your connection double click the icon you created for it Figure 7 9 TCP IP Settings screen Windows NT 4 0 Before you can connect your ISDN TA to the Internet or to another online service such as your company s network you must be sure that TCP IP is installed and set up Remote Access Service Installing TCP IP To install TCP IP 1 Click Windows Start select Settings and ...

Page 53: ... the COM port your ISDN TA is installed on Then click OK 6 Select 3Com U S Robotics ISDN TA EXT Then click Configure 7 Select the function of your ISDN TA and click OK 8 Click Network 9 Select the protocols required to dial in to the server you will be connecting to 10 Set Encryption Settings to Allow any authentification including clear text 11 Click Continue to complete RAS setup Connecting to Y...

Page 54: ...ring Phone Numbers and Logging Calls 6 Click Point to Point Protocol PPP Then click Next 7 Click None Then click Next 8 If your service provider gave you a specific IP address type it in the My IP address text box Then click Next 9 If your service provider gave you a specific Domain Name Server type the address or addresses in the appropriate text boxes Then click Next 10 Click Finish Macintosh Be...

Page 55: ...ogin name in the Name text box and your password in the Password text box 4 Type the phone number that you dial to connect to your service provider or other online service in the Number text box 5 Click Connect Note For more information about special dialing procedures for making an AO DI or MultiLink PPP connection see the chapter Dialing Storing Phone Numbers and Logging Calls Other Operating Sy...

Page 56: ...r communications application such as Windows Dial Up Networking or third party terminal software If your service provider requires that you use multiple numbers enter the first number as you would normally In the same text box type followed by the second number Then complete the connection as you would normally For example type 14086542703 14086542704 Then finish setting up your connection as usua...

Page 57: ...mmand to dial To store a number type AT Zn s and press Enter In the place of n type a number between zero and nine This number will be the code number for the stored number In the place of s type the number that you want stored To store the most recent number dialed type L in the place of s Note The stored number function will support the special dialing methods discussed above For example type AT...

Page 58: ...wn in Figure 9 1 appears At the top of the screen is a list of devices and software that Instant Update can be used with Select the device you want to set the update parameters for by clicking it If the device you want to set is not listed click the Detect button Figure 9 1 Instant Update introductory screen This screen also allows you to record all of Instant Update s activity To create this reco...

Page 59: ...ing Update Now as shown in Figure 9 2 Figure 9 2 Instant Update Scheduling tab Connection Tab The Connection tab allows you to select which of your Dial Up Networking connections Instant Update uses to download new code for your ISDN TA Select TCP IP to use the default connection used by Windows the connection that launches automatically when you open an application that requires an Internet conne...

Page 60: ...3Com U S Robotics Web site at http www usr com home online Then click Upgrades Updates The site will help you find your ISDN TA and any revised code that may exist for it Look for the newest file with the extension xmp 4 If the date of the code that you find is more recent than the code date of your ISDN TA download the code that you find on the Web site 5 Once the file has downloaded click the Fl...

Page 61: ...nter An information screen appears Take note of the Code Date of your ISDN TA 3 Go to the 3Com U S Robotics Web site at http www usr com home online Then click Upgrades Updates The site will help you find your ISDN TA and any revised code that may exist for it Look for the newest file with the extension xmp If the date of the code that you find is more recent than the code date of your ISDN TA dow...

Page 62: ...hat says SDL Xmodem file transfer followed by Yes No and Test 5 Type Y to send the xmp file to your ISDN TA via xmodem file transfer Note If you are using a Macintosh disable the MacBinary option in your terminal program ...

Page 63: ...trolCenter and click the Protocol Decode icon The screen shown in Figure 10 1 appears Figure 10 1 Protocol Decode screen Options in the Protocol Decode application include ISDN Signaling Your ISDN TA tracks protocol information on your ISDN line s D channel If a check mark appears in the box next to an item that sort of information is displayed Raw data displays all the signaling messages passed a...

Page 64: ...ol Decode application include Save To Disk Saves your ISDN TA s Protocol Decode information to your computer or to a disk Load From Disk Loads saved information from your computer or from a disk Load From ISDN TA Transfers the information from your ISDN TA to the Protocol Decode application and displays it Reset ISDN TA Buffer Deletes the current information in your ISDN TA s record Refresh Redisp...

Page 65: ...and issued A Repeats the most recent command until canceled by pressing any key Returns your ISDN TA to command mode Do not press Enter after issuing this command The sections below cover many of the commands necessary to configure your ISDN TA for connection to an Internet Service Provider or other online service They are grouped by the ATI screens that provide you with information about how the ...

Page 66: ...hannels Telephone Numbers The telephone numbers for your ISDN TA are set using AT P n These numbers are supplied by your telephone company and are what people dial when they place a data call to your ISDN TA or to devices connected to your Analog Device Ports Command Follow the equal sign with AT P0 Area code AT P1 Telephone number 1 DN1 AT P2 Telephone number 2 DN2 SPIDs The Service Profile Ident...

Page 67: ...ult AT A 0 Disables AO DI default AT A 1 Enables AO DI To set the telephone number and TEI for AO DI Command Follow the equal sign with AT PD Packet Telephone Number on the D channel for AO DI connections to your ISDN TA AT TD 0 63 sets TEI to a fixed assignment 255 sets TEI automatically Default setting is 21 To set the long distance packet carrier code for your D channel s X 25 connection Comman...

Page 68: ...roper ISDN line type installed For more information see the Ordering ISDN Service chapter Figure 11 2 ATI15 Information screen Voice Bearer Capabilities The outgoing voice bearer capability is set using AT Bx Command Result AT Bx 0 3 1 KHz Audio default AT Bx 1 Speech Call Routing Which telephone number will be assigned to which Analog Device Port is set using the AT Rx By default the first Analog...

Page 69: ...the equal sign with AT VRx 0 to mute the receive volume 1 9 to set volume on analog device port x 9 is the default Transmit volume Command Follow the equal sign with AT VTx 0 to mute the receive volume 1 9 to set volume on analog device port x 9 is the default Supplementary Voice Services The supplementary voice services for each Analog Device Port can be universally disabled using AT Sx Command R...

Page 70: ...ign Call Forwarding Call Forwarding for each Analog Device Port can be turned on or off using AT Fx Command Follow the equal sign with AT Fx 0 disables Call Forwarding 57 a common code used to enable the option is the default If your phone company uses a different two digit number type it after the equal sign Call Transfers The call transfer options for each Analog Device Port can be turned on or ...

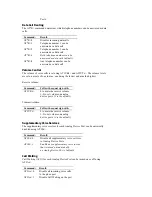
Page 71: ...ATI16 and press Enter An information screen appears listing your ISDN TA s data protocol settings as shown in Figure 11 3 Figure 11 3 ATI16 Information screen Incoming Protocol The incoming data protocol is set using AT VI Note Unless your ISDN TA is set to Automatic Protocol Detect it will only accept calls using the protocol that it is set to Command Result AT VI 0 Automatic Protocol Detect defa...

Page 72: ...ngages the B channels as they are needed The number of B channels being managed by AO DI is set using AT A0 Command Result AT A0 0 AO DI can use only the D channel AT A0 1 AO DI can use only the D channel and a maximum of one B channel AT A0 2 AO DI can use the D channel and two B channels default BACP BAP Bandwidth Allocation Control Protocol BACP and Bandwidth Allocation Protocol BAP are used to...

Page 73: ... A2 Sample time 1 999 seconds to return to D channel in AO DI AT A3 D channel threshold level to add B1 channel in AO DI percentage AT A4 Threshold level to return to D channel in AO DI percentage AT D1 Sample time 1 999 seconds to increase bandwidth in MultiLink PPP AT D2 Sample time 1 999 seconds to decrease bandwidth in MultiLink PPP AT D3 Threshold level to increase bandwidth percentage AT D4 ...

Page 74: ...LPPP is set using AT U Command Result AT U 0 Automatic assignment default AT U 1 xxx Locally assigned address xxx AT U 2 xxx Internet Protocol address xxx AT U 3 xxx IEEE 802 1 globally assigned MAC address xxx AT U 4 xxx PPP Magic Number Block xxx AT U 5 xxx Public Switched Network Directory Number xxx ...

Page 75: ...s and only one B channel is used How can I connect to my Internet Service Provider with two B channels all the time Open the ControlCenter Then click the Configuration Manager icon When the Basic Configuration screen appears click the Outgoing Calls drop down menu Then select Internet Access PPP 128 Kbps When someone calls my ISDN line with a voice call one of my B channels used for 128 Kbps data ...

Page 76: ... the Basic Configuration screen appears verify that Internet Access PPP is selected in the Outgoing Calls drop down menu This is the most common connection protocol used by Internet Service Providers Verify that the CD light on the front of your ISDN TA illuminates when you place a call to your Internet Service Provider If the CD light does not come on after you dial open ControlCenter and click t...

Page 77: ... your ISDN TA is using If your ISDN TA will also be receiving calls in a terminal program click the Advanced Configuration button Click the Data tab Then verify that V 120 Rate Adaption or Asynchronous 128 Kbps is selected in the Incoming Call Protocol drop down menu How do I program the SPIDs for my ISDN TA without using the ControlCenter software You can initiate SPID Wizard from a terminal prog...

Page 78: ...ompany s switch equipment The alert light will turn off when the ISDN TA is properly synchronized to the telephone company switch This may take one minute to complete These settings do not have to be saved using the W command Where can I get access to Q 931 and PPP information generated by my ISDN TA Open ControlCenter and click the Protocol Decode icon A protocol monitor program will then extract...

Page 79: ...ll require the connection be authenticated with the Microsoft Encrypted Password The ISDN TA will send the password using the Microsoft Encrypted Password even though the box is unchecked in Dial Up Networking To turn this option off click Windows Start select Programs and Accessories and click Dial Up Networking Right click the icon of the connection you want to change Then click Properties When ...

Page 80: ... ISDN is selected A check mark appears in the box next to the item when it is selected Be sure that your ISDN TA is using PPP Open ControlCenter and click the Configuration Manager icon Then click the Advanced Configuration button Click the Outgoing Call Protocol drop down menu Then click Internet Access PPP If your service provide does not support Reverse Charge Request be sure that it is turned ...

Page 81: ... B channels when necessary click D channel 1 B channel If you want AO DI to be able to engage both B channels when necessary click D channel 2 B channels If your service provider requires that you dial a number for the D channel as well as both B channels also be sure that you are dialing correctly Type a period in front of the D channel number Then type followed by the B channel numbers separated...

Page 82: ...conds the other channel is checked to determine if this channel needs to be turned on Sample Time to Drop B channel Use the slide bar to adjust how often in seconds this channel is checked to determine if it needs to be turned off Threshold to Add B channel Use the slide bar to adjust what percentage of the other channel must be in use before this channel is turned on Threshold to Drop B channel U...

Page 83: ...g National ISDN Ordering Codes These codes simplify ordering ISDN service by grouping common features and capabilities in packages that can be requested by name This means that you can order your ISDN service without discussing an incredible number of parameters one by one with your phone company s ISDN representative Using an ordering code also ensures that the phone line will function properly w...

Page 84: ...ith Additional Call Offering It carries voice and data traffic at speeds of up to 128 Kbps along two B channels IOC S1 allows you to use analog devices such as a telephone or fax machine on your ISDN line It includes Calling Number Identification for both data and voice calls and call waiting for both directory numbers but does not include other supplemental voice services Ordering Codes with Supp...

Page 85: ... you to use analog devices such as a telephone or fax machine on your ISDN line It includes Calling Number Identification for both data and voice calls and Call Waiting for both directory numbers However additional voice services are not supported Unlike IOC S1 however IOC X supports Always On Dynamic ISDN AO DI allowing you to take full advantage of your ISDN line s often underused D channel Orde...

Page 86: ...der by switch type 5ESS Multipoint or 5ESS Point to Point Switch To order service for the 5ESS Multipoint or Point to Point switch supply the following information Required Information Ask for Line Type Standard National ISDN 1 line If you are ordering for a point to point switch ask for point to point configuration Line Code 2B1Q Interface Type U interface RJ 11 jack Directory Numbers Telephone N...

Page 87: ...red Information Ask for Line Type Standard National ISDN 1 line Line Code 2B1Q Interface Type U interface RJ 11 jack Directory Numbers 2 Circuit switched Option Yes Bearer Restriction Option No packet mode data NOPMD Protocol Functional version 2 PVC 2 SPID Suffix 1 Terminal Endpoint Identifier TEI Dynamic Maximum Keys 64 Ring No Key System EKTS No Voice or Data Both Data Option Lower layer compat...

Page 88: ...ent command issued A Repeats the most recent command until canceled by pressing any key Returns your ISDN TA to command mode Do not press Enter after issuing this command Default settings are listed in italics Basic AT Commands Commands Results AT Help command summary ATA Answer Data Call ATDn Dials a telephone number n 0 9 Digits to dial n Auxiliary tone dial digit n Auxiliary tone dial digit n R...

Page 89: ...ommands AT An n 0 Display basic connection result codes n 3 Display extended connection result codes default AT Bn n 0 Floating DTE speed after connection n 1 Fixed DTE speed after connection default AT Cn n 0 CD always on n 1 ISDN TA controls CD default AT Dn n 0 Ignore DTR n 1 Online command mode on DTR off n 2 Normal DTR mode default AT Fn n 0 No flow control template n 1 Hardware flow control ...

Page 90: ...T A4 n Threshold level percentage to return to D channel in AO DI AT B n n 0 Enable BACP n 1 Disable BACP default AT C0 n Code for long distance packet carrier AT C1 n Prefix to dial outside line for BACP callback AT C2 n Long distance prefix for BACP callback AT C3 n n 0 Disable callback for AO DI n 1 Enable callback for AO DI default AT D1 n Sample time seconds to increase bandwidth in MLPPP AT ...

Page 91: ...xx MLPPP Endpoint Discriminator n 0 Automatic assignment default n 1 Locally assigned address xxx n 2 Internet Protocol address xxx n 3 IEEE 802 1 Globally Assigned MAC Address xxx n 4 PPP Magic Number Block xxx n 5 Public Switched Network Directory Number xxx AT VI n Data protocol for incoming calls n 0 Auto detect default n 1 V 120 Rate Adaption n 5 Auto mode PPP n 7 Asynchronous 128K n 8 Advanc...

Page 92: ...ture AT D1 n Call Drop on ADP1 n 0 Disable n 62 Enabled by default other number may be assigned by phone company to enable feature AT D2 n Call Drop on ADP2 n 0 Disable n 62 Enabled by default other number may be assigned by phone company to enable feature AT F1 n Call Forwarding on ADP1 n 0 Disable n 57 Enabled by default other number may be assigned by phone company to enable feature AT F2 n Cal...

Page 93: ... VT1 n Transmit volume on ADP1 n 0 Mute transmit n 1 9 Set volume 1 minimum 9 maximum AT VT2 n Transmit volume on ADP2 n 0 Mute transmit n 1 9 Set volume 1 minimum 9 maximum AT W1 n Message waiting indicator on ADP1 n 0 Disable n 63 Enabled by default other number may be assigned by phone company to enable feature AT W2 n Message waiting indicator on ADP2 n 0 Disable n 63 Enabled by default other ...

Page 94: ...24 n DSR pulse time in 1 50s of a second ATS25 n DTR recognition time in 1 10s of a second ATS38 n Disconnect wait time in seconds ATS67 n n 2 Fix connection rate for digital calls n 4 Connect at 64 Kbps n 16 Enable data link delay ATS69 n n 1 Disable external Plug and Play n 4 ATZ restores NVRAM settings n 32 Enable Data Over Voice n 128 Enable fast answer ...

Page 95: ...DI Asynchronous 128K CONNECT 128000 ASYNC Advanced Asynchronous 128K CONNECT 128000 ADVANCED_ASYNC PPP at 56K B channel Rate CONNECT 56000 PPP at 64K B channel Rate CONNECT 64000 V 120 at 56K B channel Rate CONNECT 56000 ARQ DIGITAL V120 V 120 at 64K B channel Rate CONNECT 64000 ARQ DIGITAL V120 ...

Page 96: ...percent noncondensing Power 13 14 VDC at 8 amps Ring Equivalence Number REN Supports up to three per Analog Device Port EMI Certification FCC Part 15 Class B RS 232 Port Pin Specifications Pin Pin Name Signal Direction 1 Shield Ground GND 2 Send Data SD To ISDN TA 3 Receive Data RD From ISDN TA 4 Request to Send RTS To ISDN TA 5 Clear to Send CTS From ISDN TA 6 Data Set Ready DSR From ISDN TA 7 Si...

Page 97: ...eady DTR 20 5 Signal Ground GND 7 6 Data Set Ready DSR 6 7 Request to Send RTS 4 8 Clear to Send CTS 5 9 Ring Indicator RI 22 Shield 1 Macintosh Serial Cable Pin Specifications 8 Pin DIN Pin Pin Name DB25 Pin 1 Data Terminal Ready DTR 20 4 2 Clear to Send CTS 5 3 Send Data SD 2 4 8 Signal Ground GND 7 5 Receive Data RD 3 7 Data Carrier Detect DCD 8 ...

Page 98: ...nd Service Profile ID information from the phone company switch BACP BAP Bandwidth Allocation Control Protocol and Bandwidth Allocation Protocol Negotiate bandwidth allocation with the server your ISDN TA is connected to B channel Bearer channel In ISDN communications a B channel transmits data and voice traffic at a rate of up to 64 Kbps BRI Basic Rate Interface One of two access methods to the I...

Page 99: ...hat allows both data and voice communication over the same line at significantly faster speeds than the traditional analog telephone service Two types of lines provide access to ISDN BRI and PRI ISDN Call Logging Displays the five latest incoming and outgoing numbers from the data and analog ports To log incoming calls your ISDN line must support Caller ID ISDN Call Waiting Allows you to place a v...

Page 100: ... Kbps B channels and one 64 Kbps D channel QuickSelect Automatically detects and uses the protocol required for a digital call SPID Service Profile Identifier If required this number is supplied to you by the telephone company Typically if your ISDN line has only one telephone number a SPID is not required SPID Wizard Using your ISDN TA s telephone numbers SPID Wizard automatically detects the typ...

Page 101: ...ne 1995 or as a commercial item as defined in FAR 2 101 a and as such is provided with only such rights as are provided in 3Com s standard commercial license for the Software Technical data is provided with limited rights only as provided in DFAR 252 227 7015 Nov 1995 or FAR 52 227 14 June 1987 whichever is applicable You agree not to remove or deface any portion of any legend provided on any lice...

Page 102: ...nterference Handbook and The CIB Telephone Interference Bulletin These documents are available on the Internet through the FCC Compliance and Interference Bureau Home Page at http www fcc gov cib listed under documents Select CIB Interference Handbook or CIB Telephone Interference Bulletin CAUTION CHANGES OR MODIFICATIONS NOT EXPRESSLY APPROVED BY THE PARTY RESPONSIBLE FOR COMPLIANCE COULD VOID TH...

Page 103: ...ies certified equipment This certification means that the equipment meets certain telecommunications network protective operation and safety requirements Industry Canada does not guarantee the equipment will operate to the users satisfaction Before installing this equipment users should ensure that it is permissible to be connected to the facilities of the local telecommunications company The equi...

Page 104: ...ed that they be insured or sent by a method that provides for tracking of the package The repaired or replaced item will be shipped to Customer at 3COM s expense not later than thirty 30 days after 3COM receives the defective product Return the product to 3COM SRO ______________ Attn Dock 15 PCD 1800 W Central Ave Mt Prospect IL 60056 3COM shall not be responsible for any software firmware informa...

Page 105: ...r the limitation of incidental or consequential damages for certain products supplied to consumers or the limitation of liability for personal injury so the above limitations and exclusions may be limited in their application to you When the implied warranties are not allowed to be excluded in their entirety they will be limited to the duration of the applicable written warranty This warranty give...

Reviews: