Serial ATA 4-Drive NAS
User Guide
Protecting Local Disks - 117
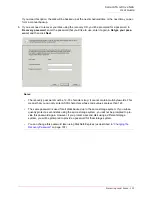
4. Review the settings for your NIC and select
Next
.
The recovery CD obtains the IP address to use from your DHCP server. If the displayed settings are
not the ones you need to use, or if no IP address is displayed, select
Config
and specify the desired IP
address or subnet mask. (If you make a mistake typing either the IP address or subnet mask, select
Disable
to clear the displayed information.) Then select
OK
and select
Next
.
5. In the
Client Name
field, enter the full computer name of this computer.
This name is always in upper case.
If you do not remember the full computer name, access the Web User Interface (as described in
“Accessing the Web User Interface”
on page 25) and click
Backups
in the navigation bar. In the
Pro-
tected disks
list, the
Computer Name
column lists the computer name of each computer that has
backed up disks to the storage system.
6. If your computer is a member of a Windows domain, enter the domain name in the
Domain Name
field. (If your computer is not a member of a Windows domain, leave this field blank.)
Initially, the recovery CD will attempt to connect to the storage system using only the computer name.
If this fails, the domain name will be appended as well. This ensures that your computer can be prop-
erly authenticated.
7. In the
Recovery Server
field, enter the name or IP address of the storage system where the backups
reside.
8. Make sure the selected authentication type is
CHAP
.
DiskSafe Express supports only
CHAP
authentication.
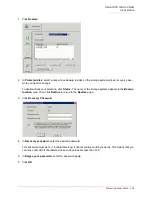
9. In the
Recovery Password
field, enter the recovery password that you specified when you protected
the disk or when you last changed the password.
If you do not remember your password, you can change it on the storage system (as described in
“Changing the Recovery Password”
on page 62) and enter the new password here.
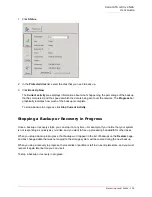
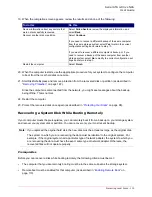
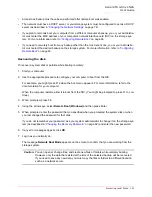
10. In the left column, select the backup that corresponds to the disk or partition that you need to recover.
If you protected only one disk or partition, only one item appears in this list.
If you protected multiple disks or partitions, you can identify the right item by looking at the
Attr
and
Size
columns. The
Attr
column displays the attributes of each listed item (
D
for disk,
P
for partition,
and
S
for system disk). For example, if you protected both a system disk and a data disk, the system
disk will be labeled
S
, and the data disk will be labeled
D
. If you protected disks of different sizes, the
Size
column (which displays the number of megabytes) can also help you identify the right backup.
11. In the right column, select the date and time of the backup that you want to recover.
In general, selecting
Base Disk
is the same as selecting the most recent backup. However, if your sys-
tem crashed during the last backup, the base disk will be in an incomplete state. In that case, be sure
to select one of the listed backup dates rather than
Base Disk
.
Note:
You can use the storage system name only if your network has a DNS server.
Summary of Contents for USR8700
Page 1: ...Serial ATA 4 Drive NAS User Guide R46 1702 00 rev 0 8 04 07 ...
Page 6: ...Serial ATA 4 Drive NAS User Guide vi ...
Page 8: ...Serial ATA 4 Drive NAS User Guide Safety Instructions 8 ...
Page 46: ...Serial ATA 4 Drive NAS User Guide Getting Started 44 ...
Page 86: ...Serial ATA 4 Drive NAS User Guide Managing Your Storage System 84 ...
Page 126: ...Serial ATA 4 Drive NAS User Guide Protecting Local Disks 124 ...
Page 136: ...Serial ATA 4 Drive NAS User Guide Disk Configurations 134 ...

