-
13
-
ASH REMOVAL
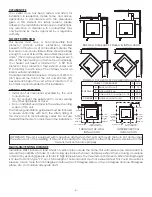
Remove the ashes periodically to avoid unnecessary ash build up. Ash removal is as follows:
1. Let fire burn out and allow unit cool to room temperature.
2.
Clean the heat exchanger tubes (see Heat Exchanger Cleaning section) – Make sure Pellet Stove is at room
temperature before touching .
3.
Open the ash pan door, remove the burn pot and empty into metal container.
4.
Vacuum to remove ashes from the firebox.
5.
BE SURE THAT ASHES ARE COOL TO THE TOUCH BEFORE VACUUMING. Some vacuum cleaners may leak ash
into the room. Your vacuum cleaner should have a special filter or bag to eliminate leakage.
6.
Remove ash pan and dispose of ashes into metal container.
7.
Reinstall ash pan.
8. Reinstall burn pot.
ASH DISPOSAL
Remove ashes when unit has cooled. Ashes should be placed in a metal container with a tight fitting lid. The
closed container of ashes should be placed on a noncombustible floor or on the ground, well away from all
combustible materials, pending final disposal. If the ashes are disposed of by burial in soil or otherwise locally
dispersed, they should be retained in the closed container until all embers have been thoroughly cooled. The
container shall not be used for other trash or waste disposal. If combined with combustible substances, ashes and
embers may ignite.
SMOKE AND CO MONITORS
Burning wood naturally produces smoke and carbon monoxide(CO) emissions. CO is a poisonous gas when
exposed to elevated concentrations for extended periods of time. While the modern combustion systems in
heaters drastically reduce the amount of CO emitted out the chimney, exposure to the gases in closed or confined
areas can be dangerous. Make sure you stove gaskets and chimney joints are in good working order and sealing
properly to ensure unintended exposure. It is recommended that you use both smoke and CO monitors in areas
having the potential to generate CO.
CHECK AND CLEAN THE HOPPER
Check the hopper periodically to determine if there is any sawdust (fines) that is building up in the feed system or
pellets that are sticking to the hopper surface. Clean as needed.
DOOR AND GLASS GASKETS
Inspect the main door and glass window gaskets periodically. The main door may need to be removed to have
frayed, broken, or compacted gaskets replaced by your authorized dealer. This unit’s door uses a 3/4” diameter
rope gasket.
BLOWER MOTORS
Clean the air holes on the motors of both the exhaust and distribution blowers annually. Remove the exhaust
blower from the exhaust duct and clean out the internal fan blades as part of your fall start-up. If you have indoor
pets your power motors should be inspected monthly to make sure they are free of animal hair build up. Animal
hair build up in blowers can result in poor performance or unforeseen safety hazards.
PAINTED SURFACES
Painted surfaces may be wiped down with a damp cloth. If scratches appear, or you wish to renew your paint,
contact your authorized dealer to obtain a can of suitable high-temperature paint.
GLASS - CLEANING, REMOVAL AND REPLACEMENT OF BROKEN DOOR GLASS
Cleaning - We recommend using a high quality glass cleaner. Should a buildup of creosote or carbon accumulate,
you may wish to use 000 steel wool and water to clean the glass. DO NOT use abrasive cleaners. DO NOT perform
the cleaning while the glass is HOT. In the event you need to replace the glass:
1. Remove the four (4) screws and glass retainers. While wearing leather gloves (or any other gloves suitable for
handling broken glass), carefully remove any loose pieces of glass from the door frame. Dispose of all broken
glass properly. ONLY high temperature ceramic glass of the correct size and thickness may be used. DO NOT
substitute alternative materials for the glass. Contact your authorized dealer to obtain this glass.

