background image

17  

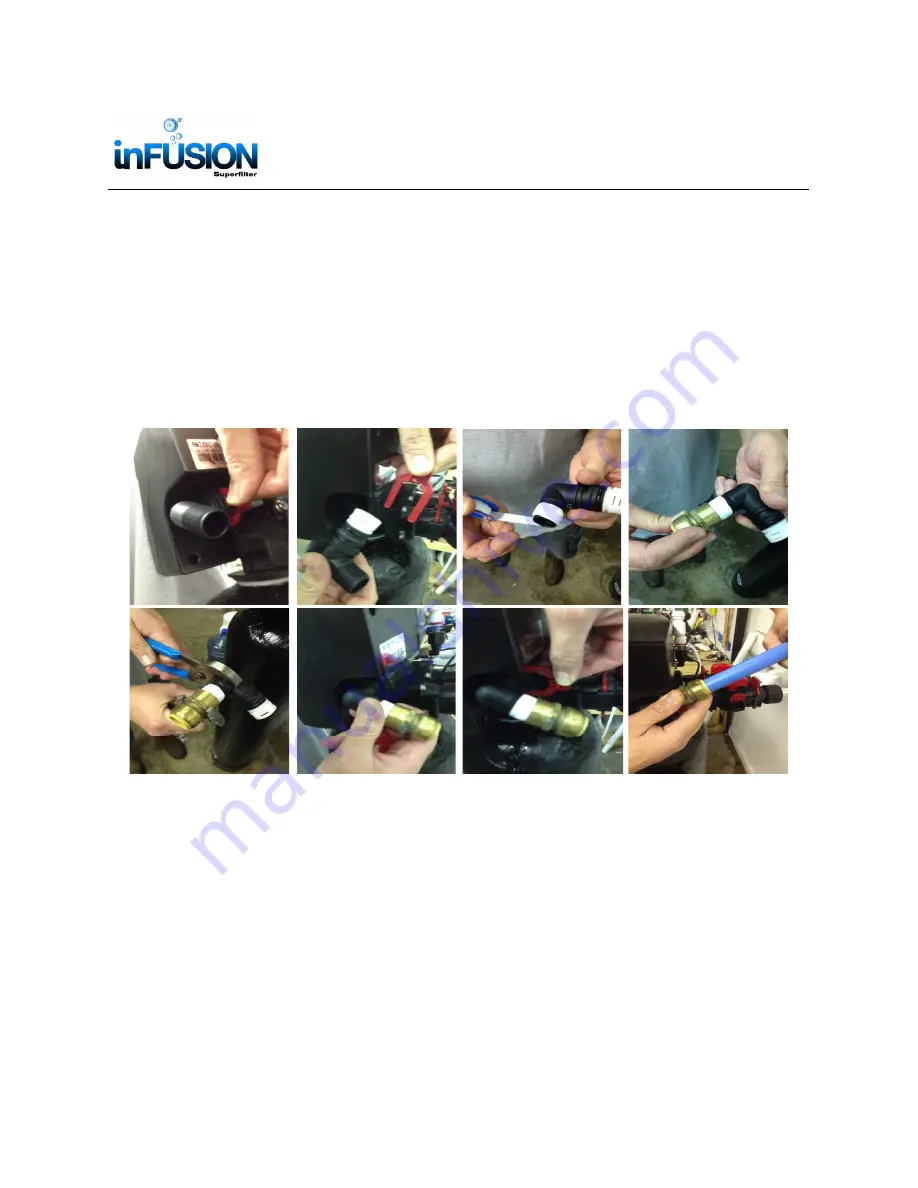
13. Install the drain line on the 3/4” threaded elbow  This should be a 3/4” solid pipe con-

veyed to a floor drain, sink drain or stand pipe.  This drain line can be any material al-
lowed by the local code (photos show PEX but PVC is typically the piping used).  An air 
gap should be established if the local code requires it.  Drain line smaller than 3/4” could 
cause a restriction on the system and prevent it from backwashing properly.  If the drain 
line is reduced to a size smaller than 3/4” 

BE SURE 

it can provide the backwash flow 

rate requirement of the unit being installed.  Drain line larger than 3/4” is acceptable.  
The system will drain with pressure, so the drain line can be ran vertically for up to 5’.  If 
the drain line is ran vertically then along the wall horizontally, make sure the horizontal 
pipe/tubing has a drop to the final drain point.  The system should be plumbed with the 
least amount of back pressure on the drain line.    


14. The drain elbow can be removed by removing the red clip and pulling the elbow out of 

the valve.  This will make it easer to connect the plumbing fitting used.  

BE CAREFUL 

not to cross thread the fitting on the elbow.  

There is a small thread tolerance for this fit-

ting to help reduce the potential for a leak so it can be cross threaded easily.  


NOTE: It may be necessary to install drain line larger than 3/4” on a linear stretch of 

drain line that exceeds 15’.   

Installation, Operation and Maintenance Manual 

Models: 089-IF-150, 089-IF-250, 089-IF-400, 

089-IF-500 

Summary of Contents for 089-IF-150

Page 1: ...stems Corporate Office 1209 Country Club Road Indianapolis IN 46234 info uswatersystems com www uswatersystems com 1 800 608 8792 Visit us online at www uswatersystems com REVISION 1 0 REVISION DATE December 18 2015 US Water Systems Commercial Residential inFusion Super Filter ...

Page 2: ... damage or personal injury Be sure to check the entire unit for any shipping damage or missing parts Also note damage to the shipping cartons Contact US Water Systems at 1 800 608 8792 for all damage and loss claims A damage claim must be made within 24 hours of receipt of the unit or the claim may not be honored Small parts needed to install the filter are in a parts bag To avoid loss of the smal...

Page 3: ...een by Design The US Water inFusion Superfilter uses up to 80 less waste wa ter compared to any conventional media like BIRM Greensand Greensand Plus Filox Pyrolox and many other old technologies because it weighs half as much Superior Performance The US Water inFusion Superfilter media is a high perfor mance media which is coated with a heavy non destructible layer of manganese diox ide which is ...

Page 4: ... media of accumulated con taminants then delivers clean clear fresh water throughout the home The electronic con trol is easy to set and once set it never has to be set it again because it has a built in ca pacitor which keeps the memory up to 72 hours in case of power failure A 5 Micron pre filter is installed prior to the inFusion Superfilter to ensure that it is being exclusively utilized for r...

Page 5: ...that the ORP is above 170 mV The US Water inFusion Superfilter works effectively when the pH is between 6 0 9 0 for iron sulfur and manganese removal When removing arsenic it is best that the pH is 7 0 or slightly lower An inFusion system should be sized to continuous flow peak flow should be something that does not happen regularly Iron sulfur and manganese are the result of prolonged con tact so...

Page 6: ...w Rate Button 6 GPM 5S 9 5 GPM 2 14 GPM 3 21 GPM 5 Filter Media Volume Cubic Feet 1 5 FT3 2 5 FT3 3 0 FT3 4 0 FT3 Filter Tank Size 10 X 54 13 X 54 16 X 65 18 X 65 Plumbing Connections 1 Male NPT Electrical Requirements Input 120V 60 Hz Output 12V 650mA Water Temperature Min 39 max 100 degrees Fahrenheit Water Pressure Min 20 Max 125 psi Before Starting Installation Tools Pipe and Fittings Other Ma...

Page 7: ...lter to backwash and rinse properly the pump supply flow and pressure must be capable of providing the backwash flow rates indicated on page 6 Checking Available Flow Rate There are several ways to check the available flow rate of the water supply The following method is intended to be simple for any application A bucket of known volume 5 gallon buckets are typically used and a stop watch is requi...

Page 8: ...om the elements con tamination vandalism etc as when in stalled indoors Keep the filter out of direct sunlight The sun s heat may soften and distort plastic parts Where To Install The Filter Proper Installation This water filter system must be properly installed and located in accordance with the Installation Instructions before it is used Do not install or store the filter where it will be expose...

Page 9: ... TO THE PICTURE BELOW ON INLET OUTLET SIDE OF THE VALVE 3 Valve Bypass Layout Drawing with Pressure Gauges Installation Operation and Maintenance Manual Models 089 IF 150 089 IF 250 089 IF 400 089 IF 500 inFusion Pressure Tank ...

Page 10: ...10 Typical Backwashing Filter Installation Operation and Maintenance Manual Models 089 IF 150 089 IF 250 089 IF 400 089 IF 500 inFusion System ...

Page 11: ... is required Note Other voltages are available Please make sure the voltage supply is compatible with the unit before instal lation EXISTING PLUMBING Condition of existing plumbing should be free from lime and iron buildup Pip ing that is built up heavily with lime and or iron should be replaced LOCATION OF INFUSION TANK AND DRAIN The Infusion tank should be located close to a drain to prevent air...

Page 12: ... It is recommended that a dust mask and safety goggles be worn to prevent possible injury A shop vacuum can be held in the area to help control the dust created by the filling process Pour all the gravel and media that was shipped in the tank US Water Systems DOES NOT ship extra gravel or media 5 When the gravel and media are installed move tank side to side to settle the media Re move the funnel ...

Page 13: ...t over the distributor tube and push the valve on the tank Thread the valve on the tank by turning it clockwise Be sure not to cross thread the valve on the tank Tighten the valve hand tight then snug it further by tapping it with the palm of the hand on the pipe connection side of the valve DO NOT use tools to tighten the valve or damage could occur Installation Operation and Maintenance Manual M...

Page 14: ... the bypass valves in the bypass position picture shows Service Posi tion see page 18 for valve position 8 Apply Teflon tape to the 1 connectors Remove the red clips from the previously in stalled bypass and install the 1 connectors in the bypass valve Re install the red clips for the 1 connectors Installation Operation and Maintenance Manual Models 089 IF 150 089 IF 250 089 IF 400 089 IF 500 ...

Page 15: ...een from the top view of the control valve The installation of 1 integrated bypass valve If the 1 integrated bypass is used instead of a three manual valve the instal lation method is shown in the picture below Installation Operation and Maintenance Manual Models 089 IF 150 089 IF 250 089 IF 400 089 IF 500 ...

Page 16: ...he control valve is the inlet The arrow point ing away from the control valve is the outlet Optional flexible connectors shown utilize rubber washer seals and do not require Teflon tape 11 Install a gauge in the inlet and outlet plumbing Use the tee fitting that matches the pip ing material The tee must have a 1 4 female threaded port to except the gauge The picture below shows optional brass fitt...

Page 17: ...ressure so the drain line can be ran vertically for up to 5 If the drain line is ran vertically then along the wall horizontally make sure the horizontal pipe tubing has a drop to the final drain point The system should be plumbed with the least amount of back pressure on the drain line 14 The drain elbow can be removed by removing the red clip and pulling the elbow out of the valve This will make...

Page 18: ...tion is Service 2 Rotate each of the two knobs in clockwise and counterclockwise respec tively when the knobs on the bypass is in one line the inlet and outlet are both closed this state of operation is By pass Installation Operation and Maintenance Manual Models 089 IF 150 089 IF 250 089 IF 400 089 IF 500 ...

Page 19: ...e main page and the dealer information page PROGRAM LEVEL USER ACCESS USER SETTINGS I These settings are programmed when the unit is installed The settings should only be adjusted by a qualified person MAIN MENU II These settings are programmed when the unit is installed The settings should only be adjusted by a qualified person ADVANCED MENU II These settings are programmed by the factory and sho...

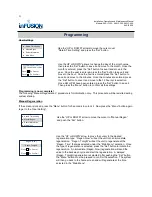
Page 20: ...rsor to Regen Cycles and press the Set button Use the UP or DOWN arrows to move the cursor over Backwash Duration and press the Set button Press MENU key Press or to change menu option Press SET to enter Press or to change value Press SET to accept Installation Operation and Maintenance Manual Models 089 IF 150 089 IF 250 089 IF 400 089 IF 500 Advanced Menu Regen Mode Regen Cycles History Values R...

Page 21: ...s To Confirm Rinse Duration 5 Minutes Press To Cancel Press To Confirm Regen Cycles Backwash Duration Rinse Duration Use the UP or DOWN arrows to move the cursor over Rinse Duration and press the Set button Use the UP or DOWN arrows to change the duration to 5 minutes Press the Settings button to save and then press the Set button to confirm Press the Menu button again to go back to the Advanced M...

Page 22: ...nu Use the UP or DOWN arrows to move the cursor over Regen Days Setting and press the Set button Use the UP or DOWN to change the Days to 20 initially The inlet and outlet gauges are used to determine that actual setting When the system is installed the service pressure drop should be recorded Once the pressure drop increases 6 10 PSI over the service pressure drop the days of use should be record...

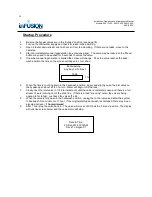
Page 23: ...d Time 01 Jan 2016 06 13 PM Press To Cancel Press To Confirm Date Time Setting Manual Regen Dealer Information Main Menu Manual Regeneration If the screen is locked press the Menu button for 5 seconds to unlock it Now press the Menu button again to get to the User Setting Use the UP or DOWN arrow to move the cursor to Manual Regen and push the Set button Use the UP or DOWN arrow to move the cursor...

Page 24: ...pen about a 1 4 of a turn Water will begin to fill the tank 7 Slowly open the inlet valve in 1 4 turn increments until the valve is completely open and there is a full stream of water coming out of the drain line If there is a loud knocking noise the valve is being opened to far to fast Just back the valve off a bit 8 When the valve is fully open in the backwash position unplug the control valve a...

Page 25: ... the filter must be backwashed The number of days recorded will be the back wash frequency 14 Now go back to the Regen Days setting in the Main Menu and input the number of days between the original startup and when the additional pressure drop was observed If the system does not show a pressure drop after 14 days set the Regen Days to 14 days This will ensure the bed is being lifted and redistrib...

Page 26: ...ouble free operation 1 Periodically make sure the supply pump is performing satisfactorily to ensure sufficient water is available for backwashing the filter 2 Periodically test the raw and filtered water to ensure conditions are still the same for the original settings and that the unit is working the way it is intended to Water testing is often the best way to determine when the filter media wil...

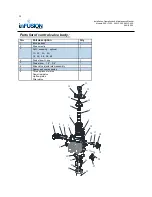
Page 27: ...1 Big O ring of Adaptor cou pling 2 6 89 secure clip 2 2 Adaptor coupling of 89 con trol valve 2 7 89 valve connector 1 3 Small O ring of adaptor coupling 2 8 Connector O ring 2 9 10 6 3 2 1 4 5 7 8 Installation Operation and Maintenance Manual Models 089 IF 150 089 IF 250 089 IF 400 089 IF 500 ...

Page 28: ... 95 secure clip 1 3 DLFC assembly optional 1S 2S 3S 4S 1 3 4 5 6 1 4 Drain elbow O ring 1 5 Drain elbow 1 2 3 4 1 6 Brine valve injector stem assembly 1 7 Spacer and seal assembly 1 8 Three options of piston Down flow piston Up flow piston Filter piston 1 Installation Operation and Maintenance Manual Models 089 IF 150 089 IF 250 089 IF 400 089 IF 500 ...

Page 29: ... BLFC 0 95gpm 1 16 Injector assembly optional grey purple red white blue yellow 1 17 Injector cover O ring 1 18 Injector cover 1 19 Injector cover screws 2 20 Tank mouth O ring 1 21 Adapter O ring 1 22 Center pipe adapter 1 23 Center pipe O ring 1 24 Valve bottom connector 1 25 Bottom connector screws 2 26 Brass nuts 1 27 Brine line elbow assembly 1 Installation Operation and Maintenance Manual Mo...

Page 30: ... BLFC 0 95gpm 1 16 Injector assembly optional grey purple red white blue yellow 1 17 Injector cover O ring 1 18 Injector cover 1 19 Injector cover screws 2 20 Tank mouth O ring 1 21 Adapter O ring 1 22 Center pipe adapter 1 23 Center pipe O ring 1 24 Valve bottom connector 1 25 Bottom connector screws 2 26 Brass nuts 1 27 Brine line elbow assembly 1 Installation Operation and Maintenance Manual Mo...

Page 31: ...ation or accident or to any damage caused by fire flood freezing Acts of God or any other casualty or if the original serial numbers have been removed These warranties are in lieu of all other warranties expressed or implied and we do not authorize any person to assume for us any other obligation on the sale of this water conditioner No responsibility is assumed for delays or failure to meet these...

Reviews: