www.uscutter.com
425.481.3555
9
Assembling the stand
Step 4.
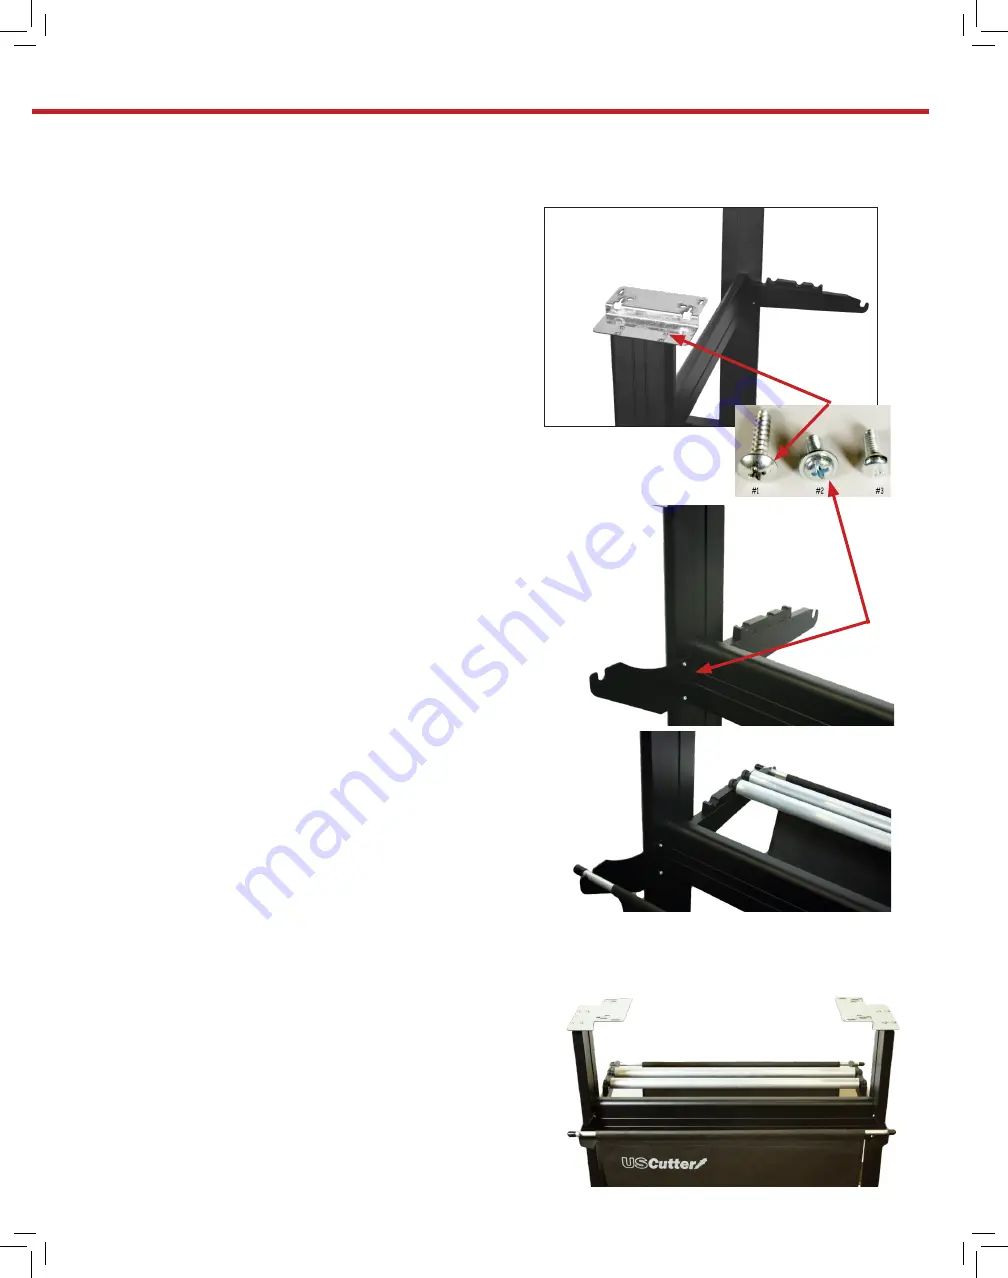
Attach the mounting brackets (
E
) to the top of the legs (
F
). This is where
you will mount your Laserpoint3 Cutter.
Use 8 #1 screws (4 on each bracket) to at-
tach the mounting brackets to the top of
the legs. The brackets have a staircase-like
shape. you will screw the lower “stair” to
the stand leg and will attach your Cutter to
the upper “stair” in a later step.
Step 5.
Step 7.
In order to mount the cutter to the
mounting brackets (
E
) on the stand, you first
need to remove the feet from your cutter.
With your cutter sitting on the mounting
bracket, re-attach the feet so that they
secure the cutter to the stand.
Alternatively you can remove the feet and
just use screws and washers to secure the
cutter to the stand.
Some cutters will have an optional mounting strategy that
allows attachment of the cutter via two thumbscrews that
screw into the bottom of the cutter.
The mounting bracket may be slighly different for these models.
F
E
Attach the front catchbasket bracket to the
leg using 4 #2 screws (2 on each bracket).
Thread the catch basket poles through the
catchbasket and position the catch basket
in the front and back grooves of the basket
brackets. Place roller bars in position.
If roller bars seem too short, brackets in
Step3 need to swap sides.
E
Step 6.


