3
INTRODUCTION
InfinitiCook 360R
Halogen Oven is a multi-utility appliance that can Roast, Grill, Bake, Air Fry, Braise,
Barbecue, Thaw, Slow Cook and Toast. It allows you to prepare a wide variety of delicious and healthy meals
in lesser time than traditional appliances, and with less or no oil. This is possible because of the state of the
art technology being used. InfinitiCook Halogen Oven cooks via dual modes:
Instant Heating from Halogen Lamp- It harnesses the power of light as a natural source of energy for
effective and efficient cooking. The direct heat from the lamp penetrates deep inside the food and cooks it
evenly on the outside and inside.
Convection heating- InfinitiCook Halogen Oven improves upon traditional oven cooking by using a
powerful fan to heat air in the oven, providing fast and even cooking from all sides. Convection heating is
best for baking, puffed pastries and cakes.
InfinitiCook 360R
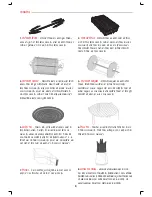
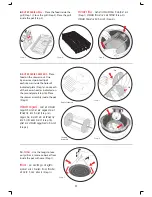
comes with exclusive Rotisserie accessories such as Rotisserie, Grill, Basket and
Skewers that allow you to Cook like a Pro with no effort. Motorized Rotisserie inside the Halogen Oven cooks
food evenly because of a 360
o
exposure of food to halogen heat exposed to rotating grill cage. So you get
exceptionally well cooked dishes without having to flip the food. All this while it saves you time spent on
flipping the dish and reheating the oven after opening it to flip. Faster & even cooking in the InfinitiCook 360R
oven retains more taste and nutrients, and allows you to experience the wholeness of the food you prepare.
IMPORTANT SAFEGUARDS
Use the oven on a flat surface.
Supervise the use of the oven by children. Do not attempt using the oven without a proper working knowledge.
In case of any malfunction faced or any technical challenges, kindly take assistance from the authorized
service centre or call USHA CARE at 1800 1033 111.
Handle the supply cord with caution. Any damage to the cord may expose the wiring.
Immersing the cord in water or any liquid must be avoided. Both may result in an electric shock.
Disconnect the power cord when the oven is not in use or immediately after it has been used.
The accessories provided with the oven can be placed inside the cavity after usage. If any accessory apart
from the ones given with the halogen oven is used kindly ensure utmost caution so as to avoid injuries.
Use the tongs to remove the rotisserie accessory after cooking as the accessory would be very hot.
The appliance is intended for household usage only.
Usage leads to heating up of the oven body. Be cautious of holding/ lifting/touching the oven surface after
immediate usage till the time the oven cools down. Cool Touch Handles and knobs provided on the oven can
instead be used to avoid burning of hands. During usage please ensure to keep the oven at a safe distance from any
running burners (gas or electrical). Also while using the oven maintain at least 8 cm of space around the oven so as
to avoid conduction of heat to objects in close proximity.
MAINTAINING & CLEANING YOUR 360R
IMPORTANT:
Before cleaning any part, ensure that the Oven is switched OFF, unplugged, and cool.
Light Cleaning
Use a clean sponge or dish cloth with a little mild dishwashing detergent and warm water to wipe bowl clean
Rinse well to remove all detergent. Wipe dry
Note: Never immerse the lid in any liquid.
Normal Cleaning
Wipe lid and fan housing using a damp, clean dish cloth or sponge with a little mild dishwashing detergent.
Do not clean with steel wool pads or abrasive materials
Wash wire racks in mild dishwashing detergent and water.
Clean metal parts using a sponge or dishcloth with mild dishwashing detergent, then wipe clean.
If scrubbing is necessary, use a nylon or polyester mesh pad or a pod brush.
Storage
The Halogen Oven has a detachable cord which can be removed to store the product safely.
This also prevents any physical damage to the cord.
When not in use disconnect the Halogen Oven and store in a dry, safe place, out of reach of children.
Summary of Contents for HO 3515i
Page 1: ......


