
Page 34
•
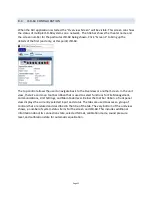
Open. Pressing “Open” allows you to load an existing configuration file. Use Default.j60 to
load the factory defaults. You can then revise the settings and save them under another
filename. Note that you may specify either a “*.j60” or “*.CFG” under file types. The GUI
saves files with the j60 extension. The SD card uses as CFG extension.
•
Save. The “Save” button prompts for the filename under which the configuration data is to
be saved. Data can be restored on a connected unit by using the Open button.
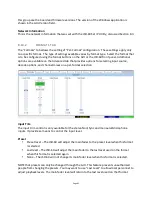
8.6
COMMUNICATIONS
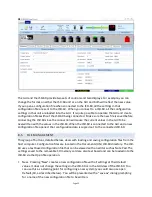
This group of buttons sets communications parameters between the GUI and the JSD-‐60 and
allows connections to be set up or removed from the discovered list.
•
Connect. The GUI connects to the JSD-‐60 specified in the Comm Settings dialog over the
specified link.
•
Disconnect. The GUI disconnects from the currently viewed JSD-‐60. When the Disconnect
button is pressed, the GUI will ask if you want to save changes to the JSD-‐60. When “Save
Changes” is selected, the current configuration will be saved to flash memory and will be
reloaded the next time the JSD-‐60 is powered up. If Save To SD Card is checked, the
configuration will be saved to both the SD card and the flash memory when the Save
Changes button is pressed. If “Save Changes” is not selected, the current configuration will
not be saved. Instead, the previous configuration will be loaded on the next power up.
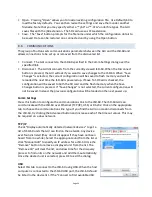
Comm Settings
Press this button to configure the communications link to the JSD-‐60. The JSD-‐60 GUI can
communicate with the JSD-‐60 over Ethernet (TCP/IP), USB, or RS-‐232. Click on the appropriate
tab to choose the communications line type. If you find the GUI on occasion disconnects from
the JSD-‐60, try clicking the Advanced button and increase each of the timeout values. This may
be required on a slow network.
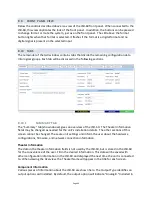
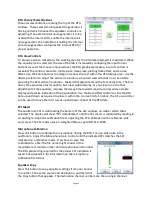
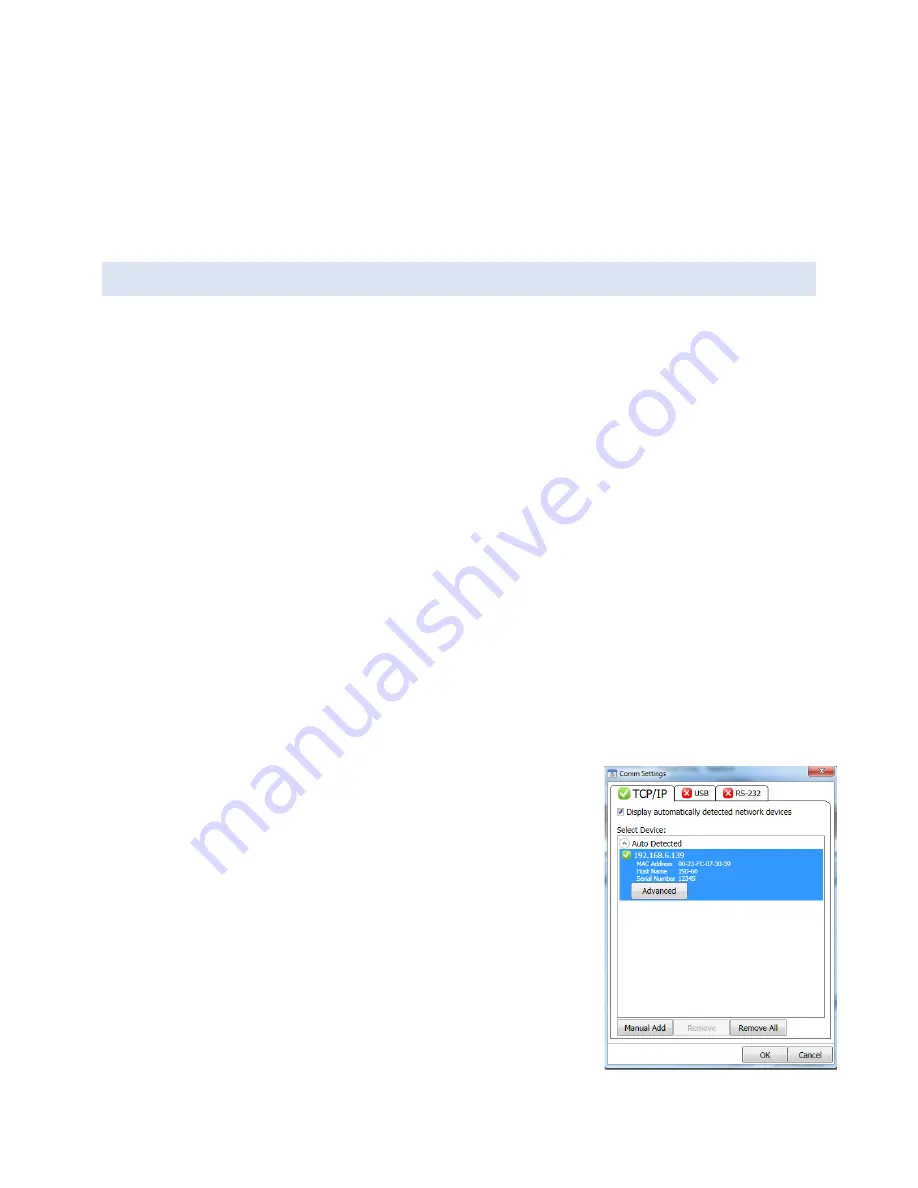
TCP/IP
Check "Display automatically detected network devices" to get a
list of JSD-‐60 units the GUI can find on the network. Any device
ever found is listed (they do not disappear if they have not been
heard from in a while). Select the appropriate unit from the list or
click "Manual Add" to specify an IP address for a JSD-‐60. Use the
"Remove" button to remove a displayed unit from the list. The
“Remove All” will clear the list, and allow time for the discovery
process to find units on the network and add them automatically.
Once the desired unit is selected, press OK to exit the dialog.
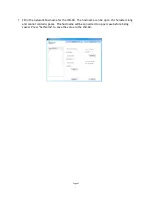
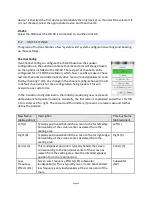
USB
Select this tab to connect to the JSD-‐60 using USB. When the host
computer is connected to the JSD-‐60 USB port, the JSD-‐60 should
be listed in the device list. If the "Connect to first available USB


