7
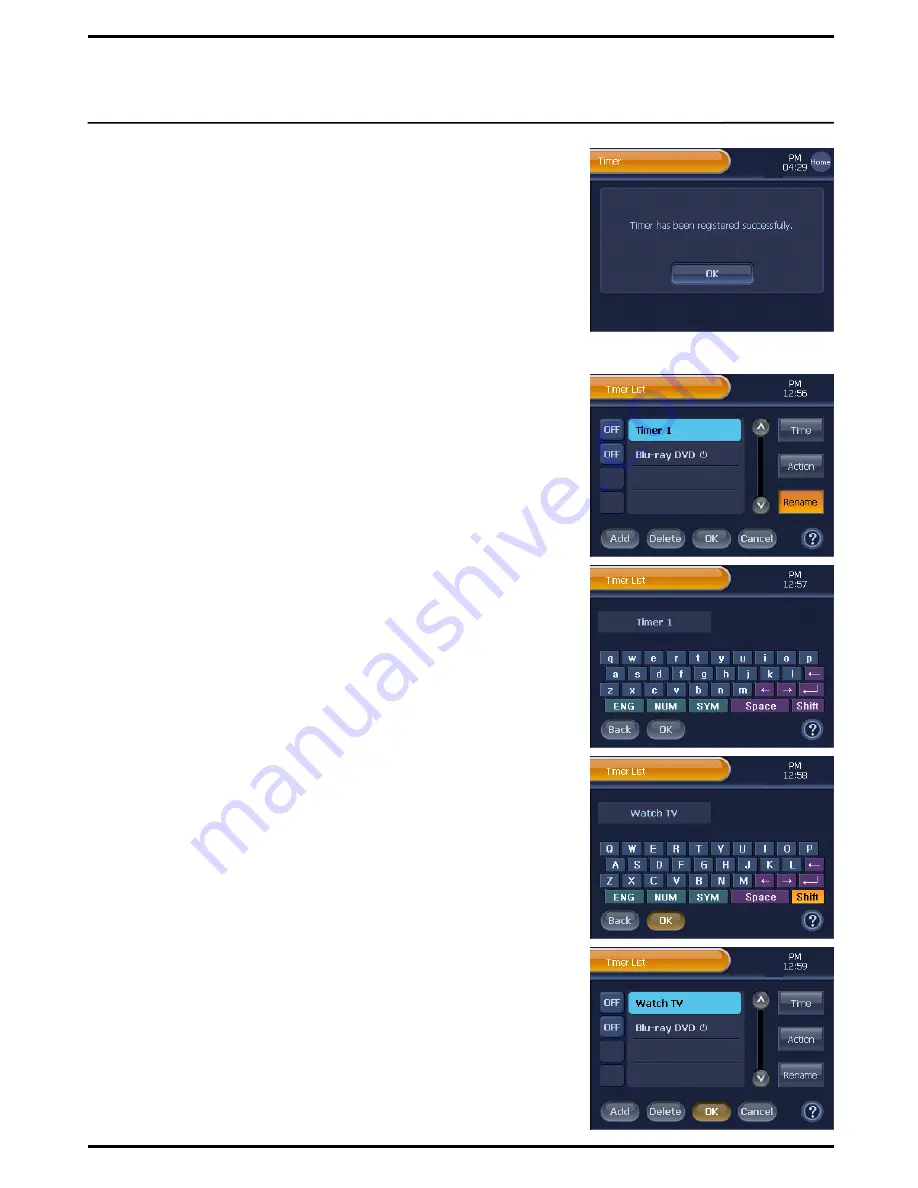
Press
[OK]
on the “Timer List” screen, and then the Registration
Confirmation screen will be displayed as the timer action
configuration is registered.
Press
[OK]
on the screen, and move back to the “Device Setup"
menu screen.
Note
. When pressing the
[Cancel]
button on the “Timer List”, you will be
directed to the Cancellation Confirmation screen. Press the
[Yes]
button
to cancel the timer setup, and move back to the “Device Setup" menu
screen.
Rename Timer
1
Press
[SET]
on the “Device Home” screen shortly.
You will be directed to the “Device Setup" menu screen.
2
Press
[Timer]
on the “Device Setup" menu screen.
You will be directed to the “Timer List” screen.
3
On the “Timer List”, select and press a timer to change its name.
The selected timer will become highlighted.
4
Press
[Rename]
on the “Timer List” screen.
You will be directed to the keyboard screen.
5
Use the keyboard to enter the timer‟s new name.
6
After entering a new name, press
[OK]
on the “Keyboard” screen.
You will be redirected to the “Timer List” screen that has the timer
list with the new name.
Note
. If you press the
[Back]
button on the “Keyboard” screen after entering
a name, the name change process will be canceled, and you will be
redirected to the “Timer List” screen.
7
Press
[OK]
on the “Timer List” screen, and then the Registration
Confirmation screen will be displayed as the timer name
configuration is registered.
Press
[OK]
on the screen, and move back to the “Device Setup"
menu screen.
Note
. When pressing the
[Cancel]
button on the “Timer List”, you will be
directed to the Cancellation Confirmation screen. Press the
[Yes]
button
to cancel the timer setup, and move back to the “Device Setup" menu
screen.
48


