3-48
Preparation before Use > Registering Destinations in the Address Book
The Folder (SMB) Address
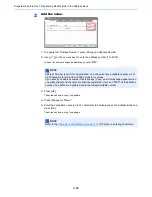
Press [Change] of "Host Name", "Path", "Login User Name" and "Login Password", enter the
information for each item and press [OK].
The table below explains the items to be entered.
*
To specify a port number different from the default (445), enter using the format
"Host name: port number" (Example: SMBhostname:140).
To enter the IPv6 address, enclose the address in brackets [ ].
(Example: [3ae3:9a0:cd05:b1d2:28a:1fc0:a1:10ae]:140)
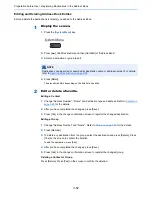
To search for a folder on a PC on the network, press [Next] of "Search Folder from Network" or
"Search Folder by Host Name".
If you selected "Search Folder from Network", you can enter the "Domain/Workgroup", and
"Host Name" to search PCs on the network for the destination.
If you pressed "Search Folder by Host Name", you can search all PCs on the network for a
destination.
A maximum of 500 addresses can be displayed. Select the host name (PC name) that you
want to specify in the screen that appears, and press [Next]. The login user name and login
password entry screen appears.
NOTE
For the computer name, share name, domain name, and user name, enter the information
that you noted when you created the shared folder. For details on creating shared folders,
refer to
Preparation for Sending a Document to a PC on page 3-35
.
Item
Description
Max. No. of
Characters
Host Name*
Computer name
Up to
64 characters
Path
Share name
For example: scannerdata
If saving in a folder in the shared folder:
"share name\folder name in shared folder"
Up to
128 characters
Login User Name
If the computer name and domain name are the same:
User Name
For example: james.smith
If the computer name and domain name are different:
Domain name\User name
For example: "abcdnet\james.smith"
Up to
64 characters
Login Password
Windows logon password
(Case sensitive.)
Up to
64 characters
NOTE
Refer to the
Character Entry Method on page 11-11
for details on entering characters.
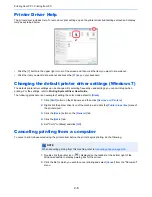
Press [Connection Test] to check the connection to the server you chose. If the connection
fails, check the entries you made.
Summary of Contents for 3005ci
Page 17: ...xvi About the Operation Guide this Guide ...
Page 44: ...xliii Menu Map ...
Page 104: ...2 46 Installing and Setting up the Machine Transferring data from our other products ...
Page 176: ...4 18 Printing from PC Printing Data Saved on the Printer ...
Page 252: ...5 76 Operation on the Machine Manual Staple ...
Page 455: ...10 7 Troubleshooting Regular Maintenance 3 4 5 6 CLICK ...
Page 458: ...10 10 Troubleshooting Regular Maintenance 4 5 6 7 1 2 CLICK CLICK ...
Page 498: ...10 50 Troubleshooting Troubleshooting Large Capacity Feeder 1 500 sheet x 2 1 2 3 4 1 2 B1 B2 ...
Page 499: ...10 51 Troubleshooting Troubleshooting Multi Purpose Tray 1 2 3 4 ...
Page 501: ...10 53 Troubleshooting Troubleshooting Duplex unit 1 2 ...
Page 502: ...10 54 Troubleshooting Troubleshooting Duplex Unit and Cassette 1 1 2 3 CLICK ...
Page 504: ...10 56 Troubleshooting Troubleshooting Fixing unit 1 2 3 A1 ...
Page 506: ...10 58 Troubleshooting Troubleshooting Optional Job Separator Inner Job Separator 1 2 3 A1 ...
Page 507: ...10 59 Troubleshooting Troubleshooting Right Job Separator 1 2 3 Bridge Unit Option A1 1 2 ...
Page 508: ...10 60 Troubleshooting Troubleshooting 1 000 sheet Finisher Option 1 2 3 D1 D2 2 1 D3 ...
Page 511: ...10 63 Troubleshooting Troubleshooting Tray B 1 2 3 Tray C 1 D2 D3 ...
Page 512: ...10 64 Troubleshooting Troubleshooting Conveyor Inner Tray 2 3 Mailbox Option 1 D2 D3 1 2 ...
Page 515: ...10 67 Troubleshooting Troubleshooting 5 Cassette 5 Option Side Feeder 3 000 sheet 1 2 2 1 ...
Page 522: ...10 74 Troubleshooting Troubleshooting Staple cartridge holder B C 1 2 3 4 2 1 CLICK ...
Page 570: ...Index 10 ...
Page 571: ......


