6-30
Using Various Functions > Functions
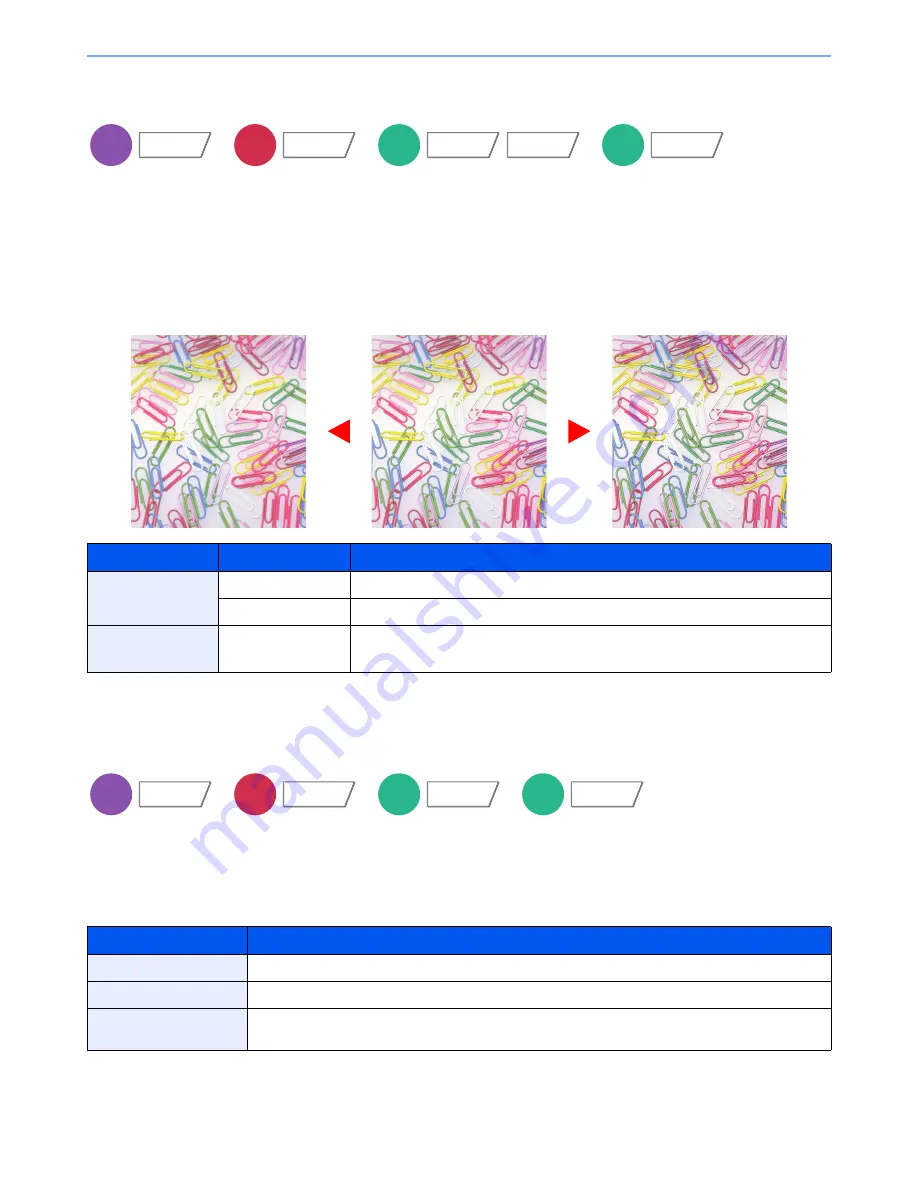
Sharpness
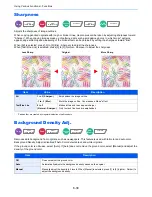
Adjusts the sharpness of image outlines.
When copying penciled originals with rough or broken lines, clear copies can be taken by adjusting sharpness toward
"Sharpen". When copying images made up of patterned dots such as magazine photos, in which moire* patterns
appear, edge softening and weakening of the moire effect can be obtained by setting the sharpness toward "Blur".
When [All] is selected, press [-3] to [3] (Blur - Sharpen) to adjust the sharpness.
When [Text/Fine Line] is selected, press [0] to [3] (Normal - Sharpen) to adjust the sharpness.
*
Patterns that are created by irregular distribution of halftone dots.
Background Density Adj.
Removes dark background from originals, such as newspapers. This feature is used with full color and auto color.
Background Density Adjust is disabled if Auto Color detects black and white originals.
If the ground color is obtrusive, select [Auto]. If [Auto] does not remove the ground color, select [Manual] and adjust the
density of the ground color.
Item
Value
Description
All
1 to 3 (Sharpen)
Emphasizes the image outline.
-1 to -3 (Blur)
Blurs the image outline. Can weaken a Moire* effect.
Text/Fine Line
0 to 3
(Normal - Sharpen)
Makes letters and lines appear sharper.
Only text and fine lines are emphasized.
Item
Description
Off
Does not adjust the ground color.
Auto
Automatically adjusts the background density based on the original.
Manual
Manually adjust the density in 5 levels. When [Manual] is selected, press [1] to [5] (Lighter - Darker) to
adjust the background density.
Copy
Color/
Image Quality
Send
Color/
Image Quality
Custom
Box
Functions
Color/
Image Quality
USB
Memory
Functions
Original
More Sharp
Less Sharp
Copy
Color/
Image Quality
Send
Color/
Image Quality
Custom
Box
Color/
Image Quality
USB
Memory
Functions
Summary of Contents for 3005ci
Page 17: ...xvi About the Operation Guide this Guide ...
Page 44: ...xliii Menu Map ...
Page 104: ...2 46 Installing and Setting up the Machine Transferring data from our other products ...
Page 176: ...4 18 Printing from PC Printing Data Saved on the Printer ...
Page 252: ...5 76 Operation on the Machine Manual Staple ...
Page 455: ...10 7 Troubleshooting Regular Maintenance 3 4 5 6 CLICK ...
Page 458: ...10 10 Troubleshooting Regular Maintenance 4 5 6 7 1 2 CLICK CLICK ...
Page 498: ...10 50 Troubleshooting Troubleshooting Large Capacity Feeder 1 500 sheet x 2 1 2 3 4 1 2 B1 B2 ...
Page 499: ...10 51 Troubleshooting Troubleshooting Multi Purpose Tray 1 2 3 4 ...
Page 501: ...10 53 Troubleshooting Troubleshooting Duplex unit 1 2 ...
Page 502: ...10 54 Troubleshooting Troubleshooting Duplex Unit and Cassette 1 1 2 3 CLICK ...
Page 504: ...10 56 Troubleshooting Troubleshooting Fixing unit 1 2 3 A1 ...
Page 506: ...10 58 Troubleshooting Troubleshooting Optional Job Separator Inner Job Separator 1 2 3 A1 ...
Page 507: ...10 59 Troubleshooting Troubleshooting Right Job Separator 1 2 3 Bridge Unit Option A1 1 2 ...
Page 508: ...10 60 Troubleshooting Troubleshooting 1 000 sheet Finisher Option 1 2 3 D1 D2 2 1 D3 ...
Page 511: ...10 63 Troubleshooting Troubleshooting Tray B 1 2 3 Tray C 1 D2 D3 ...
Page 512: ...10 64 Troubleshooting Troubleshooting Conveyor Inner Tray 2 3 Mailbox Option 1 D2 D3 1 2 ...
Page 515: ...10 67 Troubleshooting Troubleshooting 5 Cassette 5 Option Side Feeder 3 000 sheet 1 2 2 1 ...
Page 522: ...10 74 Troubleshooting Troubleshooting Staple cartridge holder B C 1 2 3 4 2 1 CLICK ...
Page 570: ...Index 10 ...
Page 571: ......


