2GM
1-6-27
1-6-10 Removing the scanner unit
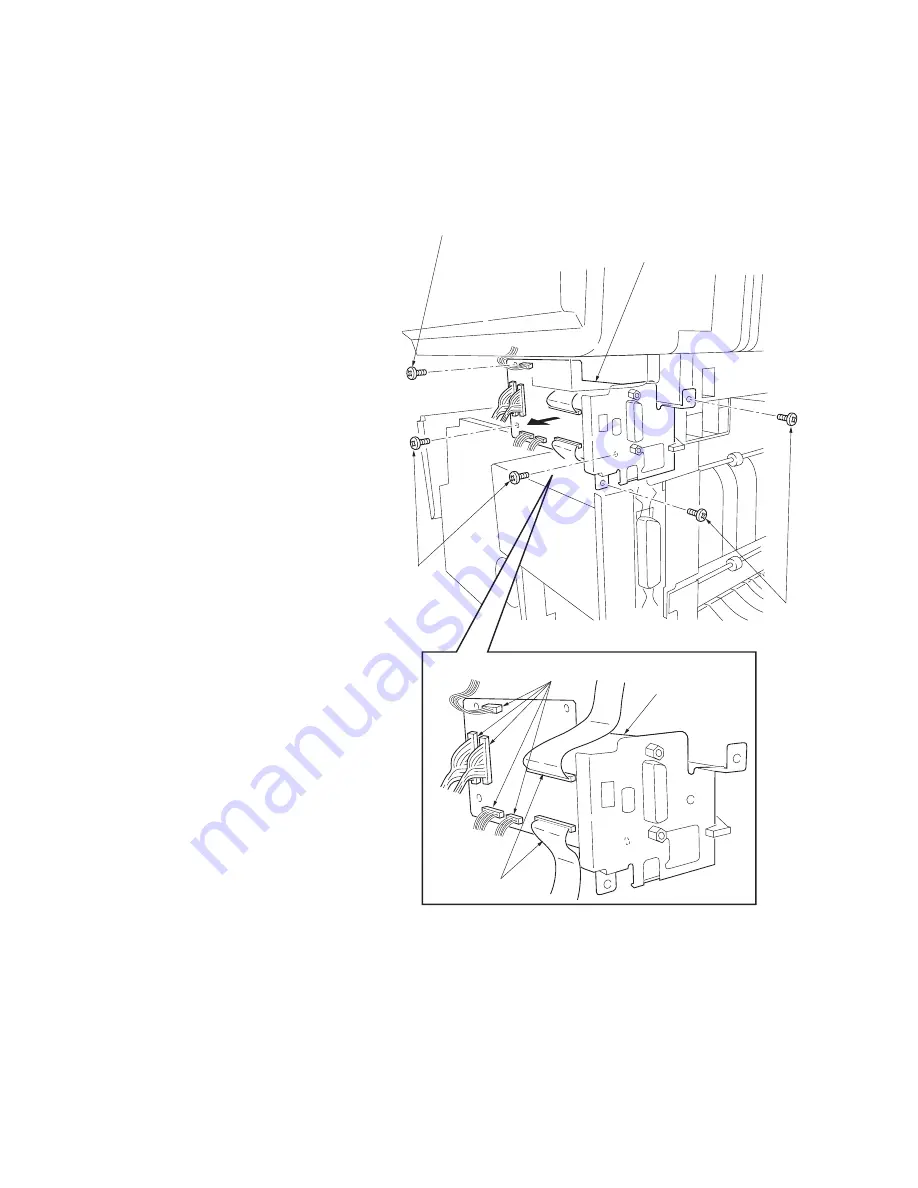
1. Remove the right and left cover (see page 1-
6-4).
2. Remove the speaker (see page 1-6-10).
3. Remove five connectors and two flexible flat
cables from the scanner PWB.
4. Remove five screws and then remove the
scanner PWB.
Screws
Screws
Screw
Scanner PWB
Connectors
Scanner PWB
Flexible flat cables
Figure 1-6-30 Removing the scanner PWB
Summary of Contents for CD 1018
Page 1: ...Service Manual MFP Copy CD 1018 Date 17 03 2005 ...
Page 2: ...Service Manual MFP Copy DC 2018 Date 17 03 2005 ...
Page 70: ...2GM 1 5 2 2 Paper misfeed detection conditions Registration sensor Exit sensor Figure 1 5 2 ...
Page 124: ...2GM 1 6 31 Eraser lamp 9 Remove the eraser lamp Figure 1 6 35 Removing the eraser lamp ...


