2GM
1-6-37
1-6-15 Removing the scanner motor
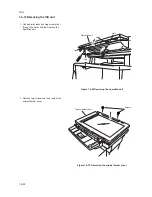
1. Remove the original holder cover (see page
1-6-32).
2. Remove the right cover (see page 1-6-4).
3. Remove the speaker (see page 1-6-10).
4. Remove the connector from the scanner
PWB.
Figure 1-6-44 Removing the scanner motor (1)
5. Remove two screws and then remove two
grounding plates.
Figure 1-6-46 Removing the scanner motor (3)
Connector
Scanner PWB
Screws
Scanner belt
Grounding plates
Screw
Screw
Figure 1-6-45 Removing the scanner motor (2)
6. Loosen two screws and then release the
tension of a scanner belt.
7. Remove the scanner belt.
Summary of Contents for CD 1018
Page 1: ...Service Manual MFP Copy CD 1018 Date 17 03 2005 ...
Page 2: ...Service Manual MFP Copy DC 2018 Date 17 03 2005 ...
Page 70: ...2GM 1 5 2 2 Paper misfeed detection conditions Registration sensor Exit sensor Figure 1 5 2 ...
Page 124: ...2GM 1 6 31 Eraser lamp 9 Remove the eraser lamp Figure 1 6 35 Removing the eraser lamp ...


