Section 5 OTHER CONVENIENT FUNCTIONS
5-20
9. Overlaying one image over another [Form overlay mode]
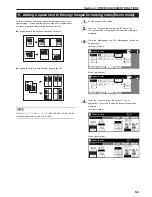
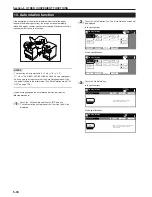
This mode can be used to scan the first original (the “form”) into
memory and have its image overlaid onto copies made from
subsequent originals. If the optional Hard Disk is installed on your
copier, it is also possible to register and store in memory, in advance,
the images that you want to use as original forms.
NOTE
Refer to “(2) Form registration” on page 6-1 for the procedure to
register images as forms.
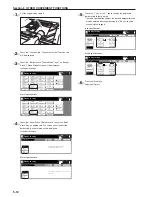
1
Touch the “Function” tab. The content of the “Function” tab
will be displayed.
2
Touch the “Forms Overlay” [“Form overlay”] key. The “Forms
Overlay” [“Form overlay”] screen will be displayed.
Inch specifications
2 sided/
Separation
Select
paper
Combine
Reduce
/Enlarge
Margin/
Centering
Forms
Overlay
Page #
Function
Basic
User choice
Program
Cover
Mode
Booklet
Sort/
Finished
Border
Erase
Exposure
mode
Orig.image
quality
Ready to copy.
Select
orig. size
Auto
Selection
Batch
scanning
Up
Down
Set
Paper size
11x8
1
/
2
"
Metric specifications
Select
paper
2-sided/
Split
Merge copy
Reduce/
Enlarge
Margin/
Imag. shift
Page
numbering
Function
Basic
User choice
Program
Cover
Mode
Booklet
Erase
Mode
Exposure
mode
Image
quality
Sort/
Finished
Ready to copy.
Select
size orig.
Auto
selection
Large # of
originals
Form
overlay
Up
Down
Set
Paper size
3
Touch the “On” key.
The screen to set the shading level of the form image will be
displayed.
Inch specifications
On
Off
Forms Overlay
Register
Overlay first scanned image onto
the scanned image or on registered from.
Ready to copy.
Set
Paper size
Back
Close
11x8
1
/
2
"
Metric specifications
On
Form overlay
Overlay 1st image on the scanned
image or on registered form.
Of
Back
Close
Ready to copy.
Register
Set
Paper size
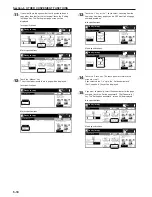
4
Touch the “+” key or the “-” key to select the level of shading
that you want to use for the original form.
The desired shading level can be set to any 10% increment
between 10% and 100%.
* A sample of the effect that the selected shading level will
produce will be displayed to the right of the entry field.
Inch specifications
Place from first then press start.
Forms Overlay
%
(10~100)
Scan form once
On
Off
Register
Back
Close
Exposure
50
Form
Selected
Metric specifications
Set form.
Press Start Key.
Form overlay
Off
50 %
On
Register
Back
Close
Scan form once
Form
selection
Exposure
(10 100)
5
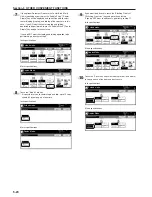
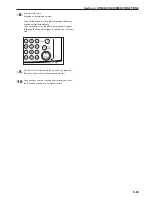
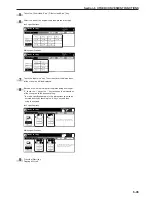
If the optional Hard Disk is installed on your copier, it is also
possible to register and store in memory, in advance, the
images that you want to use as original forms. If you want to
use a previously registered image as the form, touch the
“Form Selected” [“Form selection”] key and go to the next
step.
If you want to scan in a new image, go directly to step 9.
A
B
C
B
C
A
Summary of Contents for CD 1030
Page 1: ...INSTRUCTION HANDBOOK DIGITAL MULTIFUNCTIONAL SYSTEM CD 1030 1040 1050 ...
Page 9: ...vii Printer Kit Page 8 12 Printer scanner Kit Page 8 12 Fax Kit Page 8 12 ...
Page 12: ...x ...
Page 20: ...1 8 ...
Page 28: ...Section 2 NAMES OF PARTS 2 8 ...
Page 44: ...Section 4 BASIC OPERATION 4 12 ...
Page 114: ...Section 5 OTHER CONVENIENT FUNCTIONS 5 70 ...
Page 242: ...Section 7 COPIER MANAGEMENT FUNCTIONS 7 106 ...
Page 282: ...10 14 ...
Page 285: ...W Warm up 4 1 Waste Toner Box 10 3 When paper misfeeds 9 4 X XY zoom mode 4 8 Z Zoom mode 4 6 ...
Page 286: ...E1 ...
Page 288: ...UTAX GmbH Ohechaussee 235 22848 Norderstedt Germany ...


