Section 3 PREPARATIONS
3-5
3
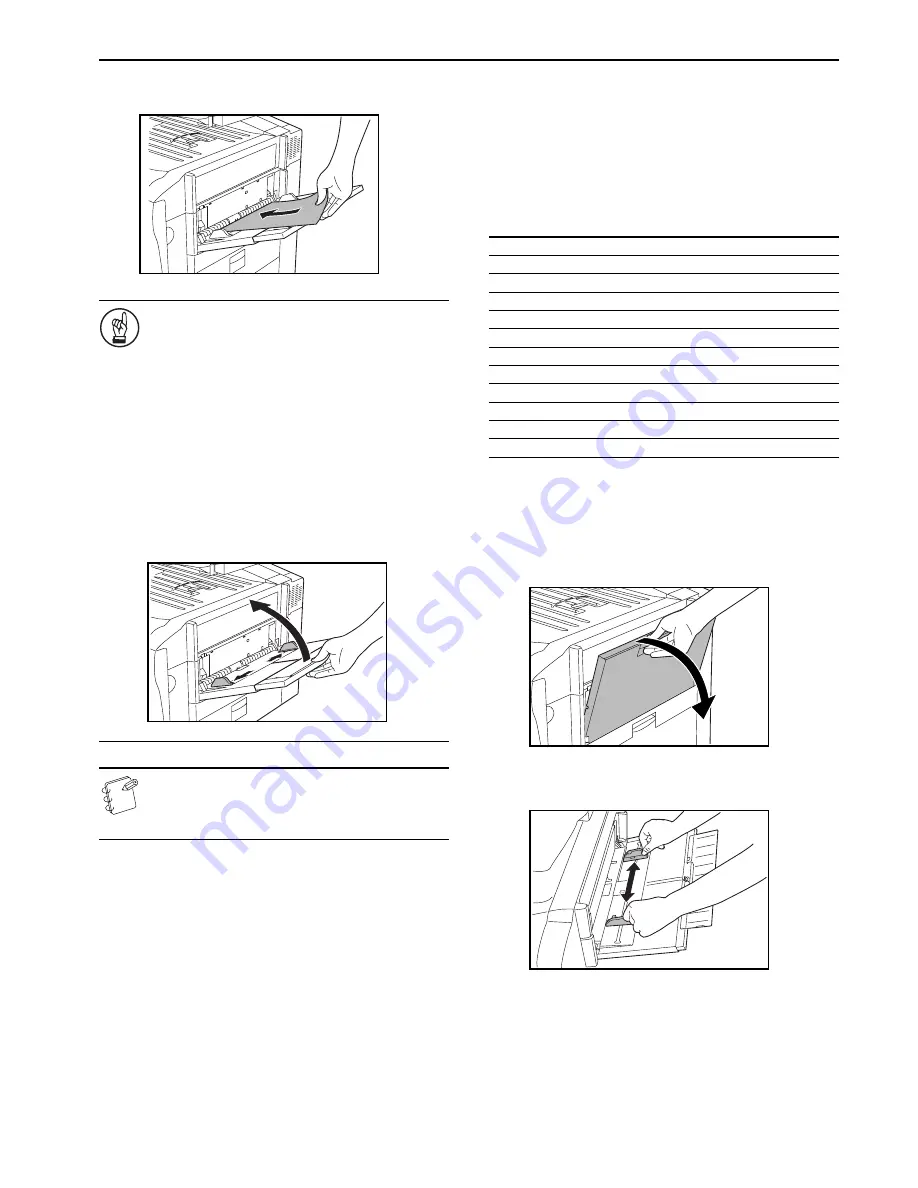
Slide the paper all the way in, along the insert guides, as
far as it will go.
IMPORTANT!
• When you are setting paper onto the multi-bypass tray,
make sure that the side facing upward when the
package is opened is the side that is facing upward on
the multi-bypass tray as well. In addition, if the leading
edge of the paper is curled at all, straighten it out
before setting it on the multi-bypass tray.
• ALWAYS straighten out curled paper before setting it
on the multi-bypass tray (Amount of curl: Copy paper –
under 10 mm, Envelopes – under 5 mm)
• If you are copying onto special paper, be sure to have
finished copies ejected onto the top tray. (See “
Copy
eject location
” on page 7-54.)
• Be sure to push the multi-bypass extension back in, and
open the insert guides as far as they will go BEFORE
closing the multi-bypass tray.
NOTE
When you are loading paper onto the multi-bypass tray,
make sure that the side to be copied onto is facing
upward.
When printing onto envelopes
When you are using the optional printer functions of this machine,
envelopes can be set in the multi-bypass tray for printing.
Up to 10 (Inch specifications) [20 (Metric specifications)] enve-
lopes can be set on the multi-bypass tray at a time.
For more details, refer to the Operation Guide for the Printer Kit.
Refer to the following table for the types and sizes of envelopes that
can be used in this machine.
Setting the envelopes on the multi-bypass tray
Perform the following procedure and set the envelopes on the
multi-bypass tray.
1
Open the multi-bypass tray.
2
Adjust the insert guides to fit the width of the envelopes
that are to be set on the multi-bypass tray.
Acceptable envelope types
Size
Monarch
3
1/8
" × 7
1/2
"
Comm. #10
3
3/8
" × 9
1/2
"
Envelope DL
110 × 220 (mm)
Envelope C5
162 × 229 (mm)
Executive
7
1/4
" × 10
1/2
"
Comm. #9
3
7/8
" × 8
7/8
"
Comm. #6-3/4
3
5/8
" × 6
1/2
"
ISO B5
176 × 250 (mm)
Envelope C4
229 × 324 (mm)
Oufuku Hagaki
200 × 148 (mm)
YOUKEI 2
162 × 114 (mm)
YOUKEI 4
234 × 105 (mm)
Summary of Contents for CDC 1526
Page 48: ...Section 5 COLOR COPY SETTINGS 5 8 ...
Page 64: ...Section 6 OTHER CONVENIENT FUNCTIONS 6 16 6 Press the Start key Copying will start ...
Page 136: ...Section 6 OTHER CONVENIENT FUNCTIONS 6 88 ...
Page 254: ...Section 7 COPIER MANAGEMENT 7 118 ...
Page 290: ...Section 9 TROUBLESHOOTING 9 20 ...


