background image

USER MANUAL

P-3025 MFP 

P-3525 MFP

Copy/Print/Scan/Fax 

A4

FAX SYSTEM   


Summary of Contents for P-3025 MFP

Page 1: ...USER MANUAL P 3025 MFP P 3525 MFP Copy Print Scan Fax A4 FAX SYSTEM ...

Page 2: ......

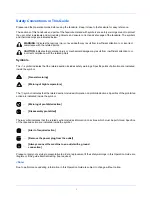
Page 3: ...hat the related section includes safety warnings Specific points of attention are indicated inside the symbol The symbol indicates that the related section includes information on prohibited actions Specifics of the prohibited action are indicated inside the symbol The symbol indicates that the related section includes information on actions which must be performed Specifics of the required action...

Page 4: ...andby Transmission 4 5 Interrupt Send 4 6 Chain Dial 4 7 Manual Send 4 8 Manual Reception 4 9 Remote Switch Function 4 11 Printing Forwarding Received Documents Memory Forwarding 4 13 Sub Address Communication 4 24 Sub Address Box Function 4 26 Program Dial 4 31 Polling Communication 4 32 Account Management 4 41 Other Convenient Functions 4 45 5 Checking Transmission Results and Registration Statu...

Page 5: ...biting FAX Printing at Specified Times Unusable Time 6 41 7 About Network FAX What is Network FAX 7 2 Setup 7 3 8 Troubleshooting Indicators During Sending Receiving Operation 8 2 Precautions When Turning Power OFF 8 2 Error Messages 8 3 Troubleshooting 8 5 Appendix Character Entry Method Appendix 2 Specifications Fax function Appendix 6 Menu List Appendix 7 Received FAX Sizes and Paper Priority I...

Page 6: ...ne for easy reference When using the machine refer to the Safety Guide booklet and the Operation Guide for the machine on the DVD for information on the topics below Power supply Grounding the machine Do not connect this machine to the same outlet as an air conditioner or copier etc Caution Labels Installation Precautions Precautions for Use Loading Paper Toner Container Replacement Clearing Paper...

Page 7: ...UCTIONS When using your telephone equipment basic safety precautions should always be followed to reduce the risk of fire electric shock and injury to persons including the following CAUTION To reduce the risk of fire use only No 26 AWG or larger UL listed or CSA certified telecommunication line cord 1 Do not use this product near water for example near a bath tub wash bowl kitchen sink or laundry...

Page 8: ...sous sol humide ou près d une piscine 2 Eviter d utiliser le téléphone sauf s il s agit d un appareil sans fil pendant un orage électrique Ceci peut présenter un risque de choc électrique causé par la foudre 3 Ne pas utiliser l appareil téléphonique pour signaler une fuite de gaz s il est situé près de la fuite 4 Utiliser seulement le cordon d alimentation et le type de piles indiqués dans ce manu...

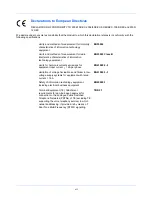
Page 9: ...mation technology equipment EN55022 Class B Limits for harmonic currents emissions for equipment input current 16A per phase EN61000 3 2 Limitation of voltage fluctuations and flicker in low voltage supply systems for equipment with rated current 16A EN61000 3 3 Safety of information technology equipment including electrical business equipment EN60950 1 Terminal Equipment TE Attachment requirement...

Page 10: ...l AN for D AN 06R00 AN for D GR and P ES 01R01 National AN for E AN 07R01 AN for D E P and N GR 01R00 National AN for GR AN 09R00 AN for D GR 03R00 National AN for GR AN 10R00 AN for D GR 04R00 National AN for GR AN 11R00 AN for P NO 01R00 National AN for N AN 12R00 AN for E NO 02R00 National AN for N AN 16R00 General Advisory Note P 03R00 National AN for P DE 03R00 National AN for D P 08R00 Natio...

Page 11: ...switched telephone networks PSTN in the following countries Austria Germany Liechtenstein Slovakia Belgium Greece Lithuania Slovenia Bulgaria Cyprus Hungary Luxembourg Spain Czech Iceland Malta Sweden Denmark Ireland Norway Switzerland Estonia Italy Poland The Netherlands Finland Latvia Portugal United Kingdom France Romania ...

Page 12: ...iginals for each requirement Furthermore explains sub address communication functions of the machine that are compatible with other makers systems and job accounting functions convenient for checking the communication status of fax Chapter 5 Checking Transmission Results and Registration Status Explains how to check the status of recent transmissions on the message display Also explains how to pri...

Page 13: ...ic Indicates a message displayed on the Message Display Ready to copy is displayed Used to emphasize a key word phrase or references to additional information For more information refer to Sleep and Auto Sleep on page 3 5 Note Indicates supplemental information or operations for reference NOTE Important Indicates items that are required or prohibited so as to avoid problems IMPORTANT Caution Indic...

Page 14: ...xii ...

Page 15: ...1 1 1 Part Names and Functions This chapter explains the names of parts of the fax device For other parts refer to the machine s Operation Guide Operation Panel 1 2 Machine 1 4 ...

Page 16: ...manually sending a FAX Shifts to switch the one touch key numbers 1 to 11 and 12 to 22 Lamp is lit while shifted 12 to 22 Displays the Add Destination screen where you can add destinations Displays the Confirm Destination screen where you can edit and delete destinations Calls the previous destination Also used to enter a pause when entering a FAX number Displays the Address Book screen where you ...

Page 17: ...tarts sending operations and processing for setting operations Clears entered numbers and characters Numeric keys Enter numbers and symbols Displays the function menu for FAX Used to select a menu item move the cursor when entering characters change a value etc Returns the Message Display to the previous screen Lights or blinks when an error occurs Selects the chosen item or finalizes the entered ...

Page 18: ...Perform the fax operation with this panel 2 Power switch Press this switch to turn on the power before performing a fax or copy operation The message display lights to enable operation 3 Multi purpose tray MP tray Set the paper in this tray when using a type of paper other than the cassette e g when using special paper 4 LINE connector Connect the modular cord for the telephone line to this connec...

Page 19: ... Document processor 7 Original width guides Adjust these guides according to the original width 8 Original table Stack the sheet originals on this table 9 Original eject table Read originals are ejected onto this table 10 Document processor open close handle Hold this handle when opening or closing the Document processor ...

Page 20: ...Part Names and Functions 1 6 ...

Page 21: ...r the customer to undertake this preparation if it has already been carried out by a service representative Selection of Telephone Line Inch version only 2 2 Selection of Transmit Terminal Identification TTI 2 3 Setting the TTI information 2 4 Date and Time Entry 2 6 Connection to PBX Private Branch Exchange Europe only 2 8 ...

Page 22: ...fax 1 Press the System Menu Counter key 2 Press the or key to select FAX 3 Press the OK key 4 Press the or key to select Transmission 5 Press the OK key 6 Press the or key to select FAX Dialing Mode 7 Press the OK key 8 Press the or key to select Tone DTMF Pulse 10pps or Pulse 20pps according to the type of telephone line you are contracted with 9 Press the OK key FAX Dialing Mode a b 2 Pulse 10pp...

Page 23: ...e information to be printed you can select inside or outside of the page image being sent NOTE Normally the Local FAX Name is printed in the transmit terminal identification TTI However when job accounting has been enabled and you send originals after entering an Account ID the Account Name is printed 1 Press the System Menu Counter key 2 Press the or key to select FAX 3 Press the OK key 4 Press t...

Page 24: ...ame 7 Press the OK key 8 Enter the Local FAX Name to be registered Up to 32 characters can be entered NOTE For details on character entry refer to Specifications Fax function on Appendix 6 9 Press the OK key Local FAX Information Entry Register the local FAX information local FAX number ID printed on in the transmit terminal identification TTI area The Local FAX ID is used for transmission limit p...

Page 25: ...er press the Clear key to delete the digits one by one before reentering the number To delete all entered digits and return to the default screen press the Reset key 9 Press the OK key Local FAX ID Entry 10 Press the or key to select Local FAX ID 11 Press the OK key 12 Use the numeric keys to enter the local FAX ID number in 4 digits 13 Press the OK key Local FAX Number T b S Local Fax ID D b 0000...

Page 26: ...ppears 3 Press the or key to select Date Setting and press the OK key A login screen will appear Then enter the user ID and password with administrator privileges to log in and press Login the Right Select key 4 The Date Settings menu appears 5 Press the or key to select Time Zone 6 Press the OK key Time Zone appears Sys Menu Count a b 3 System 4 User Job Account Exit 5 Common Settings Common Sett...

Page 27: ...he screen to enter the date of Date Time appears 11 Press the or key to move to the item Year Month Day you want to enter Press the or key to set each item 12 Press the OK key The screen to enter the time of Date Time appears 13 Set the time Press the or key to move to the item Hour Min Second you want to enter Press the or key to set each item 14 Press the OK key Completed is displayed and the sc...

Page 28: ...ress the or key to select Adjust Maint and press the OK key 3 Press the or key to select Service Setting and press the OK key 4 Press the or key to select FAX Call Set and press the OK key 5 Press the or key to select Exchange Select and press the OK key 6 Press the or key to select PBX and press the OK key 7 Press the or key to select Dial No to PSTN and press the OK key 8 Use the numeric keys to...

Page 29: ...his chapter explains the following basic operations Automatic Send 3 2 FAX Automatic Reception 3 9 Cancelling Communication 3 11 Using the Address Book 3 14 Using One touch Keys 3 23 Dialing the Same Receiving System Redial 3 25 ...

Page 30: ...ne Selection of Transmission Method 2 There are two transmission methods memory transmission and direct transmission The default is memory transmission To select direct transmission use the following procedure 1 Press the Function Menu key 2 Press the or key to select FAX Direct TX 3 Press the OK key 4 Press the or key to select On 5 Press the OK key NOTE In direct transmission you can designate o...

Page 31: ...ialed Direct Transmission When originals are placed in the document processor After the telephone line has connected with the receiving system scanning of the originals placed in the document processor starts When multiple page originals are placed each page is scanned after the previous one is sent Direct Transmission When originals are placed on the glass surface This method is suitable for send...

Page 32: ...key to display the FAX Detail menu Press the or key to select Sub Address Encrypted TX TX Start Speed or ECM and change settings and then press the OK key On Hook Press this key to connect to the telephone line When the FAX number has been entered the machine starts dialing to the receiving system FAX No Entry A b 0123456789 Chain Detail Key Description Sub Address To communicate using the sub add...

Page 33: ... number of the receiving system using the numeric keys For details refer to Manual Send on page 4 8 Dialing methods without using the numeric keys Using the Address Book Refer to page 3 14 Using One touch keys Refer to page 3 23 Manual Redial recall Refer to page 3 25 ...

Page 34: ...ter size 6 point example Resolution Resolution NOTE The default setting is 200 100 dpi Normal The higher the resolution the clearer the image However higher resolution also means longer send times The machine does not support resolution of 300 300 dpi when sending faxes If you have selected 300 300 dpi the machine sends faxes after lowering the resolution to 200 200 dpi Fine For Multi Sending the ...

Page 35: ...oes not have such capability originals are sent at an image quality of 200 200 dpi Fine Selecting the Density 6 Adjusting the density when scanning originals 4 to 4 You can adjust the density using nine levels 1 Press the Function Menu key 2 Press the or key to select Density 3 Press the OK key 4 Press the or key to select the desired density 5 Press the OK key Send Start 7 Press the Start key Tra...

Page 36: ...ou want to cancel 2 Press Cancel the Left Select key 3 Press Yes the Left Select key This cancels the transmission NOTE Pressing the Stop key on the operation panel while originals are being scanned cancels the transmission Send Job Status a b 0011 p Broadcast 0017 9876543210 Cancel Menu 0010 0123456789 r Send Job Status a b 0010 0123456789 r 0011 p Broadcast Cancel Menu 0017 9876543210 ...

Page 37: ...etails refer to DRD Reception on page 6 16 Reception Method This machine allows the following five reception methods Auto Normal Auto FAX TEL Refer to page 6 2 Auto TAD Refer to page 6 4 Auto DRD Refer to page 6 16 Manual Refer to page 4 9 Checking and Changing the Reception Method 1 Press the System Menu Counter key 2 Press the or key to select FAX 3 Press the OK key 4 Press the or key to select ...

Page 38: ...f plain paper 80 g m can be held on the inner tray However the number of sheets varies with the condition of the paper to be used IMPORTANT When the number of sheets to be printed exceeds the number of sheets that can be held remove all the paper on the inner tray Memory Reception When the machine cannot print a fax due to paper running out or a paper jams it temporarily stores originals that have...

Page 39: ...ory transmission to cancel communication after it has started following the completed scanning of originals use the following procedure NOTE If user management is set to On the administrator or the user who performs the memory transmission can be canceled the job You can cancel transmission by disconnecting the telephone line For details refer to Cancelling Transmission Disconnection of Communicat...

Page 40: ...OK key 8 Press Yes the Left Select key Communication is canceled Or communication starts if sending the job immediately Cancelling Direct Transmission During direct transmission to cancel communication during transmission press the Stop key on the operation panel The originals that have been scanned are ejected and the screen returns to the default screen for sending When originals remain in the d...

Page 41: ... communication Cancelling Polling or Bulletin Board Transmissions To cancel a polling or bulletin board transmission delete the polling transmission original saved in the polling box For information on how to delete the saved original refer to Deleting Originals in a Polling Box on page 4 39 FAX b Communicating Line Off Log ...

Page 42: ... System Menu Counter key 2 Press the or key to select Edit Destination 3 Press the OK key 4 Press the or key to select Addressbook 5 Press the OK key 6 Press Menu the Right Select key 7 Press the or key to select Add Address 8 Press the OK key 9 Press the or key to select Contact 10 Press the OK key 11 Press the or key to select Address Number 12 Press Edit the Right Select key 13 Use the numeric ...

Page 43: ...etails on character entry refer to Specifications Fax function on Appendix 6 Address Recall Pause Pressing this key adds about three seconds of waiting time during dialing For example when dialing the receiving system on an external line you can use this method to insert a pause before resuming dialing after you dial a specific number 22 Press Detail the Right Select key and then use the or key to...

Page 44: ...d TX If you do not use Encrypted TX proceed to step 38 29 Press Change the Right Select key 30 Press the or key to select On 31 Press the OK key 32 Press the or key to select the desired encryption key number 33 Press the OK key NOTE Register the encryption key in advance For details refer to Registering an Encryption Key on page 6 29 34 Press the or key to select On or Off 35 Press the OK key Pro...

Page 45: ...ps can be registered NOTE Group registration requires destinations that have been registered as contact registration Perform the necessary contact registration in advance 1 Press the System Menu Counter key 2 Press the or key to select Edit Destination 3 Press the OK key 4 Press the or key to select Addressbook 5 Press the OK key FAX Detail C b TX Start Speed 3 4 33600bps Change Item Description T...

Page 46: ...You can select any available number out of 250 numbers 200 for individuals and 50 for groups 14 Press the OK key 15 Press the or key to select Group Name 16 Press Edit the Right Select key 17 Use the numeric keys to enter the group name to be displayed in the Address Book Up to 32 characters can be entered NOTE For details on character entry refer to Specifications Fax function on Appendix 6 18 Pr...

Page 47: ...ual you want to register to the group NOTE You can search for a destination by destination name 25 Press Menu the Right Select key 26 Press the or key to select Select 27 Press the OK key 28 To add more destinations repeat steps 21 to 27 29 Press the OK key 30 Use the or key to check if the group was set correctly 31 Press the OK key The group is added to the Address Book Detail C b Group Member 3...

Page 48: ...ed in the destination list Searching for a Destination You can search for a destination registered in the Address Book 1 In the basic screen for sending press the Address Book key 2 Press the or key to select Address Book 3 Press the OK key 4 Press Menu the Right Select key 5 Press the or key to select Search Name 6 Press the OK key Ready to send 2011 05 25 12 30 Text Photo 200x100dpi Orig Img FAX...

Page 49: ...he destination or group to edit 7 Press Menu the Right Select key 8 When editing the destination of a contact registration 1 Press the or key to select Detail Edit 2 Press the OK key 3 Change the contents of the destination For details refer to steps 11 to 39 in Contact Registration fax When editing a group 1 Press the or key to select Detail Edit 2 Press the OK key 3 Change the contents of the gr...

Page 50: ...dress List You can print the list of destinations registered in the Address Book You can sort the list in the order of names or address numbers of the destinations 1 Press the System Menu Counter key 2 Press the or key to select Edit Destination 3 Press the OK key 4 Press the or key to select Print List 5 Press the OK key 6 Press the or key to select FAX List Index or FAX List No 7 Press the OK ke...

Page 51: ... the destination Numbers 12 to 22 are the One touch key numbers when the Shift Lock key is pressed 3 Press the OK key 4 Press the or key to select the destination individual or group you want to register to the One touch key from the Address Book 5 Press the OK key The destination is added to the One touch key Selecting a Destination by One touch Key In the destination entry screen press the One t...

Page 52: ...t the number you want to edit Numbers 12 to 22 are the One touch key numbers when the Shift Lock key is pressed 3 Press the OK key 4 When changing the destination to another destination 1 Press the or key to select Edit 2 Press the OK key 3 Press the or key to select the new destination individual or group 4 Press the OK key 5 Press Yes the Left Select key The destination is registered to the One ...

Page 53: ...immediately while the machine is waiting for redial Manual Redial Recall Use this when the receiving system does not respond when you have tried to send a fax When you want to send the fax to the same receiving system press the Address Recall Pause key and you can call the receiving system you dialed on the destination list 1 Press the Address Recall Pause key The receiving system you dialed is di...

Page 54: ...FAX Operation Basic 3 26 ...

Page 55: ...dby Transmission 4 5 Interrupt Send 4 6 Chain Dial 4 7 Manual Send 4 8 Manual Reception 4 9 Remote Switch Function 4 11 Printing Forwarding Received Documents Memory Forwarding 4 13 Sub Address Communication 4 24 Sub Address Box Function 4 26 Program Dial 4 31 Polling Communication 4 32 Account Management 4 41 Other Convenient Functions 4 45 ...

Page 56: ...on before the specified time Refer to Cancelling and Sending Delayed Transmissions Queued on page 3 12 You can change destinations of a delayed transmission any time before the specified transmission time Refer to Checking Scheduled Job on page 4 3 Batch Transmission Function When fax originals to be sent to the same destination are set to the same transmission start time with delayed transmission...

Page 57: ... sending a scheduled job immediately refer to Cancelling Memory Transmission during communication on page 3 11 1 Press the Status Job Cancel key 2 Press the or key to select Scheduled Job 3 Press the OK key 4 Press the or key to select the job you want to check 5 Press Menu the Right Select key 6 Press the or key to select Detail 7 Press the OK key 8 Press the or key to check the details of the jo...

Page 58: ...OK key You can enter the next fax number Select the destination from the Address Book 1 Press the Address Book key 2 Press the or key to select the desired destination 3 Press the OK key You can select the destination by pressing the Address Book key Select the destination from the One touch keys Press all the One touch keys to which necessary destinations are registered NOTE For details of the Ad...

Page 59: ...E Together with delayed transmission up to 30 transmissions can be scheduled You can use other functions such as broadcast transmission For the transmission method use memory transmission To select memory transmission refer to Selection of Transmission Method on page 3 2 1 Press the FAX key 2 Place the originals 3 Select the destination and set transmitting functions if you want to use any 4 Press...

Page 60: ...ately 1 Press the FAX key 2 Load the originals to be sent using Interrupt Send 3 Press the Function Menu key 4 Press the or key to select FAX Direct TX 5 Press the OK key 6 Press the or key to select On 7 Press the OK key 8 Set the destination and press the Start key The panel display will switch to the standby screen and the transmission will start when transmission becomes possible NOTE For oper...

Page 61: ...r the fax number to connect to the chain number Use the numeric keys to enter a fax number 1 212 is already entered and then enter the fax number 2 After entering all the destinations press the OK key Select fax number from the Address Book 1 Press the Address Book key 2 Press the or key to select Address Book or Ext Address Book NOTE If an expansion address book is not registered the address book...

Page 62: ...hen you hear the fax tone the telephone line has connected to the receiving system Press the Start key Transmission begins Using a Telephone to Send When you want to talk to the person at the receiving system or the receiving system needs to switch to fax use this method to send originals 1 Set the originals 2 Lift the handset and dial the number of the receiving system 3 Check if the telephone li...

Page 63: ...ncoming call the machine makes a ringing tone 2 Press the FAX key 3 Press the On Hook key 4 Press ManualRX the Left Select key 5 After the sending side has started transmission the machine starts receiving the originals Using the Telephone to Receive Use this method when you want to receive originals after talking to the person at the sending system 1 When there is an incoming call the telephone c...

Page 64: ...ng system When the conversation is over follow steps 1 to 2 above After the sending system has started transmission the machine starts receiving originals 4 When reception starts when the Processing indicator on the operation panel starts blinking return the handset to its original position ...

Page 65: ...t commercially available product to the machine However even if it is a tone signal sending telephone set this function may not be used satisfactorily depending on the type of telephone set For details contact our agent or the store where you purchased this machine How to Register Remote Switch Dial Remote switch dial is set to 55 at the factory but you can change the dial number 1 Press the Syste...

Page 66: ...ation 1 The connected telephone set makes a ringing tone 2 Lift the handset of the telephone 3 When you hear the fax tone from the handset enter the two digit remote switch dial number using the dial button on the telephone set NOTE The remote switch dial is set to 55 at the factory 4 The telephone line switches to the machine and reception starts ...

Page 67: ...ss Boxes or print the image Type of Forwarding Destination and Forwarding Requirements Only one forwarding destination can be specified When forwarding is set to On all received documents will be forwarded to the specified destination Type of Forwarding Destination You can forward the document to other fax machines or Sub Address Boxes or for e mail transmission or folder SMB or FTP transmission ...

Page 68: ...select Forwarding 9 Press the OK key 10 Press the or key to select On or Off 11 Press the OK key Registering Forwarding Destination Use the procedure below to register a forwarding destination 1 Press the System Menu Counter key 2 Press the or key to select FAX 3 Press the OK key 4 Press the or key to select Reception 5 Press the OK key 6 Press the or key to select Forward Settings 7 Press the OK ...

Page 69: ...rding Destination Directly 1 Press the or key to select Address Entry 2 Press the OK key 3 Press the or key to select FAX E mail Folder SMB or Folder FTP 4 Press the OK key 5 Use the numeric keys to enter the address to be registered as a forwarding destination Up to 128 digits can be entered NOTE For details on character entry refer to Specifications Fax function on Appendix 6 If you select Folde...

Page 70: ...ss the OK key 8 Press the or key to select Forward Dest 9 Press the OK key 10 Press the or key to select Confirmation 11 Press the OK key 12 Press the OK key again 13 Changing Forwarding Destination 1 Press the or key to select Edit 2 Press the OK key 3 Change the forwarding destination 4 Press the OK key The forwarding destination is changed Deleting Forwarding Destination 1 Press the or key to s...

Page 71: ...next step if you selected Preset Time in step 10 12 Press the or key to move the cursor position and enter the hours and minutes of the start time 13 Press the OK key 14 Press the or key to move the cursor position and enter the hours and minutes of the end time 15 Press the OK key NOTE Enter the time on the 24 hours system File Format Setting for Each Requirement If you are sending the file as an...

Page 72: ...t FAX 3 Press the OK key 4 Press the or key to select Reception 5 Press the OK key 6 Press the or key to select Forward Settings 7 Press the OK key 8 Press the or key to select Subject Add Info 9 Press the OK key 10 Press the or key to select Off Sender Name or Sender FAX Add 11 Press the OK key FTP Encrypted TX Setting Specify whether to use FTP encryption when you send data 1 Press the System Me...

Page 73: ...et the file name to be created when forwarding You can append information such as the date time and the job number or fax number 1 Press the System Menu Counter key 2 Press the or key to select FAX 3 Press the OK key 4 Press the or key to select Reception 5 Press the OK key 6 Press the or key to select Forward Settings 7 Press the OK key 8 Press the or key to select File Name Entry 9 Press the OK ...

Page 74: ...r key to select None 2 Press the OK key 3 Press the or key to select On or Off for appending of sender information When Appending Information to Document Name 1 Press the or key to select Date Job No Job No Date or Date Job No 2 Press the OK key 3 Press the or key to select None Add Info Sender or Sender Add Info for appending of sender information 13 Press the OK key ...

Page 75: ...r privileges is shown below Upper case and lower case letters are distinguished case sensitive Accessing Embedded Web Server RX 1 Launch your Web browser 2 In the address or location bar enter the machine s IP address or the host name Examples https 10 180 81 1 for IP address https MFP001 if the host name is MFP001 The web page displays basic information about the machine and Embedded Web Server R...

Page 76: ... time table from the drop down list File Name Configure the file name created when forwarding 1 File Name Enter the file name 2 Additional Information Select the additional information on the file name from the drop down list Forward Settings Configure the forward destination Select the destination on the list and then click the Delete icon 1 Forwarding Select On and click the desired address butt...

Page 77: ... Function Settings Encryption Box Select On to use the encryption box You can configure this setting when registering the encryption key Encryption Box No Enter the box number 4 digits You can configure this setting when registering the encryption key 6 File Format Select PDF TIFF or XPS as the file format from the drop down list You can configure the setting if you select PDF Select Off PDF A 1a ...

Page 78: ...and One touch keys you can omit their entry before transmission For details refer to the explanations in the procedure of each communication method and registration method Sub Address With the machine sub address and sub address passwords are called sub address Sub Address Use the numbers from 0 to 9 space and and characters to enter a sub address of up to 20 digits When the machine receives origi...

Page 79: ... 9 space and characters to enter a sub address 7 Press the OK key and enter the sub address password using the numeric keys NOTE You can use up to 20 digits including the numbers from 0 to 9 space and characters to enter a sub address password When the machine receives originals a sub address password is not used 8 Press the OK key 9 Press the OK key again 10 Press the Start key Transmission begin...

Page 80: ...ss Menu the Right Select key 6 Press the or key to select Add Box and press the OK key 7 Use the numeric keys to enter the sub address 8 Press the OK key and use the numeric keys to enter the name of Sub Address Box 9 Press the OK key and use the numeric keys to enter the box numnr of Sub Address Box 10 Press the OK key 11 Press the or key to select Exit and press the OK key Changing Sub Address B...

Page 81: ...ress the or key to select On or Off in Del afterPrint menu 2 Press the OK key Deleting Sub Address Box 1 Follow steps 1 to 4 of Registering a Sub Address Box on page 4 26 2 Select the box to be deleted 3 Press Menu the Right Select key 4 Press the or key to select Delete and press the OK key 5 When the deletion confirmation screen appears press Yes the Left Select key Printing Originals from a Sub...

Page 82: ...Sending cannot be done 7 Press the OK key 8 Press the or key to select Print The print starts Deleting Originals after Printing from a Sub Address Box To automatically delete the originals printed form the Sub Address Box use the following operation 1 Follow steps 1 to 3 in Printing Originals from a Sub Address Box on page 4 27 2 Press the Function Menu key 3 Press the or key to select Del afterPr...

Page 83: ...ess Menu the Left Select key 3 Press the or key to select Detail Edit press the OK key 4 Press the or key to move the item to be changed and press Edit the Right Select key The details for the selected original are displayed 5 Use the numeric keys to edit the item Repeat the step 4 and 5 for the other items Item Description File Name File name of the original Press Edit to rename the file Number o...

Page 84: ...TE The list can be printed when user login has been enabled and the machine is logged in with administrator privileges 1 Press the System Menu Counter key 2 Press the or key to select Document Box and press the OK key 3 Press the or key to select Sub Address Box and press the OK key 4 Press the or key to select SubAddr Box List and press the OK key 5 When the printing confirmation screen appears p...

Page 85: ...uirements to be registered are set press the Program key and hold it 2 seconds The program is registered to the key When you press a number where a program is already registered proceed to the next step 2 Press the or key to select Overwrite 3 Press the OK key 4 Press Yes the Left Select key The program is registered overwriting the previous one Deleting Registration Contents 1 Press the Program k...

Page 86: ...e polling transmission with the same originals as many times as you wish Refer to page 4 32 NOTE You can store up to 10 originals for polling transmission You can also add to or overwrite originals up until a polling request arrives from the destination Refer to Overwrite Setting on page 4 32 Deleting Originals After Polling Transmission Originals intended for polling transmission are automaticall...

Page 87: ...ginal s size when using custom size originals Original Image Select image quality Scan Resolution Chooses the level of detail used for scanning originals Orig Orientation To ensure that the originals are stored in the correct orientation this indicates which end of the original is the top To use the following functions select the orientation of the originals Duplex Continuous Scan Allows you to di...

Page 88: ...Advanced 4 34 9 Press the Start key The originals are scanned and stored in the Polling box Density Adjusts the density used for scanning originals Duplex Select the type and binding of originals Function Description ...

Page 89: ... Board Reception If the recipient s machine has a sub address bulletin board function you can use sub addresses to communicate with that machine even if it is a third party machine IMPORTANT The recipient s machine must also be equipped with a sub address bulletin board function Some fax machines cannot store originals and some do not support polling transmission Check both the sending and receivi...

Page 90: ...he Function Menu key 3 Press the or key to select FAX RX Polling 4 Press the OK key 5 Press the or key to select On 6 Press the OK key 7 Select the destination NOTE Only fax numbers can be selected as destinations You can select destinations using a combination of the numeric keys input and Address Book or One touch keys selection 8 Press the Start key The operations for reception begin ...

Page 91: ...ded it is equipped with the same type of sub address communication function IMPORTANT Check the sub address set by the sender beforehand 1 Press the FAX key 2 Select the destination Here refer to Sub Address Transmission on page 4 24 when entering the sub address NOTE Only fax numbers can be selected as destinations You can select destinations using a combination of the numeric keys input and Addr...

Page 92: ...key The selected original is indicated by a checkmark To cancel the selection press Select the Right Select key again 6 Selecting Two or More Originals Repeat steps 4 to 5 Selecting Cancelling All Originals 1 Press Menu the Left Select key 2 Press the or key to select Select All or Clear All 3 Press the OK key 7 Press the OK key 8 Press the or key to select Print 9 Press the OK key 10 Press the St...

Page 93: ...ing box NOTE If Delete TX File is set to On originals are automatically deleted following polling transmission Refer to page 4 32 1 Follow steps 1 to 5 in Printing from a Polling Box on page 4 38 2 Press the OK key 3 Press the or key to select Delete 4 Press the OK key 5 Press Yes the Left Select key The original is deleted ...

Page 94: ...age 4 38 2 Press Menu the Left Select key 3 Press the or key to select Detail Edit 4 Use the or key to check the details of the selected original 5 When you have finished checking the details press the OK key Item Description File Name File name of the original Press Edit the Right Select key to rename the file Page Number of pages in the original Resolution Resolution used during scanning Date an...

Page 95: ...ing NOTE For details refer to the machine s Operation Guide Item Description Registration of User Register user access privileges User ID and Password Enable Disable User accounting Enable User accounting Item Description Registration of Account Register Account Name and Account ID Up to 8 digits can be entered Enable Disable job accounting Enable job accounting FAX send restriction Restricts the ...

Page 96: ...ess Box Encrypted transmission Manual send when dialed from this machine to the receiving system Polling transmission Polling reception Network FAX transmission IMPORTANT You can use Make a call Checking FAX Job History and Communication Control Report Output functions without entering an Account ID or Administrator No When job accounting has been enabled batch transmission function works only for...

Page 97: ...lect Login User Name 3 Press the OK key 4 Use the numeric keys to enter the login user name NOTE For details on character entry refer to Specifications Fax function on Appendix 6 5 Press the OK key 6 Press the or key to select Login Password 7 Press the OK key 8 Use the numeric keys to enter the login password NOTE For details on character entry refer to Specifications Fax function on Appendix 6 9...

Page 98: ...ng and job accounting have been enabled the screen for entering a User ID and Password is displayed 1 Use the numeric keys to enter Account ID and press the OK key NOTE You can check the number of pages used by a department by entering the Account ID and pressing Counter the Left Select key 2 Perform the fax operation NOTE When the operation is completed press the Logout key Account ID b Counter ...

Page 99: ...ect Original Image Continuous Scan When you cannot place multi page originals into the document processor at one time the multi page originals can be scanned in batches and sent as one job In this method originals are scanned until you press END Scan the Right Select key Job Finish Notice This function is used to inform when the transmission of e mail is completed Original Type Binding Orientation...

Page 100: ...FAX Operation Advanced 4 46 ...

Page 101: ...ter explains how to check fax transmission results and functional registration status Various Tools for Checking Transmission Results and Registration Status 5 2 Checking FAX Job History 5 3 Printing Administrative Reports 5 5 Reporting FAX Receipt Result by E mail 5 10 ...

Page 102: ...ny time 5 3 Send result report Receiptresult report Report printing Latest send or receipt result Automatic printout after every sending or receiving operation No Print Output or Error Only is also optionally available 5 5 Activity report Report printing Latest 50 send or receipt results Any time and automatic printout after every 50 sending receiving 5 7 Status page Report printing Registration s...

Page 103: ...s of storage in Sub Address Boxes Polling Boxes and USB memory 3 Press the OK key 4 Press the or key to select the job you want to check 5 Press the OK key 6 Press the or key to check the details of the job 7 Press the OK key Description of Detailed Information Screen Print Job Status a b 0009 maury s data 0010 n aaaa Pause Menu 0008 Copy s Item Description Result Result is indicated OK Job ended ...

Page 104: ...Checking Transmission Results and Registration Status 5 4 Sender Info Transmission information Destination Recipient The number of destinations is displayed Item Description ...

Page 105: ...or key to select Report 3 Press the OK key 4 Press the or key to select Result Rpt Set 5 Press the OK key 6 Press the or key to select Send Result 7 Press the OK key 8 Press the or key to select FAX 9 Press the OK key 10 Press the or key to select Off not to print On to print Error Only or Specify Each Job 11 Press the OK key Proceed to the next step if you selected On Error Only or Specify Each J...

Page 106: ...ing FAX Receipt Result by E mail on page 5 10 1 Press the System Menu Counter key 2 Press the or key to select Report 3 Press the OK key 4 Press the or key to select Result Rpt Set 5 Press the OK key 6 Press the or key to select FAX RX Result 7 Press the OK key 8 Press the or key to select Off not to print On to print or Error SubAddress Send Result Report Completed With transmitted image Complete...

Page 107: ...er every 50 faxes sent or received Printing Activity Reports The latest 50 sent or received fax data are printed as a report 1 Press the Status Job Cancel key 2 Press the or key to select FAX 3 Press the OK key 4 Press Log the Right Select key 5 Press the or key to select Outgoing FAX Rpt to print the sent fax report or Incoming FAX Rpt to print the received fax report 6 Press Yes the Left Select ...

Page 108: ... received 1 Press the System Menu Counter key 2 Press the or key to select Report 3 Press the OK key 4 Press the or key to select Admin Rpt Set 5 Press the OK key 6 Press the or key to select Outgoing FAX Rpt or Incoming FAX Rpt 7 Press the OK key 8 Press the or key to select Off not to print or On to print 9 Press the OK key FAX TX Report FAX RX Report ...

Page 109: ...e Local FAX Number Local FAX Name fax line setting etc You can print it out as necessary 1 Press the System Menu Counter key 2 Press the or key to select Report 3 Press the OK key 4 Press the or key to select Report Print 5 Press the OK key 6 Press the or key to select Status Page 7 Press the OK key 8 Press Yes the Left Select key The status page is printed Status Page ...

Page 110: ...for every fax If the setting is Error SubAddress E mail notification is only provided when an error occurs or the received original is forwarded to Sub Address Boxes 1 Press the System Menu Counter key 2 Press the or key to select Report 3 Press the OK key 4 Press the or key to select Result Rpt Set 5 Press the OK key 6 Press the or key to select FAX RX Result 7 Press the OK key 8 Press the or key...

Page 111: ...tly 1 Press the or key to select Address Entry 2 Press the OK key 3 Use the numeric keys to enter the address you want to register as the report destination Up to 64 digits can be entered NOTE For details on character entry refer to Character Entry Method on Appendix 2 13 Press the OK key ...

Page 112: ...Checking Transmission Results and Registration Status 5 12 ...

Page 113: ...ustment 6 8 Retry Times 6 9 ECM TX 6 10 TX Start Speed 6 11 Receiving Mode 6 12 Reception Date Time 6 13 Media Type for Print Output 6 14 DRD Reception 6 16 Transmission Restriction 6 18 Encryption 6 28 Duplex Print Output 6 34 ECM RX 6 35 RX Start Speed 6 36 2 in 1 Reception 6 37 Print all at once Batch Print 6 38 Select Key Set 6 39 Remote Diagnostics 6 40 Prohibiting FAX Printing at Specified T...

Page 114: ...TE At the end of the conversation you can also manually receive the originals Refer to Manual Reception on page 4 9 Preparation Refer to Receiving Mode on page 6 12 to select Auto FAX TEL FAX FAX Telephone When the other party has sent originals with automatic send When the other party has sent originals with manual send When the other party is calling from a telephone Receives incoming call witho...

Page 115: ...ngs on page 6 7 2 When the call is from a telephone 1 The machine makes a ringing tone urging the user to respond Lift the handset of the telephone within 30 seconds NOTE If you do not lift the handset within 30 seconds the machine switches to fax reception 2 Talk to the other party NOTE At the end of the conversation you can manually receive the originals Refer to Manual Reception on page 4 9 Whe...

Page 116: ...FAX Answering Machine Auto Switch Reception it is necessary to connect an answering machine equipped telephone set commercially available product to the machine For details such as responding to messages refer to the Operation Guide of each answering machine Set the number of rings to be made by the machine more than the number of rings to be made by the answering machine Refer to FAX TEL Auto Swi...

Page 117: ... the machine enters a status the same as manual reception Refer to Manual Reception on page 4 9 2 The answering machine responds When the call is from a telephone but the user is absent The answering machine plays a response message and starts recording the other party s message NOTE When silence continues for at least 30 seconds during recording the machine switches to fax reception When the call...

Page 118: ...Setup and Registration 6 6 FAX Country Code To use this menu consult your dealer or service representative ...

Page 119: ...s can be set to between 1 and 15 times for Rings Normal and Rings TAD and 0 and 15 times for Rings FAX TEL For Rings FAX TEL this change is possible with some countries 1 Press the System Menu Counter key 2 Press the or key to select FAX 3 Press the OK key 4 Press the or key to select Reception 5 Press the OK key 6 Press the or key to select Rings Normal Rings TAD or Rings FAX TEL 7 Press the OK k...

Page 120: ...the line is connected without pressing the On Hook key such as in memory transmission 1 Press the System Menu Counter key 2 Press the or key to select Common Settings 3 Press the OK key 4 Press the or key to select Sound 5 Press the OK key 6 Press the or key to select FAX Speaker or FAX Monitor 7 Press the OK key 8 Press the or key to select the desired volume of the speaker 9 Press the OK key FAX...

Page 121: ...ial refer to Dialing the Same Receiving System Redial on page 3 25 1 Press the System Menu Counter key 2 Press the or key to select FAX 3 Press the OK key 4 Press the or key to select Transmission 5 Press the OK key 6 Press the or key to select Retry Times 7 Press the OK key 8 Use the numeric keys to enter the number of retry times 9 Press the OK key ...

Page 122: ...istortion of the image due to noise on the line and other conditions NOTE When there is a large amount of noise on the line communication may take slightly longer than when Off is selected 1 Press the System Menu Counter key 2 Press the or key to select FAX 3 Press the OK key 4 Press the or key to select Transmission 5 Press the OK key 6 Press the or key to select ECM TX 7 Press the OK key 8 Press...

Page 123: ...Start Speed Normally this should be used with the default setting 1 Press the System Menu Counter key 2 Press the or key to select FAX 3 Press the OK key 4 Press the or key to select Transmission 5 Press the OK key 6 Press the or key to select TX Start Speed 7 Press the OK key 8 Press the or key to select 9600bps 14400bps or 33600bps 9 Press the OK key ...

Page 124: ...ine is used NOTE DRD reception mode is available for some countries 1 Press the System Menu Counter key 2 Press the or key to select FAX 3 Press the OK key 4 Press the or key to select Reception 5 Press the OK key 6 Press the or key to select RX Settings 7 Press the OK key 8 Press the or key to select the desired receiving mode 9 Press the OK key Proceed to the next step if you selected Auto DRD i...

Page 125: ...ta is printed on multiple pages the reception date time is printed on the fist page only It is not printed on the pages that follow When the received fax data is forwarded after retrieving it from memory the reception date time is not added to the forwarded data 1 Press the System Menu Counter key 2 Press the or key to select FAX 3 Press the OK key 4 Press the or key to select Reception 5 Press th...

Page 126: ...ey 8 Press the or key to select the desired paper type If you do not specify any paper type select All Media Type 9 Press the OK key Setting the cassette for the print output of received faxes By specifying the media type faxes can be received on the corresponding cassette 1 Press the System Menu Counter key 2 Press the or key to select Common Settings 3 Press the OK key 4 Press the or key to sele...

Page 127: ...e OK key 14 Press the or key to select the desired paper type 15 Press the OK key The previous screen reappears 16 Press the Back key to return to the default System Menu screen 17 Now make the FAX receiving settings Refer to Media Type for Print Output on page 6 14 for the setting procedure Select the same paper type as that selected in step 14 Cassette 1 Size a b 2 Legala 3 Statementa 1 Lettera ...

Page 128: ... the Distinctive Ring Pattern service provided by your telephone company Contact your telephone company for further information on the Distinctive Ring Pattern service available Flow of reception Preparation Refer to Receiving Mode on page 6 12 to select Auto DRD 1 When a call comes in the telephone will ring NOTE If you lift the handset while the telephone is still ringing the machine will deal w...

Page 129: ...e call is from a telephone Lift the handset and speak with the other party When the conversation is over fax reception can be initiated manually When the call is from a fax Once the ringing tone stops fax reception will start automatically ...

Page 130: ...egistering Permit FAX No on page 6 19 or Registering Permit ID No on page 6 24 Send restriction settings are specified in Permit Addr Book in Send Restrictions Refer to Setting Send Restriction on page 6 26 Register the Local FAX Numbers or Local FAX IDs of other parties If there is neither a Permitted FAX No nor a Permitted ID No registered for the recipient sending is not rejected The recipient ...

Page 131: ...ts Reception Rejection Register Reject FAX numbers Refer to Registering Reject FAX No on page 6 21 Reception restriction settings are specified in Reject List in Reception Restrictions Refer to Setting Reception Restriction on page 6 26 The sender s Local FAX Number is not registered The sender s Local Fax Number matches a Reject FAX No registered on the machine If there are no Reject FAX numbers ...

Page 132: ...o on page 6 19 2 Press the or key to select the Permit FAX No to be changed or deleted 3 Press Menu the Right Select key 4 Changing Permit FAX No 1 Press the or key to select Detail Edit 2 Press the OK key 3 Use the numeric keys to reenter the Permit FAX number Up to 32 digits can be entered NOTE Press the Address Recall Pause key to insert a pause between two digits Press the or key to move the c...

Page 133: ...stered 1 Press the System Menu Counter key 2 Press the or key to select FAX 3 Press the OK key 4 Press the or key to select TX RX Restrict 5 Press the OK key 6 Press the or key to select Reject No List 7 Press the OK key 8 Press Menu the Right Select key 9 Press the or key to select Add FAX Number 10 Press the OK key Menu a b 1 Detail Edit 3 Add FAX Number 2 Delete Delete Are you sure z 0667640001...

Page 134: ...t FAX No on page 6 21 2 Press the or key to select the Reject FAX No to be changed or deleted 3 Press Menu the Right Select key 4 Changing Reject FAX No 1 Press the or key to select Detail Edit 2 Press the OK key 3 Use the numeric keys to reenter the Reject FAX number Up to 32 digits can be entered NOTE Press the Address Recall Pause key to insert a pause between two digits Press the or key to mov...

Page 135: ...or key to select Delete 2 Press the OK key 3 Press Yes the Left Select key This deletes the Reject FAX number 5 To change and delete other Reject FAX numbers repeat steps 2 to 4 Menu a b 1 Detail Edit 3 Add FAX Number 2 Delete Delete Are you sure z 0667640001 Yes No ...

Page 136: ...ss the or key to select Permit ID List 7 Press the OK key 8 Press Menu the Right Select key 9 Press the or key to select Add FAX ID 10 Press the OK key 11 Use the numeric keys to enter a Permit ID number 0000 to 9999 NOTE Press the Clear key to display the previous number 12 Press the OK key 13 To register other Permit ID numbers repeat steps 8 to 12 Permit ID List a b 0007 Menu 0004 Menu a b 1 De...

Page 137: ... numeric keys to reenter a Permit ID number 0000 to 9999 NOTE Press the Clear key to display the previous number 4 Press the OK key Deleting Permit ID No 1 Press the or key to select Delete 2 Press the OK key 3 Press Yes the Left Select key This deletes the Permit ID number 5 To change and delete other Permit ID numbers repeat step 2 to 4 Permit ID List a b 0007 Menu 0004 Menu a b 2 Delete 3 Add F...

Page 138: ...can restrict incoming faxes so that you only receive originals from senders registered in Permit FAX No and Permit ID No and senders registered in your Address Book This mode also allows you to set a Reject List for Reception Restriction so that reception from senders on the list of Rejected FAX numbers or from senders whose Local FAX Number is not registered are rejected To change the reception r...

Page 139: ...n fax number follow the steps below 1 Press the System Menu Counter key 2 Press the U or V key to select FAX 3 Press the OK key 4 Press the U or V key to select TX RX Restrict 5 Press the OK key 6 Press the U or V key to select UnknownNumber RX 7 Press the OK key 8 Press the U or V key to select the reception restriction number To permit reception select Permit To prohibit reception select Prohibi...

Page 140: ...ame 16 digit encryption key When the encryption key differs between the sending system and the receiving system the encryption cannot be conducted Therefore the sending system and the receiving system need to have the same encryption key and 2 digit key No registered in advance Description of settings at sending and receiving systems NOTE Set the same characters for the numbers indicated by the sa...

Page 141: ... Press the System Menu Counter key 2 Press the or key to select FAX 3 Press the OK key 4 Press the or key to select TX RX Common 5 Press the OK key 6 Press the or key to select Encryption Key 7 Press the OK key 8 Press the or key to select an unregistered encryption key and then press Menu the Right Select key 9 Press the or key to select Register NOTE Refer to Character Entry Method on Appendix 2...

Page 142: ...4 Confirming Registration Contents of Encryption Key 1 Press the or key to select Detail 2 Press the OK key Deleting Encryption Key 1 Press the or key to select Delete 2 Press the OK key 3 Press Yes the Left Select key This deletes the encryption key 5 Repeat steps 2 to 4 to confirm or delete other encryption keys Encryption Key a b 2 Key 02 3 Key 03 Menu 1 Key 01 Menu a b 1 Register 3 Delete 2 De...

Page 143: ...6 29 When an encryption key has already been registered go to the next step 2 Press the FAX key 3 Place the originals 4 Use the numeric keys to enter the FAX number of the other party and press Detail the Right Select key NOTE When encrypted transmission has been set to a destination in the Address Book or One touch keys you can use the destination 5 Press the or key to select Encrypted TX 6 Press...

Page 144: ...ct encryption communication operating the receiving system follow the steps below NOTE In encryption communication sub address communication cannot be used 1 Register the encryption key you have arranged with the sending system Refer to Registering an Encryption Key on page 6 29 2 Press the System Menu Counter key 3 Press the or key to select FAX 4 Press the OK key 5 Press the or key to select Rec...

Page 145: ... encryption key number 12 Press the OK key 13 The sending system conducts encrypted transmission When encryption communication is conducted normally the machine decrypts the encrypted originals received and prints the originals Encryption Key a b 2 Key 02 3 Key 03 1 Key 01 ...

Page 146: ...ut on both sides of paper having the same width as the data 1 Press the System Menu Counter key 2 Press the or key to select FAX 3 Press the OK key 4 Press the or key to select Reception 5 Press the OK key 6 Press the or key to select Duplex Printing 7 Press the OK key 8 Press the or key to select On or Off 9 Press the OK key ...

Page 147: ... distortion of the image due to noise on the line and other conditions NOTE When there is a large amount of noise on the line communication may take slightly longer than when Off is selected 1 Press the System Menu Counter key 2 Press the or key to select FAX 3 Press the OK key 4 Press the or key to select Reception 5 Press the OK key 6 Press the or key to select ECM RX 7 Press the OK key 8 Press ...

Page 148: ...tart Speed Normally this should be used with the default setting 1 Press the System Menu Counter key 2 Press the or key to select FAX 3 Press the OK key 4 Press the or key to select Reception 5 Press the OK key 6 Press the or key to select RX Start Speed 7 Press the OK key 8 Press the or key to select 9600bps 14400bps or 33600bps 9 Press the OK key ...

Page 149: ...s of the original at a time on one Letter or A4 size sheet of paper 1 Press the System Menu Counter key 2 Press the or key to select FAX 3 Press the OK key 4 Press the or key to select Reception 5 Press the OK key 6 Press the or key to select 2 in 1 Printing 7 Press the OK key 8 Press the or key to select On or Off 9 Press the OK key ...

Page 150: ...er all pages are received If Off is set each page is printed as it is received 1 Press the System Menu Counter key 2 Press the or key to select FAX 3 Press the OK key 4 Press the or key to select Reception 5 Press the OK key 6 Press the or key to select Batch Print 7 Press the OK key 8 Press the or key to select On or Off 9 Press the OK key ...

Page 151: ...sh Notice FAX Delayed TX FAX Direct TX FAX RX Polling Density Duplex 1 Press the System Menu Counter key 2 Press the or key to select FAX 3 Press the OK key 4 Press the or key to select Select Key Set 5 Press the OK key 6 Press the or key to select Left or Right 7 Press the OK key 8 Press the or key to select the function you want to register to the flexible key 9 Press the OK key IMPORTANT f you ...

Page 152: ...nd register a Predetermined ID on the machine For more information contact your Service Representative or Authorized Service Center 1 Press the System Menu Counter key 2 Press the or key to select Adjust Maint 3 Press the OK key 4 Press the or key to select Service Setting 5 Press the OK key 6 Press the or key to select Remote Diag Set 7 Press the OK key 8 Press the or key to select On 9 Press the...

Page 153: ...ress the System Menu Counter key 2 Press the or key to select Common Settings 3 Press the OK key 4 Press the or key to select Timer Setting 5 Press the OK key 6 Press the or key to select Unusable Time 7 Press the OK key 8 Press the or key to select On 9 Press the OK key 10 Press the or key to enter the start time 11 Press the OK key 12 Press the or key to enter the end time 13 Press the OK key NO...

Page 154: ...Setup and Registration 6 42 ...

Page 155: ... to use Network FAX Please also read the Network FAX Driver Operation Guide Online Manual contained in the included DVD which describes how to operate your PC to send a fax using Network FAX and make various settings What is Network FAX 7 2 Setup 7 3 ...

Page 156: ...g Network FAX sending is performed in the following sequence Flow of Network FAX Receiving Network FAX receiving is performed in the following sequence NOTE The memory forwarding function allows not only reception by the networked PC but also forwarding of the received fax by e mail forwarding to another fax machine Prepare a document using a PC networked to this machine Forward the document data ...

Page 157: ...ails refer to the Network FAX Driver Operation Guide contained in the included DVD Network FAX Driver Operation Guide The Network FAX Driver Operation Guide Online Manual is contained in the included DVD in PDF Portable Document Format The main contents include the following Installing Network FAX Driver Performing Network FAX Sending Specifying the Network FAX Transmission Settings Specifying the...

Page 158: ...About Network FAX 7 4 ...

Page 159: ...8 1 8 Troubleshooting This chapter explains how to deal with problems Indicators During Sending Receiving Operation 8 2 Precautions When Turning Power OFF 8 2 Error Messages 8 3 Troubleshooting 8 5 ...

Page 160: ...n The Memory indicator is lit when there is source data stored in the memory for delayed transmission Precautions When Turning Power OFF You cannot automatically receive a fax when the power switch is turned off Make sure that the Memory indicator is off before turning off the power switch CAUTION The device may still be operating as long as the Memory indicator is lit Turning the machine off at t...

Page 161: ...error code Turn the power switch off and unplug the power cord Call your service representative Polling box limit exceeded Job is canceled Polling box capacity is used up with document data Press the OK key The job is canceled Try to perform the job again after printing or deleting the data in the polling box 4 32 Job Accounting restriction exceeded The number of paper used has exceeded the limit ...

Page 162: ...s indicated When the type of printing paper is specified the necessary paper types are also displayed To use another paper source select the paper source and press the OK key To use another paper source press Paper the Right Select key select the desired paper source and then press the OK key Is the type of printing paper specified The cassette for the specified paper type is not available Press P...

Page 163: ...istrations correct both at sender and recipient Double check the registrations both at sender and recipient 6 28 Cannot use the remote switching function Is a pulse line used Some phones may transmit tone signals using buttons Refer to the operation manual of your phone set Is the remote switching number correct Check the registration Default 55 4 11 No print output after reception Is memory forwa...

Page 164: ...m memory forwarding Is memory forwarding set to On Check the memory forwarding setting 4 13 Cannot output from a Sub Address Box Is the box password been set Enter the correct box password 4 24 Cannot use polling reception Is polling transmission being used correctly on the sending machine Check with the recipient Cannot use sub address bulletin board communication Does the other party s fax machi...

Page 165: ...ntry Method Appendix 2 Specifications Fax function Appendix 6 Menu List Appendix 7 Received FAX Sizes and Paper Priority Inch Model Appendix 9 Received FAX Sizes and Paper Priority Metric Model Appendix 10 Error Code List Appendix 11 ...

Page 166: ...he character to the left of it is deleted 3 Back Key Press this key to return to the screen from which you invoked the character entry screen 4 Cursor Keys Use these to select the entry position or select a character from the character list 5 Numeric Keys Use these keys to select the character you want to enter 6 Reset Key Press this key to cancel the character entry procedure and return to the st...

Page 167: ...screen press Text the Right Select key to select the type of characters you want to enter Each time you press Text the Right Select key the character type switches as follows ABC 123 Symbol ABC NOTE By pressing on the numeric keys while entering characters you can directly display the Symbols screen File name input RD Center 123 Text Current character type ABC Text 123 Text Symbols a b Text ...

Page 168: ...mode Available characters Alphabetic Symbol _ 1 Numeric 1 Alphabetic Symbol a b c A B C 2 Numeric 2 Alphabetic Symbol d e f D E F 3 Numeric 3 Alphabetic Symbol g h i G H I 4 Numeric 4 Alphabetic Symbol j k l J K L 5 Numeric 5 Alphabetic Symbol m n o M N O 6 Numeric 6 Alphabetic Symbol p q r s P Q R S 7 Numeric 7 Alphabetic Symbol t u v T U V 8 Numeric 8 Alphabetic Symbol w x y z W X Y Z 9 Numeric ...

Page 169: ...When Select Character Is Selected in Login Operation Settings In the login screen that appears when user management is enabled the character entry method may vary depending on the settings For the Login Operation refer to the machine s Operation Guide If a character palette appears on the screen use cursor keys to select the desired character from the displayed characters and then press the OK key...

Page 170: ...15 mm Max length 14 355 6 mm Automatic Document Feed Max 50 sheets Scanner Resolution Horizontal Vertical 200 100 dpi Normal 8 dot mm 3 85 line mm 200 200 dpi Fine 8 dot mm 7 7 line mm 200 400 dpi Super Fine 8 dot mm 15 4 line mm 400 400 dpi Ultra Fine 16 dot mm 15 4 line mm Printing Resolution 600 600 dpi Gradations 256 shades Error diffusion One Touch Key 22 keys Multi Station Transmission Max 1...

Page 171: ...d Job page 4 3 Print Job Log page 5 3 Send Job Log page 5 3 Store Job Log page 5 3 FAX page 5 7 Document Box Key Sub Address Box page 4 26 Polling Box Store File page 4 32 System Menu Counter Key Report Report Print Status Page page 5 9 Admin Rpt Set Outgoing FAX Rpt page 5 7 Incoming FAX Rpt page 5 7 Result Rpt Set Send Result page 5 5 FAX RX Result page 5 6 Common Settings Sound FAX Speaker page...

Page 172: ...page 6 13 2 in 1 Printing page 6 37 Batch Print page 6 38 Remote SW Dial page 4 11 Encryption RX page 6 28 Duplex Printing page 6 34 ECM RX page 6 35 RX Start Speed page 6 36 TX RX Restrict TX Restriction page 6 18 RX Restriction page 6 18 Permit No List page 6 18 Permit ID List page 6 18 Reject No List page 6 18 Select Key Set page 6 39 Document Box Sub Address Box page 4 26 Polling Box Delete TX...

Page 173: ...r LG Legal When a paper type is selected in Media Type a received fax is printed using the matching paper source Refer to page 6 14 Even if All Media Types is selected paper types such as transparency cannot be used for fax printouts Priority Received FAX Size Paper Size 1 Paper orientation is different from the received document The image is printed after being rotated 90 automatically 2 Received...

Page 174: ...olio When a paper type is selected in Media Type a received fax is printed using the matching paper source Refer to page 6 14 Even if All Media Types is selected paper types such as transparency cannot be used for fax printouts Priority Received FAX Size Paper Size 1 2 3 4 Paper orientation is different from the received document The image is printed after being rotated 90 automatically Folio size...

Page 175: ...tion was established U00600 U00690 Communication was stopped due to the machine failure Send or receive again U00700 Communication was stopped due to failure on the part of the sender or recipient machine U00800 U00810 Page s not sent correctly Send again U00900 U00910 Page s not received correctly Ask the sender to resend U01000 U01092 Communication error occurred during transmission Send again U...

Page 176: ...An error occurred due to either 1 or 2 below Check with the other party 1 The other party s machine is an our brand model and transmission restrictions were found set by the other party during polling reception Communication was interrupted because the password was incorrect 2 The other party s machine is an our brand model and transmission restrictions were found set by the other party during sub...

Page 177: ...tion key is not yet registered U04500 Encrypted reception was canceled because the encryption key does not match U05100 Transmission was canceled because communication requirements are not met due to the transmission restriction set on this machine Check with the recipient U05200 Reception was canceled because communication requirements are not met due to the reception restriction set on this mach...

Page 178: ...opped because there is no more free space in the memory of the recipient machine Check with the recipient U19200 Memory transmission was stopped due to a data error occurring during transmission Send again U19300 Transmission was stopped due to a data error occurring during transmission Send again U19400 Reception was stopped due to a data error occurring during reception Ask the sender to resend ...

Page 179: ...istration Status 5 1 Confirming and Deleting Registration Contents of Encryption Key 6 30 Continuous Scan 4 45 D Date 2 6 Delayed Transmission 4 2 Cancel 3 12 Immediate Transmission 3 12 Density 3 7 Direct Transmission 3 2 3 3 Cancel 3 12 Document Processor 1 5 DRD Reception 6 12 6 16 Duplex Print Output 6 34 E ECM Communication 3 4 3 17 ECM RX 6 35 ECM TX 6 10 E mail Notice Job Finish Notice 4 45...

Page 180: ... No Change Deletion 6 25 Registration 6 24 Placing Originals 3 3 Polling Communication 4 32 Checking 4 40 Deleting Originals in a Polling Box 4 39 Polling Reception 4 35 8 6 Polling Transmission 4 32 Printing from a Polling Box 4 38 Renaming Files 4 40 Precautions for Use iv Precautions When Turning Power OFF 8 2 Preparation Before Use 2 1 Printing Forwarding Received Documents Memory Forwarding 4...

Page 181: ...rom a Sub Address Box 4 28 How to Change 4 26 How to Delete 4 27 How to Register 4 26 Printing Originals from Sub Address Box 4 27 Sub Address Communication 3 4 4 24 How to Conduct 4 24 Sub Address 4 24 Sub Address Password 4 24 T Telephone Line 2 2 Time 2 6 Transmission Restriction 6 18 Communication Establishing Requirements 6 18 Permit FAX No 6 19 Permit ID No 6 24 Prerequisites 6 18 Reception ...

Page 182: ...Index 4 ...

Page 183: ......

Page 184: ...Rev 1 2013 11 2MJGEEN001 ...

Page 185: ...TA Triumph Adler GmbH Ohechaussee 235 22848 Norderstedt Germany ...

Reviews: