Operation Panel
4-66
PIN (Device) (Connect using a PIN code (for the Wireless Network Interface Kit))
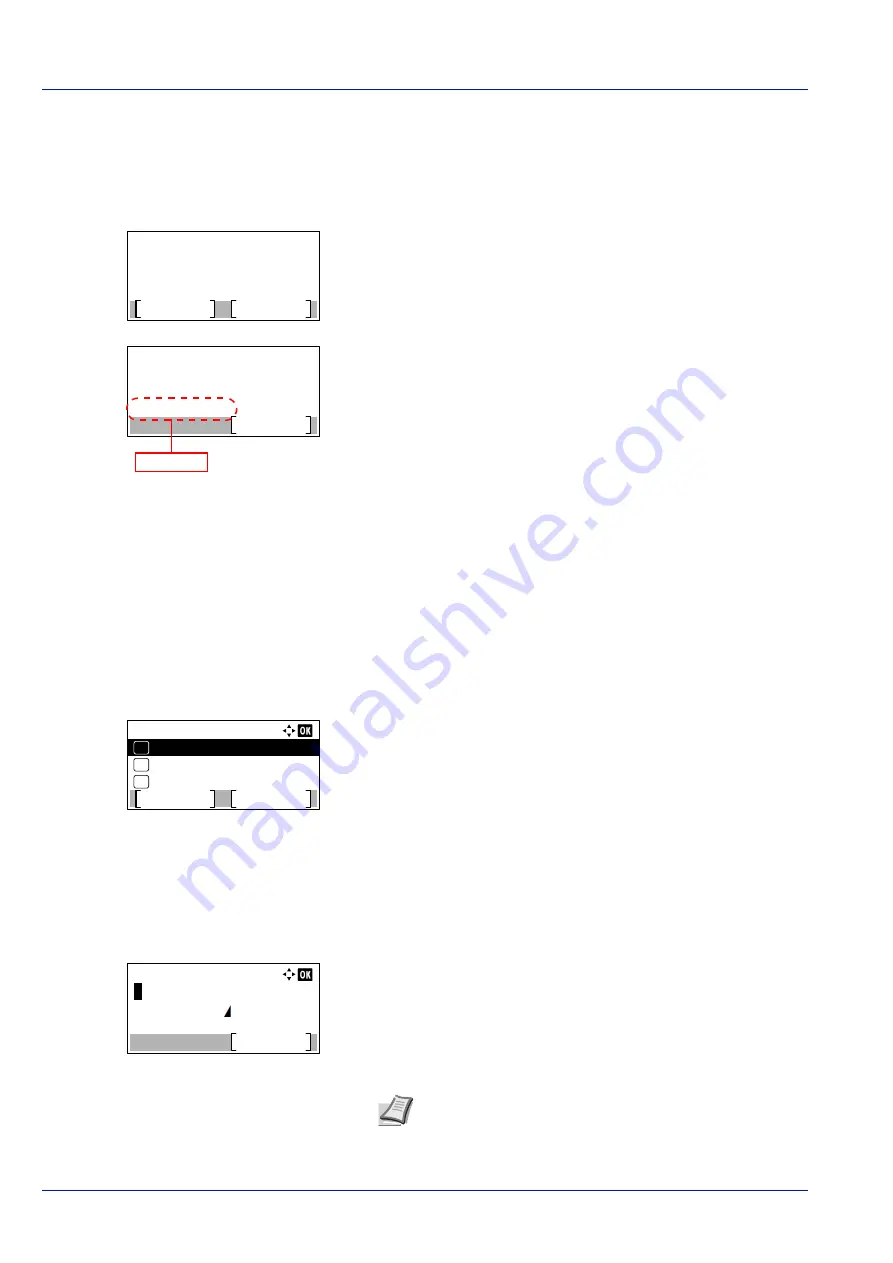
The connection is started using the PIN code for the machine. The PIN code displayed should be entered at the access
point. The PIN code for the machine is generated automatically.
1
In the
Quick Setup
menu, press
or
to select
PIN (Device)
.
2
Press
[OK]
. The message
Start the PIN code setup. Are
you sure?
appears.
3
Press
[Yes]
(
[Left Select]
). A PIN code is displayed on the
Message display.
4
Write down the PIN code displayed on the Message display.
5
Press
[Next]
(
[Right Select]
). The message
Connecting...
appears.
6
At the access point, immediately enter the PIN code which wrote
down on step 4. The connection with the access point starts.
Custom Setup (Detailed settings for the wireless network)
It is possible to change the detailed settings of the wireless network.
1
In the
Wireless Network
menu, press
or
to select
Custom
Setup
.
2
Press
[OK]
. The
Custom Setup
menu screen appears.
The following operations are possible:
• Netwk Name (SSID) (Registration of the access point's SSID)...4-
• Netwk Authentic. (Network Authentication setting)...4-67
• Encryption (Encryption settings)...4-67
Netwk Name (SSID) (Registration of the access point's SSID)
This sets the SSID (Service Set Identifier) for the wireless network access point the machine will be connected to.
1
In the
Custom Setup
menu, press
or
to select
Netwk
Name(SSID)
.
2
Press
[OK]
. The
Netwk Name(SSID)
entry screen appears.
3
Enter the access point's SSID using the numeric keys.
Start the PIN code
setup.
Are you sure?
Yes
No
Enter the PIN code
into the access point
and press [Next].
Next
PIN:xxxxxxxx
PIN code
Custom Setup:
Encryption
03
Netwk Authentic.
02
01
Netwk Name(SSID)
Connect
Exit
Netwk Name(SSID):
Text
ABC
Note
Up to 32 characters can be entered. For details on
entering characters, refer to
Character Entry Method on page
.
Summary of Contents for P-4531DN
Page 1: ...Operation Guide P 4531DN P 5031DN P 5531DN P 6031DN ...
Page 22: ...Machine Parts 1 6 ...
Page 68: ...Preparation before Use 2 46 ...
Page 78: ...Printing 3 10 ...
Page 284: ...Maintenance 7 12 ...
Page 312: ...Troubleshooting 8 28 ...
Page 342: ...Appendix A 30 ...
Page 351: ......


