3-25
Preparation before Use > Registering Destinations in the Address Book
The Folder (FTP) Address
1
[
◄
] [
►
] key > [
Folder (FTP)
] > [
Edit
]
2
Enter the information for "Host Name (FTP)", "Path", "Login User Name" and "Login
Password" > [
OK
] key
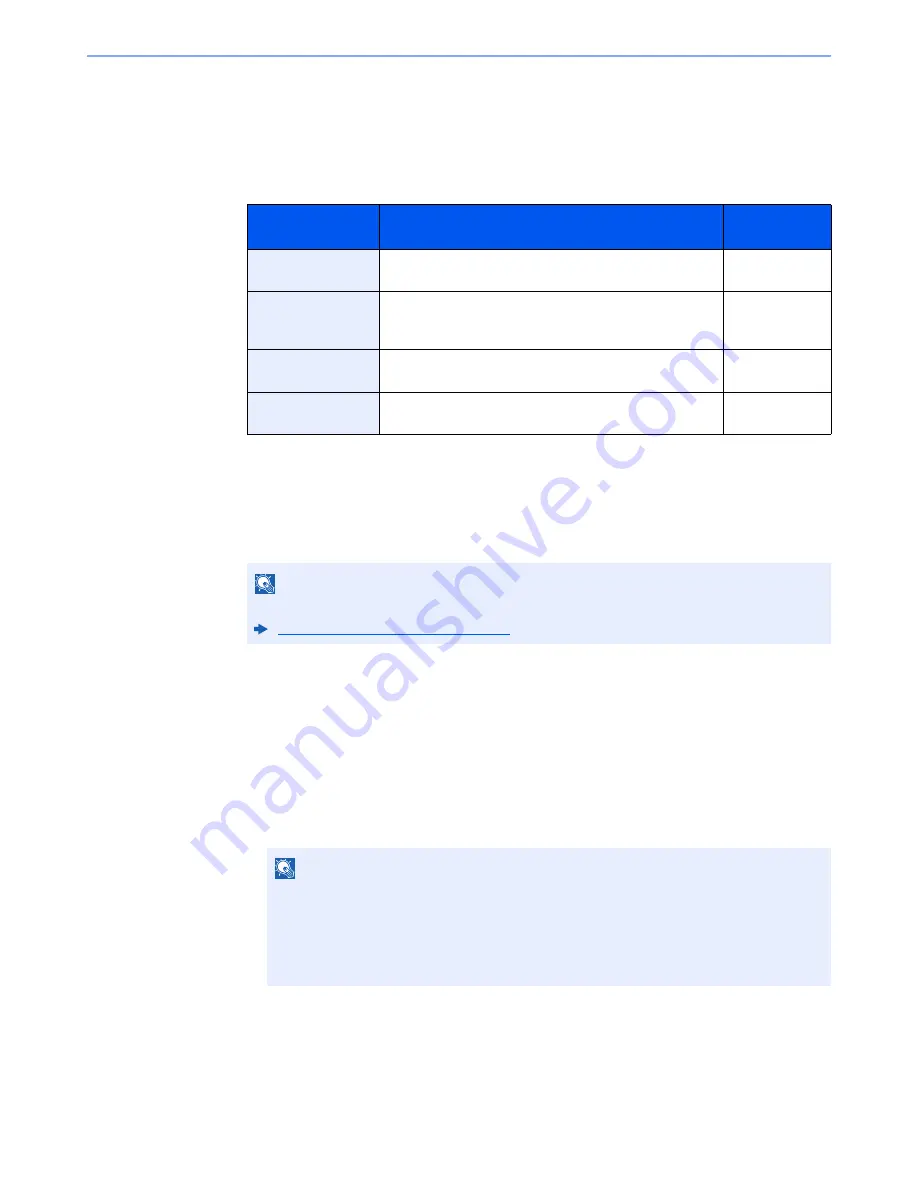
The table below explains the items to be entered.
3
The connection confirmation screen appears. Select [
Yes
] to check the connection and
[
No
] to not check it.
"Connected." appears when connection to the destination is correctly established. If "Cannot
connect." appears, review the entry.
4
Specify the address number.
1
[
◄
] [
►
] key > [
Address Number
] > [
Edit
]
2
Enter an address number.
3
Select the [
OK
] key.
5
Check if the destination entry is correct and select the [OK]
key.
The destination is added to the Address Book.
Item
Descriptions
Max. No. of
Characters
Host Name (FTP)
*1
*1 If you specify a port number other than the default (21), use the "Host name: port number" (Example:
FTPhostname:140).
To enter the IPv6 address, enclose the address in brackets [ ].
(Example: [3ae3:9a0:cd05:b1d2:28a:1fc0:a1:10ae]:140)
Host name or IP address of FTP server
Up to
64 characters
Path
*2
*2 When the FTP server is based on Linux/UNIX, the path including the sub-folder is combined by the
slash "/" not using the back-slash.
Path for the file to be stored
For example: User\ScanData
If no path is entered, the file is stored in the home directory.
Up to
128 characters
Login User Name
FTP server login user name
Up to
64 characters
Login Password
FTP server login password
Up to
64 characters
NOTE
Refer to the following for details on entering characters.
Character Entry Method (page 11-11)
NOTE
You can set any value between 1 and 250.
Use the numeric keys or select the [
▲
] or [
▼
] key to enter a number.
Address Number is an ID for a destination. You can select any available number.
If you specify an address number that is already in use, an error message appears when
you select the [
OK
] key and the number cannot be registered.
Summary of Contents for P-C3060
Page 1: ...Operation Guide P C3060 MFP P C3065 MFP ...
Page 48: ...2 3 Installing and Setting up the Machine Part Names 17 Handles 18 Rear Cover 1 17 18 ...
Page 356: ...10 37 Troubleshooting Troubleshooting 3 4 5 6 ...
Page 360: ...10 41 Troubleshooting Troubleshooting 2 3 4 ...
Page 363: ...10 44 Troubleshooting Troubleshooting 4 5 6 A2 A2 ...
Page 365: ...10 46 Troubleshooting Troubleshooting 4 5 6 7 A2 A2 A3 ...
Page 366: ...10 47 Troubleshooting Troubleshooting 8 Document Processor 1 2 3 ...
Page 367: ...10 48 Troubleshooting Troubleshooting 4 5 ...
Page 368: ...10 49 Troubleshooting Troubleshooting Clearing a Staple Jam 1 2 3 ...
Page 408: ......


