7.1
95-8533
4-4
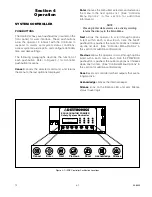
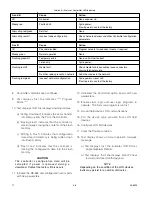
Moving within the Main Menu is done by using the
NEXT or PREVIOUS pushbuttons located on the
controller’s front panel. The menu options will scroll
upward (NEXT Pushbutton) or downward (Previous
Pushbutton) while the Main Menu name remains
stationary. When the desired menu option is selected
by the “>” indicator, the ENTER pushbutton is pressed
to advance the menu display to the desired
information set.
Note
Pressing the CANCeL pushbutton from within
any sub-menu returns the display to the Main
Menu. the display will also return to the Main
Menu if left unattended for a period of 20
minutes. If an alarm or trouble condition is
present after 20 minutes, the display will change
to the existing Alarm or trouble message.
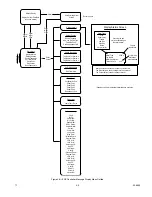
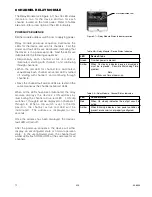
DISPLAY ALARMS
displays a list of existing Alarms
and Trouble conditions. Moving within this menu is
done by using the NEXT or PREVIOUS pushbuttons.
Note
Multiple alarm information can be viewed by
pressing the NeXt or PReVIoUS pushbuttons.
Pressing CANCeL will return the menu to the
DISPLAY ALARMS menu.
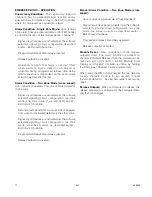
DISPLAY DEVICES
displays device information on all
devices on the LON loop. Device tag name, type, and
node address are displayed.
Pressing the NEXT or PREVIOUS pushbuttons allows
cycling through devices. Pressing the CANCEL
pushbutton will return the display to the Main Menu.
DEVICE TAG NAMES
displays device tag name
information for all devices on the LON loop.
Pressing the NEXT or PREVIOUS pushbutton allows
cycling through devices. Pressing the CANCEL
pushbutton will return the display to the Main Menu.
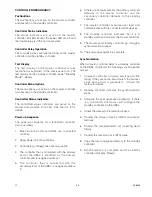
SET TIME AND DATE
provides access to
configuration controls for system clock and date
settings.
Note
When the Set time and Date menu opens, the
current hour will flash.
To move within this menu, press the ENTER
pushbutton until the desired property is flashing. To
set the desired property value, press the NEXT
Pushbutton to increase or PREVIOUS Pushbutton to
decrease the value. When the desired value is
displayed, press the ENTER pushbutton. This will
advance the menu to the next property and it will
flash. When all desired properties have been entered,
press the ENTER pushbutton until the message “Press
ENTER to Save” is displayed. When the ENTER
pushbutton is pressed, the settings are saved and the
menu changes back to the MAIN MENU.
>Display Alarms
Display Devices
Device Tagnames
Main Menu
Tag Name
Alarm Description
Time & Date
ack
Alarm Type
Off/On
Add:63 UV / IR Detect
No Fault
Z398-63 U / I
11:20:52
Set Time & Date
Jul 29 / 2002
Controller
Z398-80 X
Device Tagnames
Summary of Contents for DET-TRONICS 95-8533
Page 128: ...7 1 95 8533 A 4 Figure A 1 System Drawing 007545 001 ...
Page 129: ...95 8533 A 5 7 1 Figure A 2 System Drawing 007545 001 ...
Page 131: ...95 8533 7 1 B 2 Figure B 1 Drawing 007546 001 ...
Page 132: ...95 8533 7 1 B 3 Figure B 2 Drawing 007546 001 ...
Page 134: ...95 8533 7 1 C 2 Figure C 1 Drawing 007547 001 ...
Page 141: ...95 8533 7 1 D 7 Figure D1 System Drawing 007545 001 ...
Page 143: ...APPENDIX E E 1 95 8533 7 1 ...


