1
'LDORJ5)(OHFWURQLF
7KHUPRVWDW
ITI Part No. 60-XXX 43-EUR
Installation Instructions
Document Number: 466-1931 Rev. A PRELIMINARY
December 2001
Preliminary 12/19/01
Product Summary
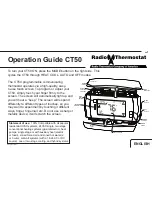
The Dialog RF Electronic Thermostat provides a money-
saving and convenient way to monitor and control tempera-
tures. The Thermostat uses low and high temperature limits
to save energy by overriding the existing HVAC thermostat.
When the Thermosatat is on, temperature limits determine
when the heat or air conditioning turns on. when the Ther-
mostat is off, the HVAC thermostat controls heat and air
conditioning.
For example, if the HVAC thermostat is set for 68° F and
the RF Thermostat has a high limit of 80° F, the RF Ther-
mostat prevents the air conditioner from turning on until the
temperature reaches 80° F.
A temperature sensor within the RF Thermostat monitors
the temperature and reports a freeze alarm to the panel if the
temperature drops below the set freeze temperature (default
= 42° F).
Note
Depending on where the RF Thermostat is located,
additional freeze sensors may need to be placed
throughout the residence to provide adequate freeze
protection
The Dialog RF Electronic Thermostat is compatible with
Simon 3 panels.
Installation Guidelines
❑
Use 22-gauge or larger stranded wire from the RF
Thermostat to the HVAC thermostat.
❑
Install the RF Thermostat on an inside wall next to, or
as close as possible, to the existing HVAC thermostat.
This keeps the temperature difference between the two
thermostats to a minimum.
❑
Programmable thermostats that use a battery to keep
time and other programmed settings may lose time and/
or programmed settings when the RF Thermostat is
turned on. This happens when the RF Thermostat relay
is interrupted by the HVAC thermostats main power,
forcing it to rely on battery power to save time and pro-
grammed settings. As a result, the HVAC thermostat
battery may need to be replaced more often, depending
on how often and how long the RF Thermostat is
turned on.
❑
Test the RF Thermostat from a desired location before
mounting it to the wall. This will verify that RF com-
munication can be established with the panel.
❑
Whenever possible, keep all sensors within 100 feet of
the panel.
❑
Avoid installing your RF Thermostat on plaster walls
with wire mesh (metal lath) embedded in them. This
can interfere with the wireless range/communication
between the RF Thermostat and the panel.
Tools and Supplies
❑
Screwdrivers (Phillips and Flathead)
❑
Screws and anchors (included)
❑
Digital voltmeter
❑
Drill with bits
❑
Wire cutters/snippers
❑
22-gauge or larger stranded wire
❑
Pen or pencil
Installation
Installation consists of mounting the RF Electronic Ther-
mostat to the wall (as close as possible to the existing ther-
mostat) and wiring it to the existing HVAC thermostat.
Mounting the RF Thermostat to the wall:
1.
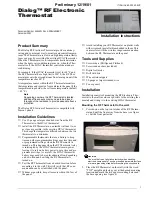
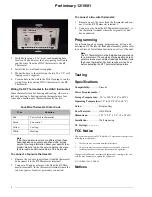
Press down on the top two latches of the RF Thermo-
stat and pull the front away from the base (see figure
x). Set the front part aside.
&$87,21
You must be free of all static electricity when handling
electronic components. Touch a grounded bare metal surface
or wear a grounding strap before touching the circuit board.
2.
Place the RF Thermostat on the wall (with the word
“TOP” upright and facing you) at the desired mounting
location and mark the two upper mounting holes and
the base opening (see figure x).


