background image

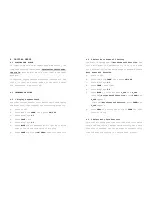
4. INITIAL SETUP 

4.1 PLACING THE SCALE 

In order to obtain an accurate weighing result, the 

complete weighing instrument (

hereinafter referred as 

the scale

) must be placed on a firm, stable and level 

surface. 

If required, adjust the adjustable feet, underneath  the 

scale, to level the scale. Refer to the spirit level 

for assistance with leveling. 


4.2 INTERNAL SETTING 


4.2.1 Display Segment Check 

User can enter this function to check to see if the display 

and backlight (if purchased) are functioning properly. 

a.  Scale is off 

b.  Press and hold 

TARE

, then press 

ON/OFF


c.  Scale displays 

F.1


d.  Press 

TARE

 once 

e.  Scale displays 

F.2


f.  Press 

MODE

 and all segments will light up to allow 

user to check the condition of display 

g.  Press 

TARE

 to quit and 

ON/ZERO

 to restart the scale 


4.2.2 Select Auto Power Off Setting 

The scale is equipped with 

Auto Power Off Function

. The 

scale will power off automatically if it is not used 

for 4 minutes. Follow the below steps to enable/disable 

Auto Power Off Function.


a.  Scale is off 

b.  Press and hold 

TARE

, then press 

ON/OFF


c.  Scale displays 

F.1


d.  Press 

TARE

 three times 

e.  Scale displays 

F.4


f.  Press 

MODE

 to shift between 

0_OFF

 and 

4_OFF


-To enable 

Auto Power Off Function

, press 

TARE

 when 

4_OFF

 appears 

-To disable 

Auto Power Off Function

, press 

TARE

 when 

0_OFF

 appears 

g.  Press 

ZERO

 to restart the scale or 

TARE

 for next 

function setup 


4.2.3 Select Auto Tare Function 

This scale is equipped with an auto tare function which 

tares off the initial weight automatically when this 

function is engaged. The tare weight is automatically 

cleared when everything is removed from platter.  


Summary of Contents for APM-15

Page 1: ...EFORE ATTEMPTING TO OPERATE THIS SCALE DECEMBER 2003 REV 2 Specifications subject to change without prior notice CONTENTS 1 INSTALLATION 2 SPECIFICATIONS 3 KEYBOARD LAYOUT AND DESCRIPTION 4 INITIAL SETUP 5 INSTRUCTION FOR USE 6 TROUBLE SHOOTING 7 DAILY CARE AND MAINTENANCE APPENDIX ERROR CODES ...

Page 2: ...s unit or conduct any trouble shooting other than that listed in TROUBLE SHOOTING 2 SPECIFICATIONS Model No Capacity Max Division e APM 6 Non NTEP 6kg 15lb 0 002kg 0 005lb APM 15 NTEP 15kg 30lb 0 005kg 0 01lb APM 30 NTEP 30kg 60lb 0 01kg 0 02lb APM 60 NTEP 60kg 150lb 0 02kg 0 05lb APM 150 NTEP 150kg 300lb 0 05kg 0 1lb Tare Range 1 3 Max e Power on Zero Range Ó10 Max Zero Range Ó2 Max Min Load 20e ...

Page 3: ...MC KEY Press MR and ZERO simultaneously to clear weight from memory 8 LO BAT INDICATOR This indicator appears when input voltage is below the lowest input limit Check the power supplied to the indicator 9 ZERO INDICATOR This indicator appears to indicate zero weight status 10 NET INDICATOR This indicator appears to indicate the tare function is in operation and weight shown is net weight 11 M INDI...

Page 4: ... of display g Press TARE to quit and ON ZERO to restart the scale 4 2 2 Select Auto Power Off Setting The scale is equipped with Auto Power Off Function The scale will power off automatically if it is not used for 4 minutes Follow the below steps to enable disable Auto Power Off Function a Scale is off b Press and hold TARE then press ON OFF c Scale displays F 1 d Press TARE three times e Scale di...

Page 5: ...a Connect the load cell signal and power to the indicator properly b Place the scale on a level and firm surface c The indicator is turned on d The ZERO INDICATOR is on If not press ZERO to set display to zero 5 2 WEIGHING a Always place an object onto the scale gently Excessive force applied to platter may cause damage to weight sensor b The weight of the object is displayed on the indicator auto...

Page 6: ...um zero range NOTE When the operating environment is unstable scale memorizes the command and will take place when environment is stable 5 6 TARE OFF THE WEIGHT OF A CONTAINER When a container is used follow the steps below to manually tare off the weight of container and get the net weight a Remove all loads away from platter b Make sure that the ZERO INDICATOR is on c Place the container on the ...

Page 7: ...mmand and willcomplete the command when the environment is stable NOTE 3 Data stored in memory will be cleared when switching to different weight unit 5 8 2 Memory Recall Press MR to recall total accumulated weight from memory After MR is pressed indicator displays P X X Means the number of transactions accumulated then a flashing value The flashing value is the total accumulated weight stored in ...

Page 8: ...atus is detected during power on indicator shows P_OFF and the indicator will be powered off automatically 6 TROUBLE SHOOTING Symptom Indicator cannot be turned on Check Is the indicator powered properly Action Check power supply to indicator Symptom Indicator turned off automatically Check Is Auto Power Off Function employed Action Refer to 4 2 2 to disable Auto Power Off Function Check Is the LO...

Page 9: ...ale placed on a level surface Action Install the scale on a level surface Check Is the scale affected by airflow vibration or RFI Action Position the scale away from all disturbances Check Is the indicator calibrated correctly Action Contact your dealer 7 DAILY CARE AND MAINTENANCE 7 1 Clean the indicator with a soft and damp cloth If necessary apply a mild detergent 7 2 Do not use any harsh abras...

Page 10: ...ator will shut off after this message appears Error Error during calibration Case 1 The 1st calibration weight entered is less than 1 3 of rated capacity Case 2 The 2nd calibration weight entered is over the rated capacity Case 3 The span value is not within the acceptable range ...

Reviews: