background image

1

Assembly

Beny Sports Co. UK Ltd

Unit 8, Riparian Way,
The Crossings, Cross Hills,
West Yorkshire.
BD20 7BW

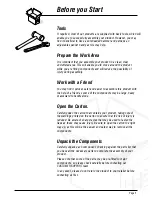
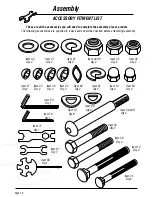
Carefully unpack each component, checking against the parts list that
you have all the necessary parts to complete the assembly of your
product. 
Please note that some of the parts may be pre-fitted to major
components, so please check carefully before contacting our
CUSTOMER SUPPORT team. 
In any event, please do not return the product to your retailer before
contacting us first.

Tel:- 01535 637711 or

Fax:- 01535 637722 or 
E-mail:- support@benysports.co.uk 

CUSTOMER SUPPORT is open from 9.00am to 5.00pm from Monday
to Friday

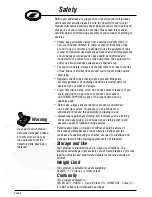
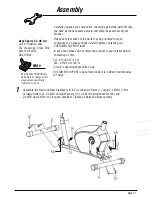
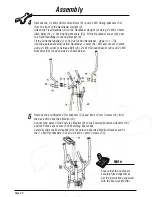
Do NOT FULLY TIGHTEN any 
Bolts, Nuts or Fittings at this 
stage unless specifically 
instructed to do so. 
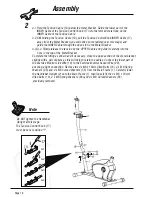
Note

65

65

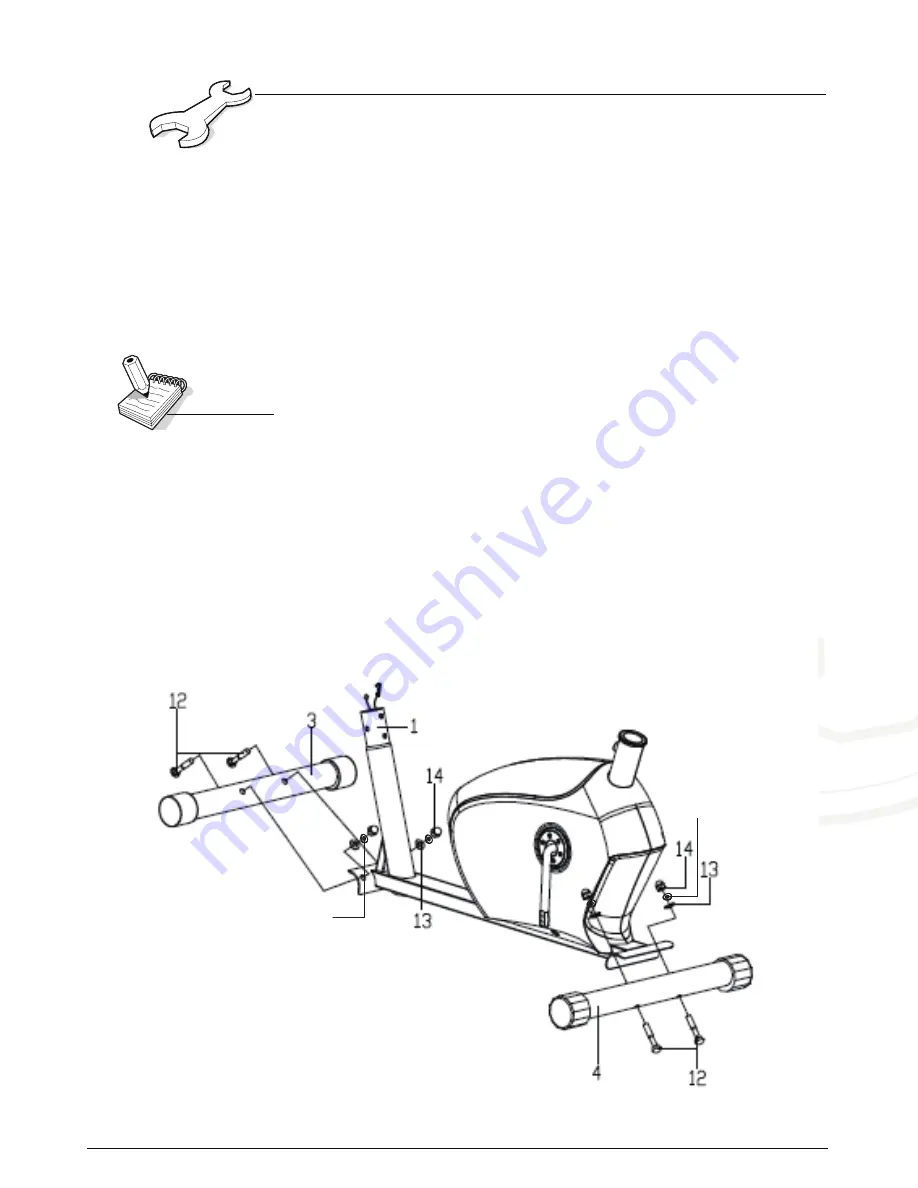
Assemble the Front and Rear Stabilisers (3 & 4) to the Main Frame (1) using 2 x M10 x 57mm
Carriage Bolts (12), 2 x M10 Curved Washers (13), 2 x M10 Spring Washers (65) and
2 x M10 Dome Nuts (14) for each Stabiliser. Tighten all Bolts and Nuts securely.

Page 1

7

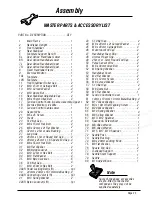
Summary of Contents for KP2071

Page 1: ...MBINATION 2 IN 1 MAGNETIC CYCLE ELLIPTICAL TRAINER KP2071 UK Assembly User Manual use your new product and retain for future use Please ensure that you read this manual carefully before attempting to...

Page 2: ......

Page 3: ...Section Page General Information 4 Before You Start 5 Safety 6 Exercise Information 7 Assembly Adjustments 14 Assembly 16 Page 3 Protect the environment by not disposing of this product with househol...

Page 4: ...turned to our warehouse at the purchaser s cost c Replace the product if it is deemed by us to be economical to do so This guarantee does not cover wear and tear on upholstery or consumables This guar...

Page 5: ...e components may be large heavy or awkward to handle alone Open the Carton Carefully open the carton that contains your product taking note of the warnings printed on the carton to ensure that the ris...

Page 6: ...t their mental and physical development and above all their temperament should be taken into account They should be controlled and instructed to the correct use of the equipment The equipment is under...

Page 7: ...ur heart With regular exercise your cardiovascular system will become stronger and more efficient Your recovery rate i e the time taken for your heart to reach its normal resting level will also decre...

Page 8: ...r heart is working in its exercise target zone you need to be able to take your pulse If you do not have a pulse monitor either from the product you are using or a proprietary independent unit you wil...

Page 9: ...xercises Hold each stretch for a minimum of ten seconds and then relax Repeat each stretch two or three times Do this before your Aerobic Exercise session and also after you have finished Head Roll Ro...

Page 10: ...h Open both arms to the side and gently lift them above your head Reach your right arm as high as you can for one count gently stretching the muscles of the stomach and lower back Repeat the action wi...

Page 11: ...0 Minutes Cool Down 5 Minutes Exercise 4 minutes at A Rest 1 minute Exercise 2 minutes at A Exercise slowly 1 minute Exercise 5 minutes at A Rest 1 minute Exercise 3 minutes at A Exercise slowly 2 min...

Page 12: ...tor either press the MODE button or start to exercise and the Exercise Monitor will begin to register the various functions To reset data stored in any individual function except Odometer which requir...

Page 13: ...th connectors and then push firmly together ensuring that the clips lock together Before contacting our Customer Support Team see contact details below please re check all cable connections disconnect...

Page 14: ...Cap 15 to compensate for uneven floors RESISTANCE ADJUSTMENT To ensure smooth efficient cycling action the magnetic braking system on your Magnetic Cycle Elliptical Trainer has been correctly adjuste...

Page 15: ...Drive Belt when correctly adjusted 10mm Alignment Bolts LUBRICATION and MAINTENANCE The moving pa HOW TO MOUNT and DISMOUNT Hold the handlebar and stand on the foot platform Start your training When y...

Page 16: ...tempting assembly Item 34 Qty 4 Item 41 Qty 2 Item 38 L R Qty 2 Item 33 Qty 4 Item 30 Qty 2 Item 31 Qty 2 Item 42L R Qty 2 Item 70 Qty 1 Item 43 Qty 2 Item 62 Qty 2 Item 35 Qty 6 Item 23 Qty 4 Item 69...

Page 17: ...In any event please do not return the product to your retailer before contacting us first Tel 01535 637711 or Fax 01535 637722 or E mail support benysports co uk CUSTOMER SUPPORT is open from 9 00am...

Page 18: ...Frame 1 Carefully lower the Handlebar Upright 2 onto the Main Frame 1 then loosely fit the 4 x M8 x 16mm Allen Bolts 16 4 x M8 Spring Washers 66 and 4 x M8 Curved Washers 56 previously removed A 1 Ho...

Page 19: ...rt Bar Pivot Bracket and into the Crankshaft then fit 1 x M13 Spring Washer 41 and 1 x M13 Nylon Locknut 42 L R for each side to secure the complete assembly Cap the M13 Nylon Locknut with 1 x S19 Rou...

Page 20: ...2 Using 2 x M8 x 30mm Allen Bolts 51 2 x M8 Spring Washers 52 Fit the Handlebar cover 53 over the Fixed Handlebar mounting bracket 8 Connect the wires of the Exercise Monitor 9 to the Exercise Monitor...

Page 21: ...t Washer 75 and 1 x M8 x 20mm Locking Knob 74 Then insert the Saddle Post 72 to the Main Frame 1 using 1 x M16 Adjust Knob 80 Fit the Saddle 79 to the Saddle Stem Support 78 adjusting the saddle clamp...

Page 22: ...Assembly 41 65 66 80 77 79 78 76 75 74 Page 22...

Page 23: ...mm Hex Bolt M10 Flat Washer 1 1 1 1 2 1 1 1 1 1 1 1 1 2 4 4 4 2 4 1 1 1 1 1 4 2 2 4 1 2 4 2 2 2 4 4 6 4 2 1pr 4 1pr 2 1pr M10 Nylon Locknut S16 Nut Cap M10 x 50mm Hex Bolt Pedal Locking Bolt L R 24mm...

Page 24: ...t 2012 Beny Sports Co UK Ltd CUSTOMER SUPPORT is open from 9 00am to 5 00pm from Monday to Friday Tel 01535 637711 Fax 01535 637722 E mail support benysports co uk Unit 8 Riparian Way The Crossings Cr...

Reviews: