background image

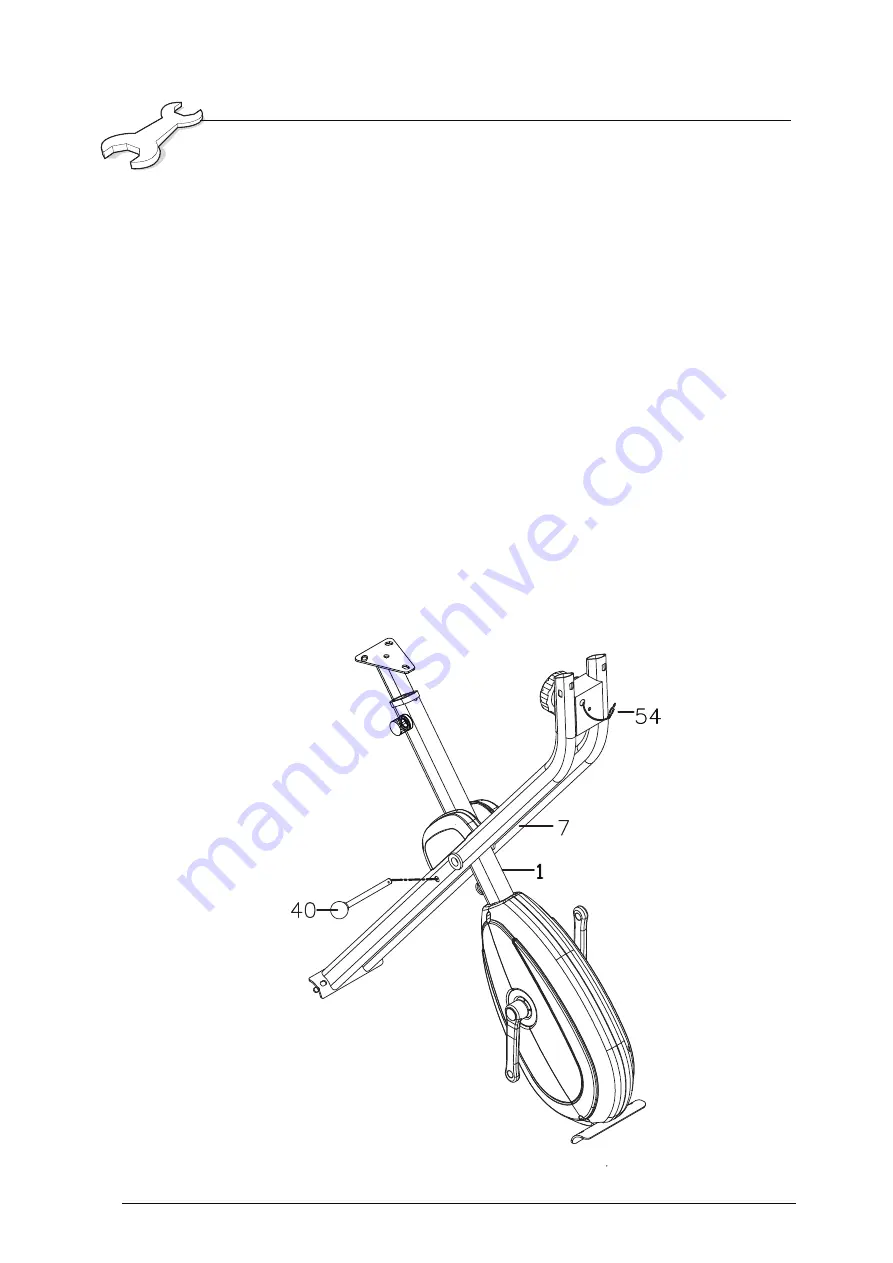
1.

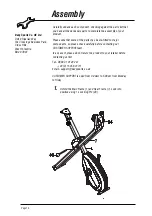
Unfold the Main Frame (1) and Rear Frame (7). Lock into 
position using 1 x Locking Pin (40).

Page 16

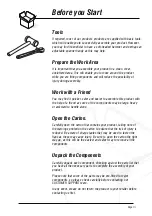
Carefully unpack each component, checking against the parts list that
you have all the necessary parts to complete the assembly of your
product. 

Please note that some of the parts may be pre-fitted to major
components, so please check carefully before contacting our
CUSTOMER SUPPORT team. 

In any event, please do not return the product to your retailer before
contacting us first.

Tel:- 0800 3 101 202 or 
       +44 (0) 1535 637711
Email:- support@benysports.co.uk  

CUSTOMER SUPPORT is open from 9.00am to 5.00pm from Monday
to Friday

Assembly

Beny Sports Co. UK Ltd.

Unit 8 Riparian Way, 
The Crossings Business Park,
Cross Hills, 
West Yorkshire. 
BD20 7BW

Summary of Contents for Xer Fit MAGNETIC X FC2916-UK

Page 1: ...SERIAL NO FC2916 UK FOLDABLE MAGNETIC X BIKE ...

Page 2: ......

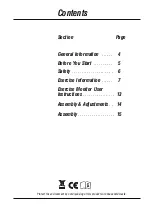
Page 3: ...General Information 4 Before You Start 5 Safety 6 Exercise Information 7 Assembly Adjustments 14 Exercise Monitor User Instructions 13 Assembly 15 Protect the environment by not disposing of this product with household waste ...

Page 4: ...ose intended If you need to advise us of a defect with your product and in order for us to service any requirement for replacement parts or repairs we will ask for proof of purchase Failure to do so will result in any claim for replacement parts or repairs being refused This guarantee both given and implied applies to the original purchaser only is not transferable and will be invalidated if used ...

Page 5: ... of the components may be large heavy or awkward to handle alone Open the Carton Carefully open the carton that contains your product taking note of the warnings printed on the carton to ensure that the risk of injury is reduced Be aware of sharp staples that may be used to fasten the flaps as these may cause injury Be sure to open the carton the right way up as this will be the easiest and safest...

Page 6: ...ny doubt do not use your product but contact CUSTOMER SUPPORT by any of the means listed on the opposite page Before use always ensure that your product is positioned on a solid flat surface If necessary use a rubber mat underneath to reduce the possibility of flooring or slipping in use Always wear appropriate clothing and footwear such as training shoes when exercising Do not wear loose clothing...

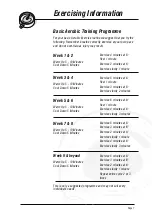
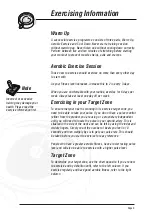
Page 7: ... 10 Minutes Cool Down 5 Minutes Exercise 4 minutes at A Rest 1 minute Exercise 2 minutes at A Exercise slowly 1 minute Exercise 5 minutes at A Rest 1 minute Exercise 3 minutes at A Exercise slowly 2 minutes Exercise 6 minutes at A Rest 1 minute Exercise 4 minutes at A Exercise slowly 3 minutes Exercise 5 minutes at A Exercise 3 minutes at B Exercise 2 minutes at A Exercise slowly 1 minute Exercise...

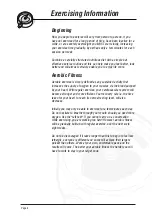
Page 8: ...our heart With regular exercise your cardiovascular system will become stronger and more efficient Your recovery rate i e the time taken for your heart to reach its normal resting level will also decrease Initially you may only be able to exercise for a few minutes each day Do not hesitate to breathe through your mouth should you need more oxygen Use the talk test If you cannot carry on a conversa...

Page 9: ... need to be able to take your pulse If you do not have a pulse monitor either from the product you are using or a proprietary independent unit you will need to locate the pulse in your carotid artery This is situated in the side of the neck and can be felt by using the index and middle fingers Simply count the number of beats you feel in 10 seconds and then multiply by six to get your pulse rate T...

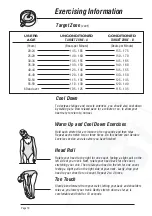
Page 10: ...xercises Hold each stretch for a minimum of ten seconds and then relax Repeat each stretch two or three times Do this before your Aerobic Exercise session and also after you have finished Head Roll Rotate your head to the right for one count feeling a slight pull on the left side of your neck Next rotate your head back for one count stretching your chin Then rotate your head to the left for one co...

Page 11: ...ch Open both arms to the side and gently lift them above your head Reach your right arm as high as you can for one count gently stretching the muscles of the stomach and lower back Repeat the action with your left arm Repeat 3 4 times Inner Thigh Stretch Sit on the floor and pull your legs toward your groin the soles of your feet together Hold your back straight and lean forward over your feet Tig...

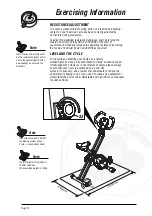
Page 12: ... tight fit of the new bearings bushes and the drive belt Note LEVELLING THE CYCLE For security and stability your Cycle has a factory welded frame and once fully assembled correctly should not need further alignment However in the interest of safety please always ensure that your Cycle is positioned on a solid flat surface If necessary use a rubber mat underneath to reduce the possibility of slipp...

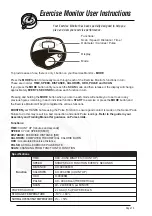
Page 13: ...on START to exercise or press the MODE button and the Exercise Monitor will begin to register the various functions MOISTEN your HANDS before using the Pulse Function to ensure good contact is made on the Sensor Pads Failure to do this may result in a bad connection and erratic Pulse readings Refer to the guide in your Assembly and Training Manual for guidance on Pulse Limits Functions Specificatio...

Page 14: ... Exercise Monitor is set to start automatically when you begin to cycle However it is possible to switch on the monitor by pressing the Mode Button at the bottom of the monitor To save battery consumption the monitor will also switch off after it has been idle for approximately four minutes Please refer to the leaflet supplied with the Exercise Monitor for all operational functions LUBRICATION and...

Page 15: ...embly of your product The following accessories are supplied in a pack and should be checked before attempting assembly Item 44 Qty 4 Item 47 Qty 4 Item 46 Qty 4 Item 45 Qty 4 Item 52 Qty 4 Item 43 Qty 2 Item 61 Qty 4 Item 53 Qty 2 Item 79 Qty 1 Item 80 M5 M15 M13 Qty 1 Page 15 Assembly ...

Page 16: ...f the parts may be pre fitted to major components so please check carefully before contacting our CUSTOMER SUPPORT team In any event please do not return the product to your retailer before contacting us first Tel 0800 3 101 202 or 44 0 1535 637711 Email support benysports co uk CUSTOMER SUPPORT is open from 9 00am to 5 00pm from Monday to Friday Assembly Beny Sports Co UK Ltd Unit 8 Riparian Way ...

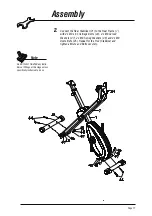
Page 17: ... Bolts 44 2 x M8 Curved Washers 47 2 x M8 Spring Washers 46 and 2 x M8 Dome Nuts 45 Repeat for the Front Stabilizer and tighten all Nuts and Bolts securely Do NOT FULLY TIGHTEN any Bolts Nuts or Fittings at this stage unless specifically instructed to do so Note Page 17 Assembly ...

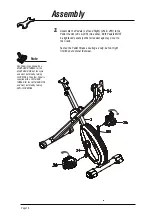
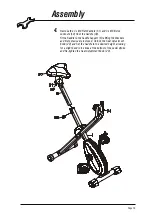
Page 18: ...h a LEFT HAND THREAD for the LEFT HAND SIDE and must be fitted by turning ANTI CLOCKWISE Note Page 18 3 Assemble the Pedals Left and Right 25L 26R to the Pedal Cranks 23L 24R See note Both Pedals MUST be tightened securely other wise damage may occur to the Crank Fasten the Pedal Straps ensuring a snug but not tight fit with your normal footwear Assembly ...

Page 19: ...0 Fit the Saddle to the Saddle Support 6 refitting the Washers and Nuts previously removed Unlock the Seat Adjustment Knob 29 and Set the Saddle to the desired height allowing for a slight bend in the knee at the bottom of the pedal stroke and Re tighten the Seat Adjustment Knob 29 Assembly ...

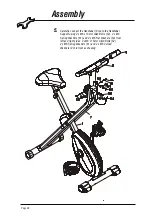
Page 20: ...o the Handlebar Support using 2 x M6 x 15mm Allen Bolts 52 2 x M6 Spring Washers 61 and 2 x M6 Flat Washers 53 from left and right sides 2 x M6 x 15mm Allen Bolts 52 2 x M6 Spring Washers 61 and 2 x M6 Curved Washers 43 in front as drawing Assembly ...

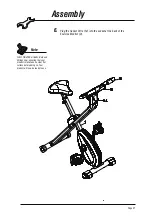
Page 21: ...d Fittings now ensuring that your product in located on a clear flat surface before doing so Your product will now be ready to use Note Page 21 6 Plug the Sensor Wire 54 into the socket at the back of the Exercise Monitor 9 Assembly ...

Page 22: ...Page 22 Assembly ...
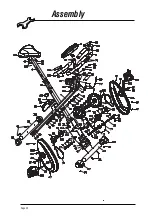
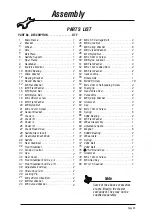
Page 23: ... Stabiliser Cap 4 34 Front Stabiliser End Cap L 1 35 Front Stabiliser End Cap R 1 36 1 37 Rear Cover Chain Cover L R 2 38 Locking Pin 2 39 1 40 Adjustable End Cap M8 Flat Washer 2 41 M6 Curved Washer 2 42 2 43 M8 x 20mm Allen Bolt M8 Dome Nut 4 44 M8 Spring Washer 4 45 6 46 M8 x 65 Carriage Bolt M10 Nylon Nut 4 47 M5 x 50mm Screw 2 48 1 49 M8 Curved Washer M8 Flat Washer 3 50 M6 x 15mm Allen Bolt ...

Page 24: ...ss Park Cross Hills West Yorkshire BD20 7BW CUSTOMER SUPPORT Open from 9 00am to 5 00pm from Monday to Friday Tel FREEPHONE in the UK 0800 3 101 202 or 44 0 1535 637711 outside the UK E mail support benysports co uk Website www benysports co uk Copyright BSCL 2019 ...

Reviews: