2
Base Assembly
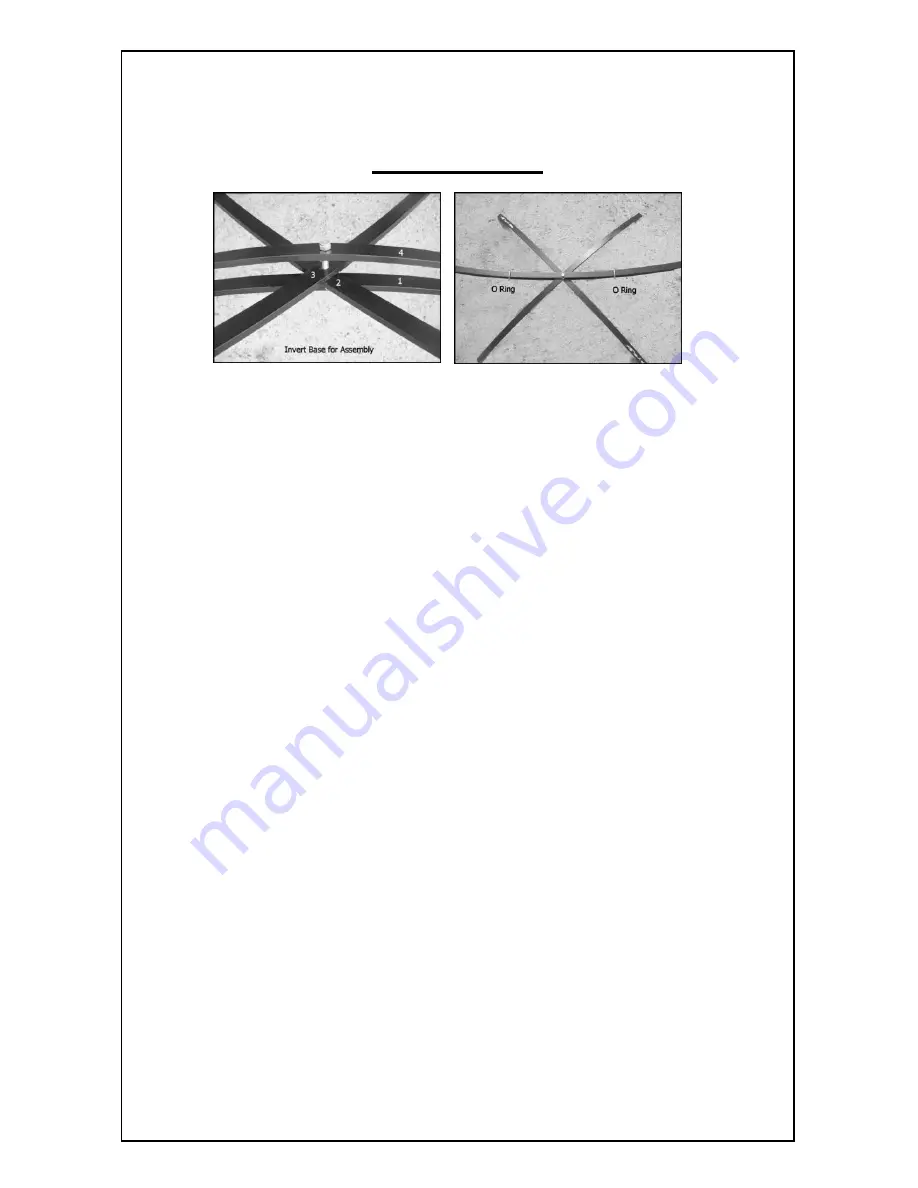
There are (4) parts to the base. Each is numbered and color
coded. Place the 5/16” washer on the bolt that goes through
the center of each piece. Invert the frame during the assembly
so the bolt is facing upward. Take #1 and place #2, #3 and #4
onto the center bolt. Place the second washer over the bolt
and loosely tighten the lock nut as shown. This will allow #4
to be turned parallel to #1 before tightening the lock nut
completely.
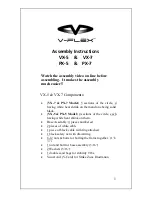
Turn part #4 parallel to part #1
. This is the hardest part of
the assembly. Once the parts line up, slide the O-Rings over
each end of the two parallel pieces to hold them in place while
the nut is being tightened. There is substantial pressure
between the two parts as the nut is being tightened.
Completely tighten lock nut. All pieces should be in their
pre-notched groves when finished with this phase. Also, there
should be a substantial amount of tension between part #1 and
part #4 when finished
.
The base must be assembled correctly for the product to
function properly.
If your base doesn’t look like this, call our
support line for assistance or watch the assembly video on our
website. Help Line: (865) 566-5425


