LED EMERGENCY LIGHTS
INSTALLATION:
• Provide power to the required point of installation
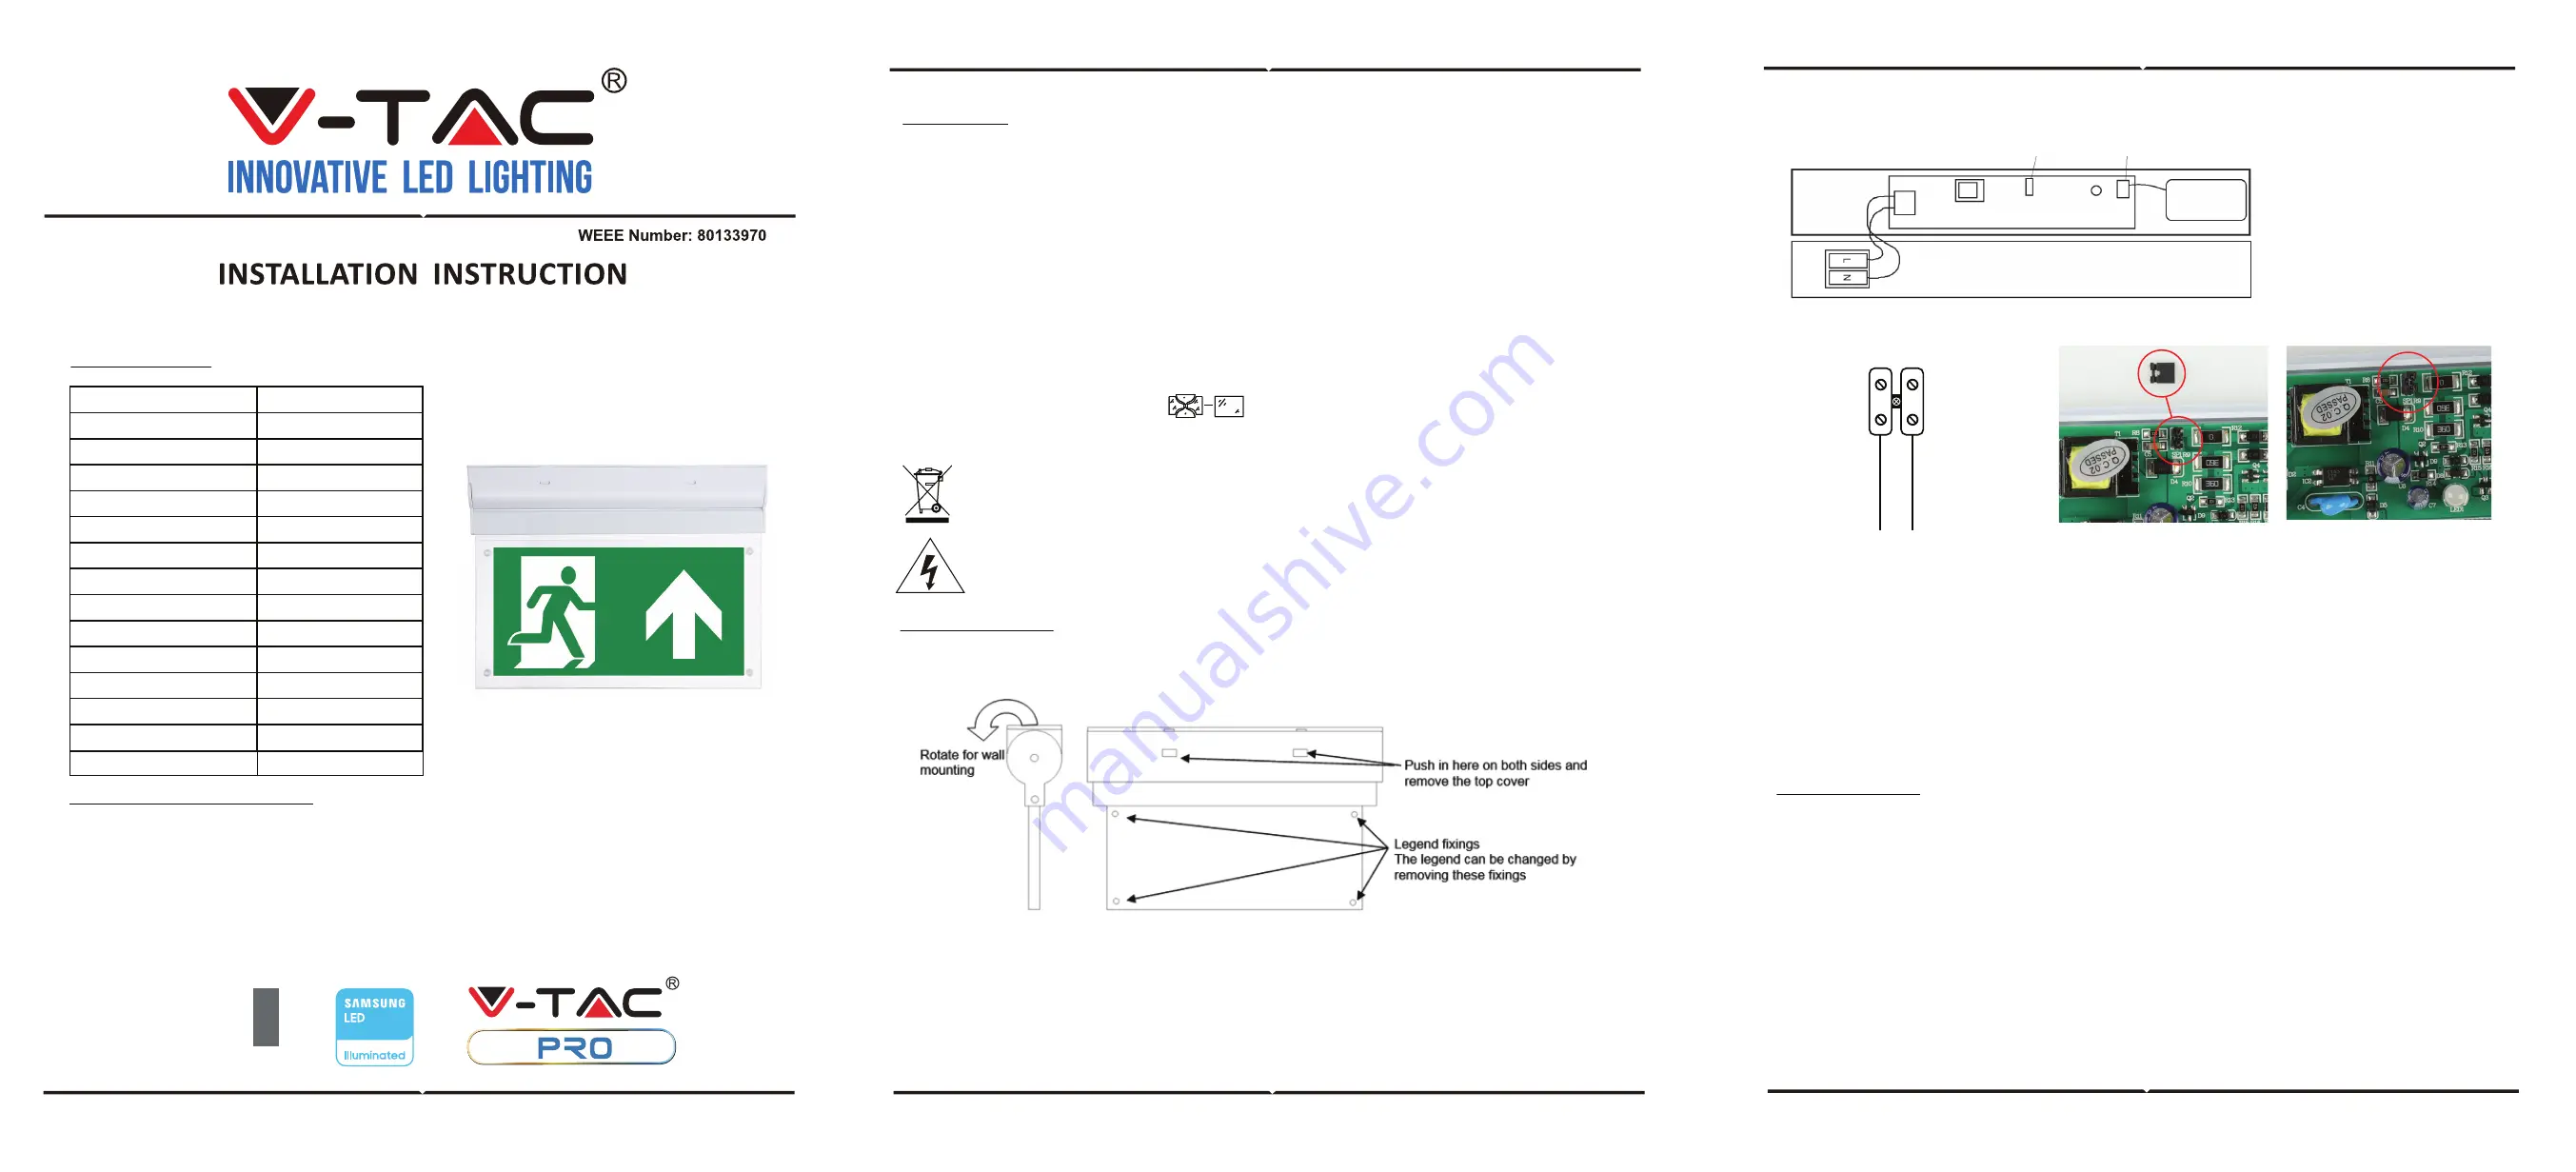
• Remove the top cover as shown below in the image
• Rotate up to 90° for Wall Mounting
TECHNICAL DATA
INTRODUCTION & WARRANTY
Thank you for selecting and buying V-TAC product. V-TAC will serve you the best. Please read these instruc-
tions carefully before starting the installing and keep this manual handy for future reference. If you have any
another query, please contact our dealer or local vendor from whom you have purchased the product. They
are trained and ready to serve you at the best. The warranty is valid for 3 years from the date of purchase.
The warranty does not apply to damage caused by incorrect installation or abnormal wear and tear. The
company gives no warranty against damage to any surface due to incorrect removal and installation of the
product. This product is warranted for manufacturing defects only.
• Using the top cover as a template, mark the location for, and drill 2 fixing holes ensuring not to infringe with
any joists, gas or water pipes or electrical cables.
• Feed the mains cable through the cable entry hole in the top cover.
• Connect mains cable into push-fit terminal block ensuring correct polarity is observed,see the following figures
for maintained, non-maintained and switched maintainedwiring diagram.
• Connect flying lead from battery pack to the socket on the PCB.
• Refit the exit sign to the top cover ensuring all 4 lugs lock into place.
WARNING:
• This product must be disconnected from the circuit if subjected to any high voltage or insulation resistance
testing. Irreparable damage will occur if this instruction is not followed
• Recommended routine test procedure in accordance with BS5266
• Daily check – check that the status GREEN LED indicator is illuminated
• Monthly functional test – simulate a mains supply failure for approx. 30 secs by operation of key switch or
switching off a circuit breaker. Ensure normal supply is restored after test and the indicator status LED is
illuminated
• Twice yearly conduct a one hour duration test - simulate a mains supply failure for one hour continuous test
by operation of key switch or switching off circuit breaker. Ensure normal supply is restored after test and the
indicator status LED is illuminated
• Annual full three hour duration test - conduct a three hour continuous duration test. Simulate a mains supply
failure for three hour continuous test by operation of key switch or switching off circuit breaker. Ensure normal
supply is restored after test and the indicator status LED is illuminated
• Please make sure to turn off the power before starting the installation.
• The light source of this luminaire is not replaceable; when the light source reaches its end of life the whole
luminaire shall be replaced.
• Replace any cracked protective shield.
• Installation should only be done by a certified electrician.
• For Indoor Use only
3
YEA
RS
WARRANTY
*
This marking indicates that this
product should not be disposed
of with other household wastes.
Caution, risk of electric shock.
ENGLISH
ENGLISH
ENGLISH
①
②
EMERGENCY TERMINATIONS MAINTAINED/NON-MAINTAINED
1. Remove 2-PIN connector for
Non-Maintained Operation
2. Connect battery lead
• Restore the supply and check that the Green LED indicator illuminates to confirm the batteries are charging.
There are three possible reasons when the green LED indicator does not light up:
1) there is no power supply AC220-240V,
2) the batteries are not properly connected to the PCB,
3) the batteries are not being charged.
• Allow a short period for partly charging the batteries and then isolate the mains supply to the fitting in order
to check the correct operation of the fitting in emergency mode. After 36 hours on continuous charge (and only
at a safe time) a mains failure should be simulated to ensure that the fitting illuminates for its rated emergency
duration.
The luminaire will have a 1-hour backup after 14 hours charging and will be fully charged after 24 hours (first
charge 36 hours)
MAINTENANCE
Once the luminaire no longer meets the rated emergency operation the batteries must be replaced after a
maximum of 4 years in service.
Repairs should only be carried out by a qualified person. Please recycle disposal of replaced components where
facilities exist. Special care should be taken if it’s required to open the fitting as the fitting may still be “live”
even though the mains supply has been isolated. In these circumstances immediately disconnect the battery
supply.
Servicing and cleaning should only be carried out after the fitting has been made electrically safe. Cleaning of
luminaires should be carried out at regular intervals not only to ensure good optical performance but also
ensure that dirt does not accumulate to such an extent as to impair the electrical or thermal safety of the
fitting.
IN CASE OF ANY QUERY/ISSUE WITH THE PRODUCT, PLEASE REACH OUT TO US AT: SUPPORT@V-TAC.EU
FOR MORE PRODUCTS RANGE, INQUIRY PLEASE CONTACT OUR DISTRIBUTOR OR NEAREST
DEALERS. V-TAC EUROPE LTD. BULGARIA, PLOVDIV 4000, BUL.L.KARAVELOW 9B
L
N
Live
(brown)
Neutral
(blue)
WIRING DIAGRAM
NON-MAINTAINED
MAINTAINED
Model
VT-519-S
WATTS
2W
NO. OF LED
16 SMD LEDs
LUMENS
140LM
BATTERY TYPE
Ni-Cd 3.6V, 900mAh
EMERGENCY OPERATION TIME
>3 Hours (Maintained)
BATTERY DISCHARGE CURRENT
200-280mA
BATTERY CHARGING CURRENT
100-140mA
RECHARGING
12 HOURS
VIEWING DISTANCE
24 METERS FROM BOTH SIDE
DIMENSION
INPUT POWER
AC:220-240V
STICKER
3 WAY LEGENDS AVAILABLE
INDICATOR
GREEN LIGHT TEST BUTTON
LAMP TYPE
EXIT LAMP
380x195x51mm


