19
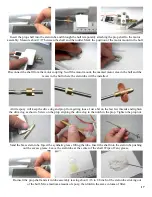
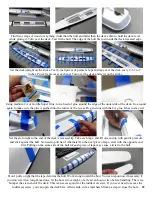
Install the rudder arm onto the centered servo. Secure it with the small screw from the servo package. Insert the
pushrod into the EZ connector. Straighten the rudder as shown.
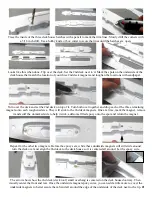
From the servo box, choose this rudder arm. Enlarge this rudder arm’s outer hole with a 1/16 inch drill. Install
the EZ Connector into the hole. It should rotate without binding. Install your radio gear and “center” the servo.
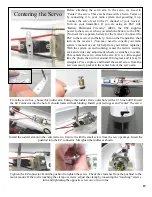
Before attaching the servo arm to the servo, we need to
“Center” the servo. This can be done with a Servo Tester or
by connecting it to your radio system and powering it up.
Connect the servo lead to the #1 channel of your receiver.
Turn on your transmitter. If you are using an ESC with
“Battery Eliminator Circuitry” (BEC), the ESC supplies
power to the receiver when you attach the battery to the ESC.
(No need for a separate battery for the receiver.) Connect the
ESC to the receiver and battery. Turn on the Transmitter, then
turn on the receiver. (You may need to consult your radio
system’s manual or ask for help from your fellow captains.)
With the system on and working, center the radio’s steering
stick and center any adjustment wheels or switches to center.
This centers the servo. Attach the arm. If it is a little angled
like the photo, then turn it around 180 degrees and it may fit
straighter. Press in place and install the small screw from the
servo accessory packet to the center hole of the servo arm.
Centering the Servo
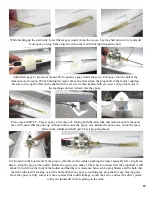
Tighten the EZ connector. Hold the pushrod to tighten the screw. Check the clearance from the pushrod to the
motor mount. If the rod is touching the clamp or screws, adjust the clamp by loosening the “touching” screw a
turn and tightening the opposite screw one or two turns.


