Commissioning
If Autoadjust is successful, the parameters will be stored automatically and the positioner will
revert to operating mode 1.1.
If an error occurs during Autoadjust, the process will be terminated with an error message. If
this happens, press and hold down or for approximately three seconds. The unit will switch
to the operating level, mode 1.3 (manual adjustment within the sensor range). Check the mount
and correct if necessary. Then run Autoadjust again.
6.
Set potential dead bands and tolerance bands.
This step is only required for critical (e.g., very small) actuators.
It is not necessary under normal circumstances.
1) The zero position is determined automatically and saved during Autoadjust (counter-clockwise (CTCLOCKW) for
linear actuators and clockwise (CLOCKW) for rotary actuators).
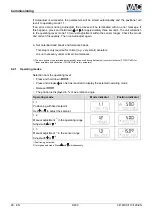
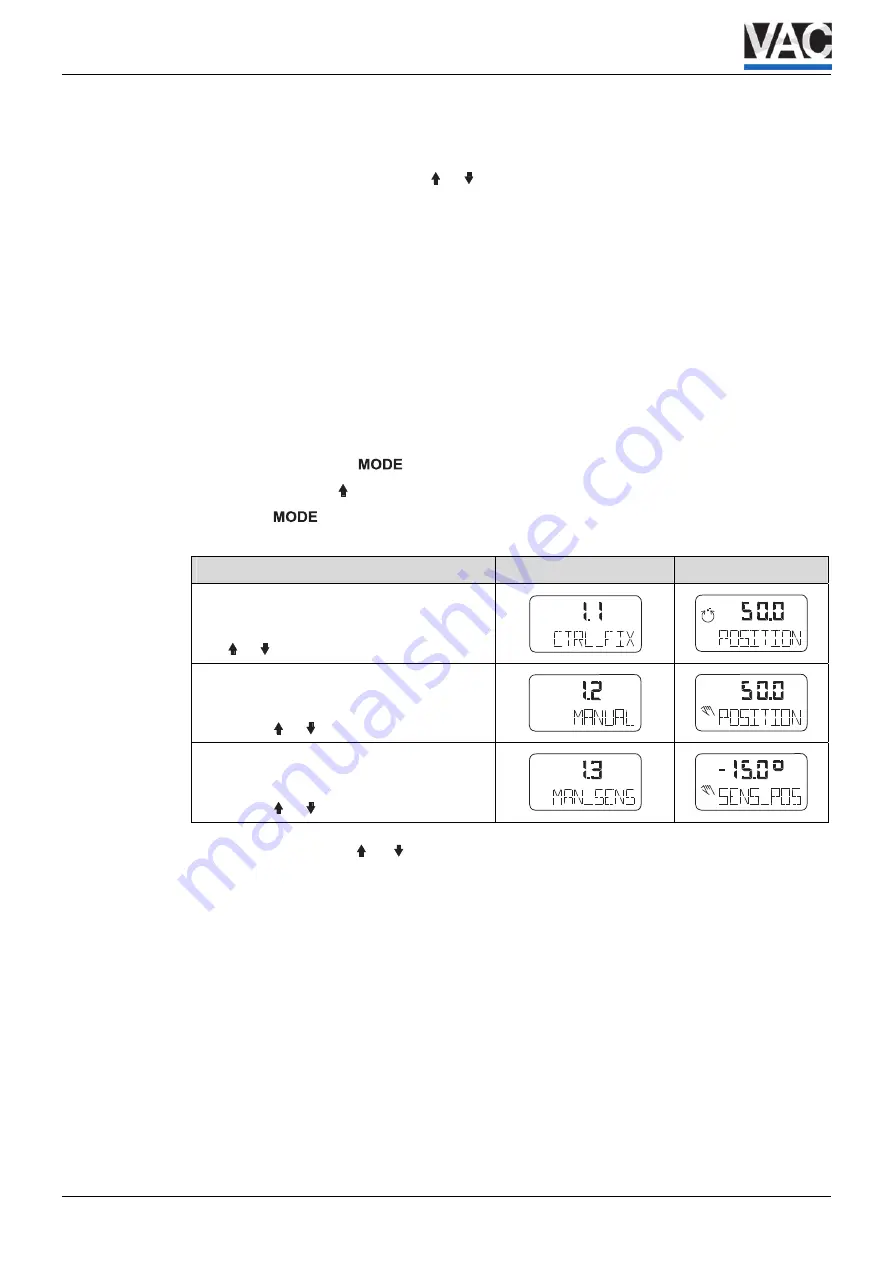
6.2.1 Operating modes
Selection from the operating level:
• Press and hold down
• Press and release as often as required to display the selected operating mode
• Release
• The position is displayed in % or as a rotation angle
Operating mode
Mode indicator
Position indicator
1.1
Positioning with fixed setpoint
Use or to adjust the setpoint
conf
mA
%
C
°
conf
mA
%
C
°
1.2
Manual adjustment
1)
in the operating range
Adjust with or
2)
conf
mA
%
C
°
conf
mA
%
C
°
1.3
Manual adjustment
1)
in the sensor range
Adjust with or
2)
conf
mA
%
C
°
conf
mA
%
C
°
1) Positioning not active.
2) for high-speed mode: Press and simultaneously.
26 - EN
D400
CI/TZIDC/110/120-EN

