11
CHECKING OUTPUT TUBE CONDITION / OUTPUT TUBE BIAS ADJUSTMENT
Bias settings it should be checked when you install your amplifier and approximately once every
month thereafter. It must also be adjusted each time a tube is replaced.
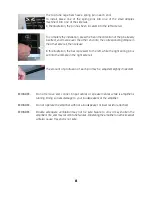
The condition of the individual KT88 output tubes is checked using the TEST switch and eight built
in indicator lights (four on each side of the front panel, adjacent to the adjustment points..
If checking existing tubes, allow the amplifier to reach normal operating temperature (about ten
minutes of warmup should be sufficient). If installing new tubes, see INSTALLING NEW OUTPUT
TUBES.
To start, be certain to stop the music; no music should be playing during the adjustments. Next,
move the TEST switch to the right.
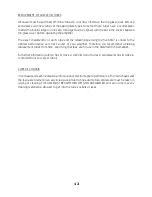
Start with the V06 BIAS control. Insert the supplied screwdriver (or a small flat bladed screwdriver)
into the adjustment control and turn in clockwise until the adjacent LED just lights; then turn it slightly
counterclockwise until the light goes out. Next, go to V07 BIAS and repeat the procedure, and so
on, through the V13 BIAS setting.
Because the adjustments can interact slightly, recheck all eight tubes, starting with V06.
The TEST switch may be turned off, or may remain on while playing music. If left on, the lights will
illuminate at low volume levels and appear to flash with the beat of the music. This is a simple way
to monitor bias in an ongoing fashion; the lights should be out between songs, and come on more
or less equally at low levels of music.


