7
PERFORMING TEST
Remove new test strip from vial. Be sure to tightly replace
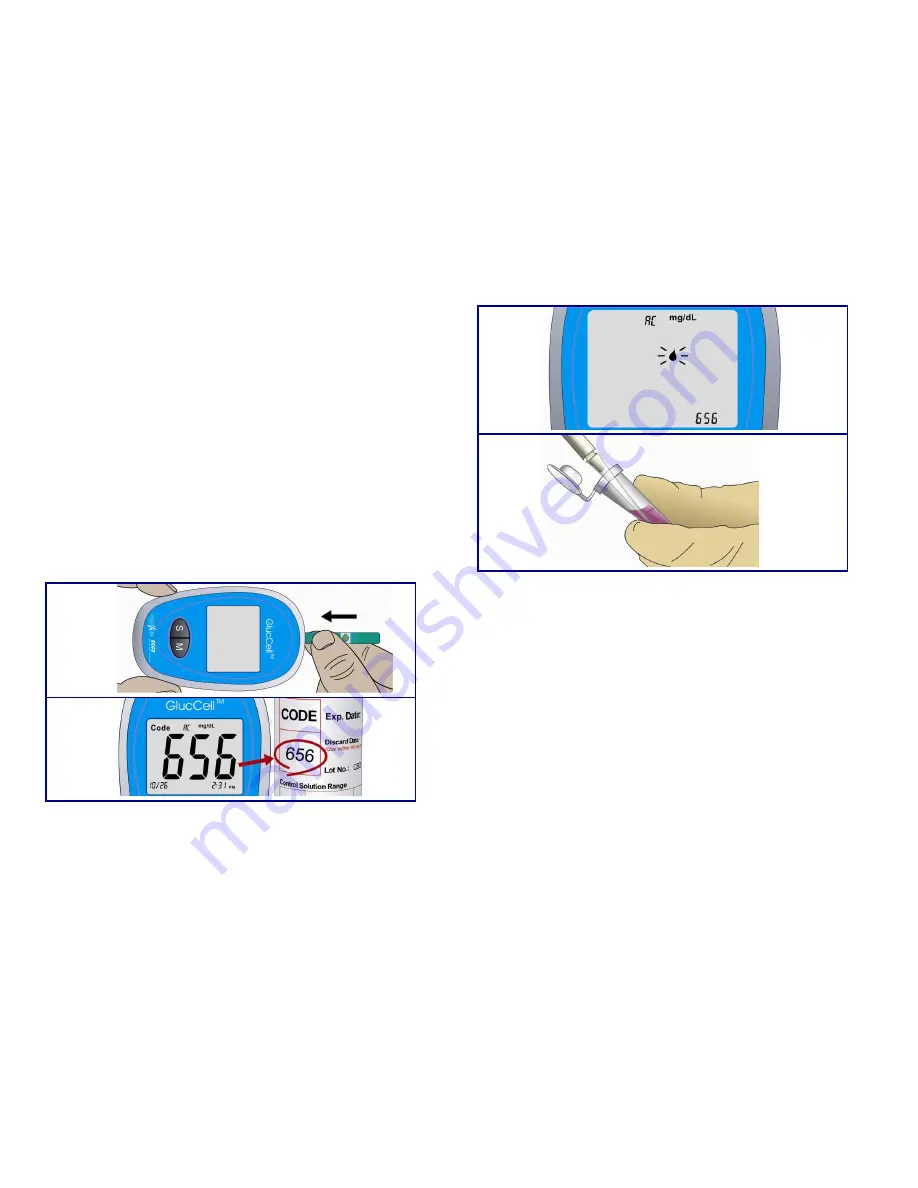
vial cap after removing test strips. Insert test strip
immediately into strip slot as illustrated (FIG 1). The meter
turns on automatically.
Check that the code number in the meter matches the
code on the vial (FIG 2). If the two numbers match you
may begin testing. Otherwise refer to above section to
code your meter first.
When the drop symbol flashes (FIG 3), you are ready to
perform a test. To perform the test, you need only 1.5 uL
of test sample. Use a pipette tip to withdraw around 1.5 ul
test sample (FIG 4).
FIG 1
FIG 2
FIG 3
FIG 4
Carefully depress to form a 1.5uL droplet on the pipette
tip. Bring the droplet underneath the right or left aperture
of the testing strip and touch gently to the strip, allowing
the entire droplet to be wicked into the strip. (FIG 5 ).
Please allow the sample to be absorbed naturally to fill up
the confirmation window Make sure that the sample has
saturated the test confirmation window. Never push test
sample over the aperture and cause overloading of the
sample. When sample is applied to the strip, a line moves
on the screen until measurement is completed (FIG 6).
Test result will show up in 15 seconds (FIG 7 ).
After test complete, remove the strip from meter (FIG 8),
and discard the used strip safely.
The measuring range of the meter is from 20 to 600


