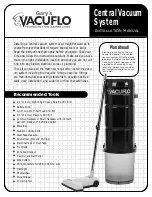


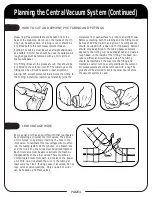

Plan Ahead!
Planning is the key to the suc-
cessful installation of a central
vacuum system. Strive to obtain
a balance between the best loca-
tions for the inlet valves and the
practicality of servicing these
locations. Always fully consider
the implications before you cut
into a wall.
INSTALLATION MANUAL
Central Vacuum
System
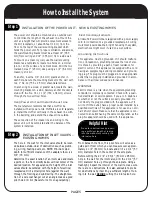
•
1/2" (1.3 cm) Right Angle Heavy Duty Electric Drill
•
Battery Drill
•
2-1/4" to 2-9/16” Self Feed Drill Bit
•
1/4" (6.4 mm) Masonry Drill Bit
•
Common Hacksaw or Small Handsaw with 18 teeth
per inch blade or 2" PVC Pipe Cutter
•
Mitre Box
•
Pocket or Utility Knife
•
Steel Tape Measure
•
Screwdriver (Slot and Phillips)
•
Electrical Tape or Duct Tape
•
Tie Wraps
•
Wire Coat Hanger
•
Hammer and Nail Puller
•
Side Cutters
•
Wire Connectors for #18 (1.00 mm) wire
•
Flashlight
•
Drywall Saw
•
Wire Stripper
•
Crimping Tool
Installing a central vacuum system is a straightforward do-it-
yourself project that doesn’t require special tools or skills.
Read the instructions thoroughly before you begin. Take your
time and follow the instructions carefully. Make sure you have
chosen the right installation location and that you are not cut-
ting into any hidden electrical wires or plumbing.
This kit contains all the materials required to install the vacu-
um system including the Vaculine fittings. Vaculine fittings
are manufactured to exacting standards to provide positive
seals, easy installation, and superior airflow characteristics.
Recommended Tools