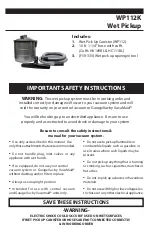

Wash and check the float before each use...
Once the float dries, it can get stuck to the bottom of
the cage on the underside of the lid. When this occurs,
it prevents the float from being able to rise up and seal
the water from getting into the unit. This can cause
damage to your unit, as well as possiblity of shock.
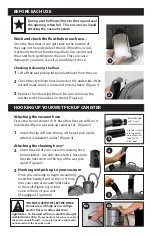
Lift off the wet pickup lid by unlatching it from the can.
Check the styrofoam float located on the underside of the
lid and make sure it is loose and moving freely. (Figure 1)
Replace the lid and latch back. Be sure to line up the
latches with the notches on the lid. (Figure 2)
Checking & cleaning the float
1
2
3
BEFORE EACH USE
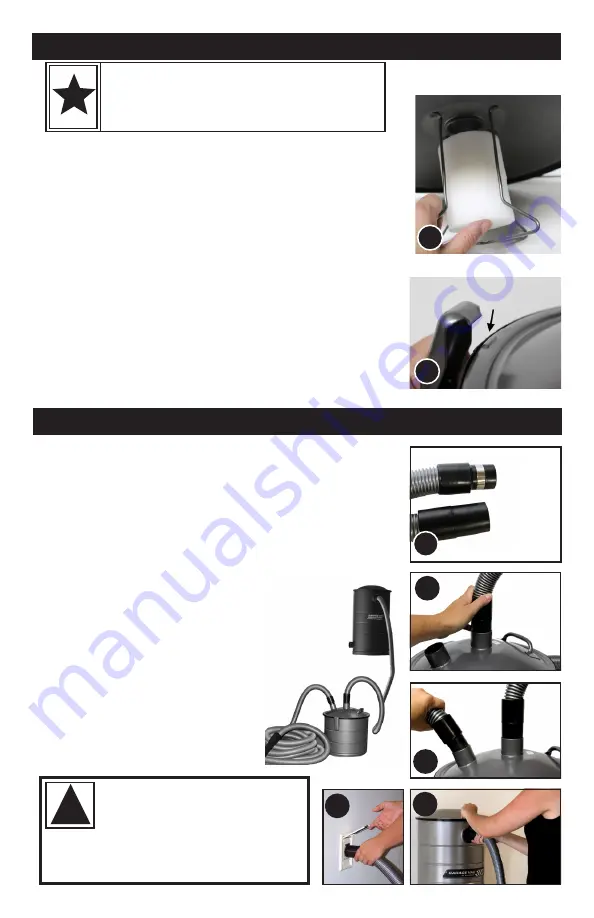
Attaching the vacuum hose
First, attach your shorter 10 ft. hose that has two cuffs on it
included with your wet pick up canister set. (Figure 3)
Insert the slip cuff into the top of the wet pick up lid,
where it is labeled “to inlet”. (Figure 4)
Attaching the cleaning hose*
Insert the end of your vacuum cleaning hose
(not included - Use only non-electric hose) into
the side inlet stem on the top of the wet pick
up lid. (Figure 5)
3
HOOKING UP YOUR WET PICKUP CANISTER
During use the float will rise to the top and seal
the opening when full. This ensures no liquid
entering the vacuum system.
1
2
Metal banded
cuff - Inserts
into inlet valve
Slip cuff - Inserts
into top center
hole of canister.
Look for “To
Inlet” label.
4
5
3
6b
6a
*DO NOT USE WITH ELECTRIC HOSE
Do not use with high or low voltage
electric hoses or other electrical
!
1
2
appliances. To be used with non-electric straight
suction hoses only.
(If your hose has two pins or a cord at
the end or an on/off switch, it is an electric hose and should
not be used with the wet pick up kit.)
Hooking wet pick up to your vacuum
Once you are ready to begin vacuuming,
insert the banded end of the 10 ft. hose
Into your central vacuum inlet valve
in the wall (Figure 6a) or inlet
valve on front of your unit
(if equipped; Figure 6b).