page 48 of 152
A warm up period (approximately 15 min.) is
required to ensure that the rated ultimate vac-
uum and pumping speed are attained.
O
➨ I
m
3
/h
Torr/mbar
✔
✔
~15min
Important notes regarding the use of gas ballast
Gas ballast is a continuous purge to keep the pump’s in-
terior as clean as possible and to reduce the possibility of
condensation inside the pump.
➨
Air and pumped media might react inside the pump or
at the outlet of the pump and form hazardous or explo-
sive mixtures, when you use air rather than inert gas
for the gas ballast. This constitutes a risk of significant
damage to equipment and/or facilities, a risk of per-
sonal injury or even loss of life.
+
Make sure that air/gas intake through the gas ballast
valve can never lead to hazardous, explosive or other-
wise dangerous mixtures. If in doubt, use inert gas.
To reduce condensation in the pump, do not pump vapor
before the pump has reached its operating temperature.
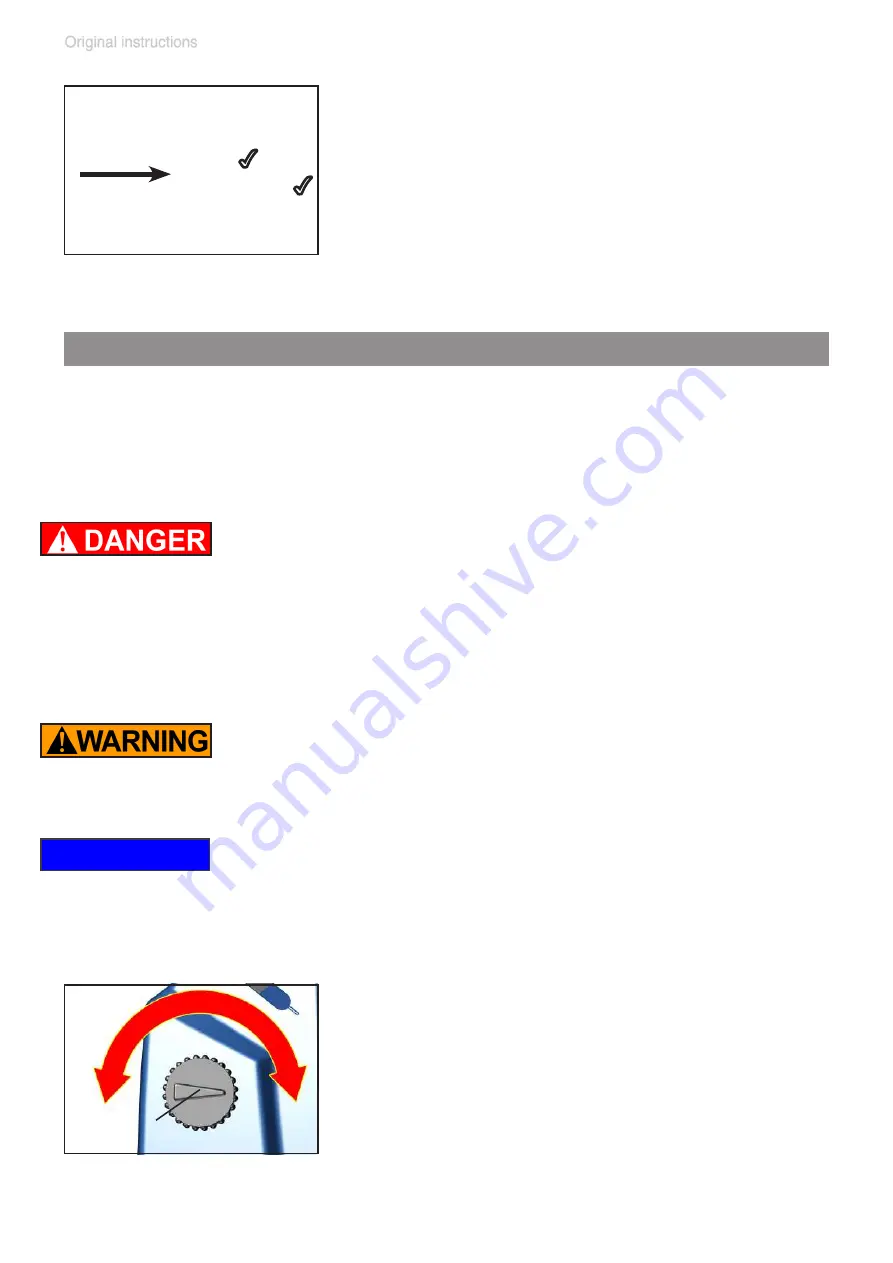
Open the gas ballast valve when pumping condensable
vapors. Turn gas ballast cap to open valve.
NOTICE
gas ballast
(open)
For
condensable vapors
(water vapor, sol-
vents, etc.):
- The gas ballast valve is open if the arrow on
the gas ballast cap is pointing towards the
inlet of the pump.
- With gas ballast valve open, the ultimate
vacuum will be reduced.
Summary of Contents for MV 10C NT VARIO o.C.
Page 34: ...page 34 of 152 1 8 2 9 18 PC 3012 NT VARIO EK Peltronic 12 11 16 8 17 3 4...
Page 104: ...page 104 of 152 2 3 size 1 2x 4...
Page 105: ...page 105 of 152 6 5 7 4 4x...
Page 106: ...page 106 of 152 9 8 1 2 2 5 mm 2 5 mm 10 ME 16C NT VARIO MD 12C NT VARIO MV 10C NT VARIO...
Page 108: ...page 108 of 152 12 Emission condenser Peltronic 4 4x 11A 13 4 2x...
Page 109: ...page 109 of 152 15 14 4 4x Don t loosen this screw 15A 16...
Page 110: ...page 110 of 152 16 17 5 2x 15A 1 2 3 1 4 1 4 3 2x 5...
Page 111: ...page 111 of 152 19 20 18 5 2x...
Page 113: ...page 113 of 152 21 2 5 mm Replacing the diaphragms 22 23 696867 696839 Clean 5 8x...
Page 114: ...page 114 of 152 24 25 26 1 2...
Page 115: ...page 115 of 152 27 3 28 29 Pay attention to number of washers...
Page 118: ...page 118 of 152 36 37 38 Clean...
Page 119: ...page 119 of 152 39 40 41 IN IN EX EX 696867 696839 4x...
Page 120: ...page 120 of 152 42 43 44 IN EX T20 4x 2 2 ft lbf 3 Nm...
Page 121: ...page 121 of 152 45 46 47 Maintain all pump heads in the same way...
Page 125: ...page 125 of 152 2 size 2 2x 3 4A Version A valve 24 4 mm...
Page 126: ...page 126 of 152 5A 696839 24 4 mm 26 mm 4B 5B 696839 37 mm 40 mm Version B valve 37 mm...
Page 127: ...page 127 of 152 6 7 size 2 2x 7A ME 16C NT VARIO MD 12C NT VARIO MV 10C NT VARIO size 2 2x...
Page 129: ...page 129 of 152 49 Assembling the pump housing 50 51 5 2x 8 9 ft lbf 12 Nm...
Page 130: ...page 130 of 152 52 53 54 5 2x 8 9 ft lbf 12 Nm...
Page 131: ...page 131 of 152 55 55A 1 2 3 3 2x 55A 56...
Page 132: ...page 132 of 152 56 4 4x 3 7 ft lbf 5 Nm 58 4 4x 3 7 ft lbf 5 Nm 57 4 2x 3 7 ft lbf 5 Nm...
Page 133: ...page 133 of 152 59 60 61...
Page 135: ...page 135 of 152 62 63 4 4x 3 7 ft lbf 5 Nm 64...
Page 136: ...page 136 of 152 65 66 67 size 1 2x...
Page 137: ...page 137 of 152 68 69...
Page 140: ...page 140 of 152 4 638821 638821 5 6...
Page 141: ...page 141 of 152 7 T20 4x size 1 4x 8...
Page 149: ...page 149 of 152...
Page 150: ...page 150 of 152...
Page 151: ...page 151 of 152...


