page 74 of 152
Configuration
In the ”Configuration” menu the device parameters are preselected.
After 20 seconds without action the function ”Configuration” and its sub
-
menus (except submenu ”Sensors”) are quit automatically without stor-
ing any possibly changed parameter.
+
Adjustment
:
Adjustment of the pressure transducer under vacuum
and/or at atmospheric pressure, see also section ”Readjustment of
Adjustment to atmospheric pressure is carried out at an absolute pres-
sure value between 795 - 525 Torr (1060 - 700 mbar). This is espe-
cially helpful in high elevation laboratories. Adjustment under vacuum
may be done at an absolute vacuum value between 0 - 15 Torr (0 - 20
mbar). In the range between 15 to 525 Torr (20 to 700 mbar) no adjust-
ment is possible; ---- Torr is displayed.
+
RS-232
:
Configuration of the interface, setting of parameters and com
-
mands, see section ”Interface”.
Baud rate can be set to 19200, 9600, 4800 or 2400, parity on ”8-N-1”,
”7-O-1” or ”7-E-1”, Handshake on ”no”, ”Xon-Xoff” or ”RTS-CTS” and
remote on ”On” or ”Off”.
+
Sensors
:
Selection of the pressure transducer to be controlled (maxi-
mum 4 external sensors).
+
Display
:
Selection of the device parameters ”
Brightness
” between 0
- 100%, ”
Contrast
” between 0 - 100%, ”
Sound
” ”On” or ”Off”, ”
Units
”
”mbar”, ”hPa” or ”Torr”, ”
Language
” ”German”, ”English”, ”French”,
”Italian”, ”Spanish”, ”Turkish”, ”Korean”, ”Chinese”, ”Portuguese”,
”Russian”, ”Polish”, ”Dutch”, ”Japanese”, ”Finnish”.
+
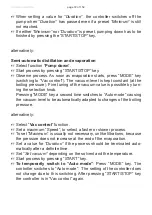
Autostart
:
If ”
Autostart
” is set to ”On” the controller restarts a running
process automatically after a mains failure. If this is unwanted, set
”
Autostart
” to ”Off”.
Attention:
If
”
Autostart
” is preselected, the process starts
immediately after power failure without pressing any fur-
Preselections
+
Use the selection knob to select the parameters.
Summary of Contents for MV 10C NT VARIO o.C.
Page 34: ...page 34 of 152 1 8 2 9 18 PC 3012 NT VARIO EK Peltronic 12 11 16 8 17 3 4...
Page 104: ...page 104 of 152 2 3 size 1 2x 4...
Page 105: ...page 105 of 152 6 5 7 4 4x...
Page 106: ...page 106 of 152 9 8 1 2 2 5 mm 2 5 mm 10 ME 16C NT VARIO MD 12C NT VARIO MV 10C NT VARIO...
Page 108: ...page 108 of 152 12 Emission condenser Peltronic 4 4x 11A 13 4 2x...
Page 109: ...page 109 of 152 15 14 4 4x Don t loosen this screw 15A 16...
Page 110: ...page 110 of 152 16 17 5 2x 15A 1 2 3 1 4 1 4 3 2x 5...
Page 111: ...page 111 of 152 19 20 18 5 2x...
Page 113: ...page 113 of 152 21 2 5 mm Replacing the diaphragms 22 23 696867 696839 Clean 5 8x...
Page 114: ...page 114 of 152 24 25 26 1 2...
Page 115: ...page 115 of 152 27 3 28 29 Pay attention to number of washers...
Page 118: ...page 118 of 152 36 37 38 Clean...
Page 119: ...page 119 of 152 39 40 41 IN IN EX EX 696867 696839 4x...
Page 120: ...page 120 of 152 42 43 44 IN EX T20 4x 2 2 ft lbf 3 Nm...
Page 121: ...page 121 of 152 45 46 47 Maintain all pump heads in the same way...
Page 125: ...page 125 of 152 2 size 2 2x 3 4A Version A valve 24 4 mm...
Page 126: ...page 126 of 152 5A 696839 24 4 mm 26 mm 4B 5B 696839 37 mm 40 mm Version B valve 37 mm...
Page 127: ...page 127 of 152 6 7 size 2 2x 7A ME 16C NT VARIO MD 12C NT VARIO MV 10C NT VARIO size 2 2x...
Page 129: ...page 129 of 152 49 Assembling the pump housing 50 51 5 2x 8 9 ft lbf 12 Nm...
Page 130: ...page 130 of 152 52 53 54 5 2x 8 9 ft lbf 12 Nm...
Page 131: ...page 131 of 152 55 55A 1 2 3 3 2x 55A 56...
Page 132: ...page 132 of 152 56 4 4x 3 7 ft lbf 5 Nm 58 4 4x 3 7 ft lbf 5 Nm 57 4 2x 3 7 ft lbf 5 Nm...
Page 133: ...page 133 of 152 59 60 61...
Page 135: ...page 135 of 152 62 63 4 4x 3 7 ft lbf 5 Nm 64...
Page 136: ...page 136 of 152 65 66 67 size 1 2x...
Page 137: ...page 137 of 152 68 69...
Page 140: ...page 140 of 152 4 638821 638821 5 6...
Page 141: ...page 141 of 152 7 T20 4x size 1 4x 8...
Page 149: ...page 149 of 152...
Page 150: ...page 150 of 152...
Page 151: ...page 151 of 152...


