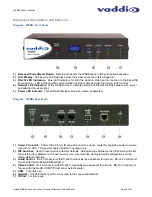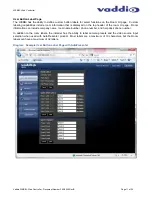
WEBBi - Web Controller
Vaddio WEBBi - Web Controller - Document Number 342-0445 Rev B Page 9 of 24
Installation Instructions
WEBBi
Locate the WEBBi near a Network jack for control over the Local Area Network. Follow the steps below to install
all of the devices.
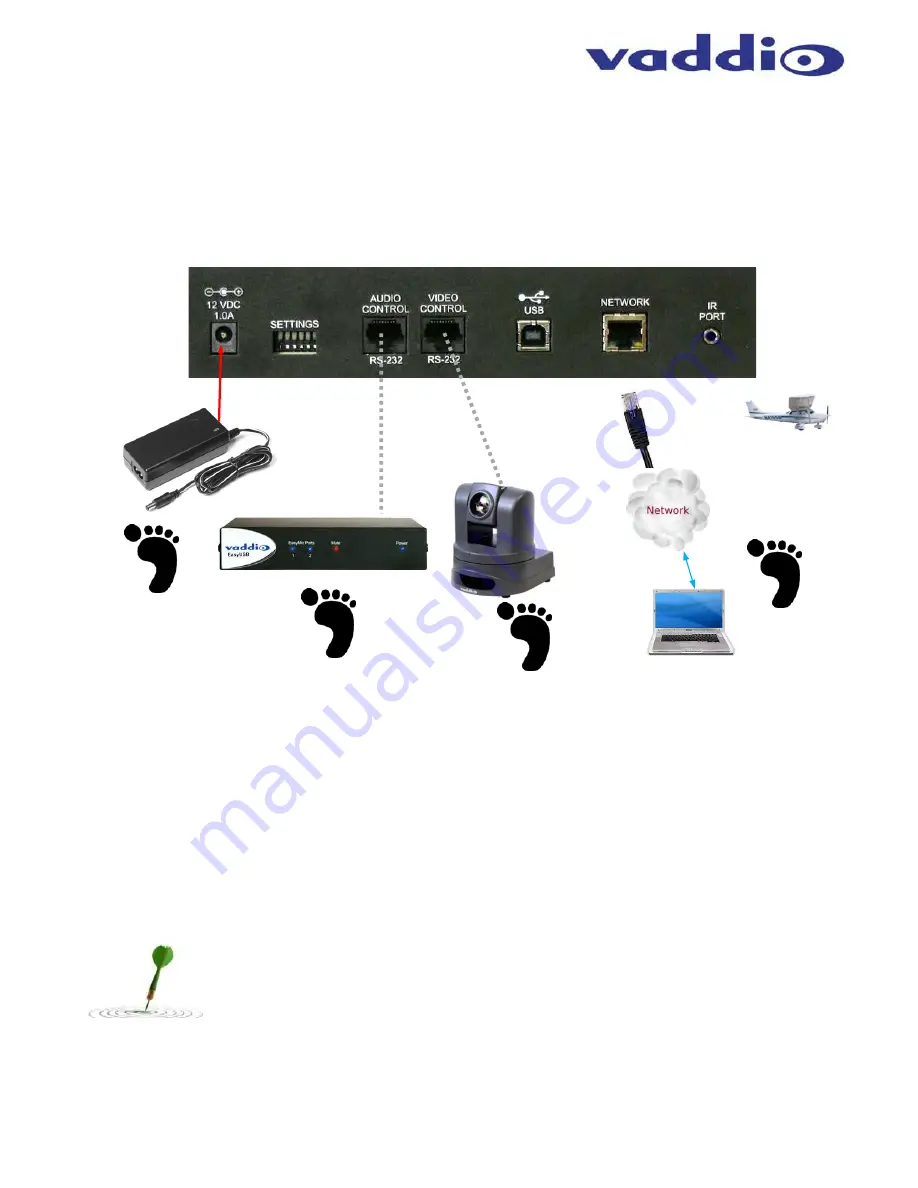
Diagram: WEBBi Installation Steps
STEP 1:
Plug 12 VDC, 1.0 Amp power supply included in package into the WEBBi. Power LED on the front
panel should light solid blue when powered.
STEP 2:
Connect RJ-45 using CAT-5 or better cable between WEBBi audio control RS-232 RJ-45 jack and
EasyUSB Mixer/Amp RS-232 RJ-45 jack for audio control via web pages.
STEP 3:
Connect RJ-45 using CAT-5 or better cable between WEBBi video control RS-232 RJ-45 jack and
ClearVIEW HD-USB PTZ Camera (RJ-45 jack) or AutoPresenter RS-232 9-pin jack.
STEP 4:
Connect WEBBi to the LAN for serving web pages over an IP address configured by the
administrator**.
**Note:
The WEBBi can be directly connected to a PC using a network crossover cable for
initial installation configuration purposes. In absence of a DHCP server in this scenario, the
WEBBi will default to a static IP address of 169.254.1.1. Once connected with the Network
crossover cable, the installer can use this static IP address in the browser to navigate to the
web pages**.
1
2
3
4
WEBBI - Web Controller
Cessna 174
Not Included
PC
HD-USB PTZ
Camera
EasyUSB
Mixer/Amp
12 VDC, 1.0
Amp Power
Supply


