Web Tasks for Administrators: Color, Lighting, and Speed Adjustments
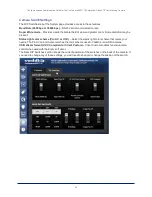
The Camera Settings page lets you do these things:
n
the camera uses.
n
Set the
that will be used.
Adjust the Color Settings
1. To allow the camera to compensate automatically for the light level, check the Auto Iris box. Leave it
unchecked to adjust iris and gain manually.
2. Auto Iris adjustments – these adjust contrast between the brightest and darkest areas of the image.
n
If there is bright light behind the main subject of the shot, check the box for Back Light
Compensation.
n
To increase contrast between the brightest and darkest areas, check the box for Wide Dynamic
Range.
Because Backlight Compensation reduces the contrast between extremes and Wide Dynamic Range
increases it, they cannot be used together.
3. To allow the camera to adjust the white balance automatically, check the Auto White Balance box.
Leave it unchecked to adjust red gain and blue gain manually.
4. Detail – adjust the slider as required for the right image sharpness.
Note
If the video looks grainy or “noisy,” try a lower Detail setting.
5. Chroma – adjust the slider as needed for the right level of color intensity.
6. Gamma – adjust the slider as needed for the desired range between bright areas and shadows.
If you make a change that you don't like, start over by selecting and then deselecting Auto White Balance.
Set Pan, Tilt, and Zoom Speeds
In the Global Preset Speeds section, set the speeds for movements to presets.
21
Configuration and Administration Guide for the ConferenceSHOT 10 Enterprise-Class PTZ Conferencing Camera


