background image

Configuring RTMP Streaming

S

TREAMING PAGE

To use RTMP streaming, you must have an account with a streaming service.

To configure an RTMP streaming service:

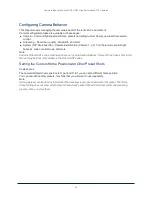
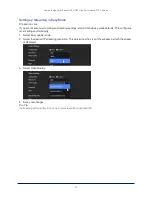
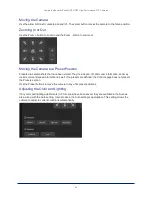
1. Select RTMP streaming, and select Settings.

2. Expand the information box for the service.

3. Enter the name of the service.

4. Paste in the key and URL(s) provided by the service.

54

Complete Manual for RoboSHOT HDBT High-Performance PTZ Cameras

Summary of Contents for RoboSHOT HDBT Series

Page 1: ...Complete Manual for RoboSHOT HDBT High Performance PTZ Cameras Including RoboSHOT 12 HDBT RoboSHOT 30 HDBT RoboSHOT 12E HDBT and RoboSHOT 30E HDBT Document 411 0003 30 Rev E April 2019...

Page 2: ...tions RoboSHOT 12E HDBT or RoboSHOT 30E HDBT 16 Basic Connections RoboSHOT 12 HDBT or RoboSHOT 30 HDBT 17 Basic Connections RoboSHOT HDBT with Camera Extension 18 Basic Connections RoboSHOT HDBT Basic...

Page 3: ...42 Renaming Presets and Custom CCU Scenes 43 Initial Lighting and Color Settings 44 Lighting Adjustments 45 Fine Tuning Image Quality and Color 45 Lighting and Image Quality Cheat Sheet 46 Color Adju...

Page 4: ...u scene 73 camera led 73 camera standby 74 streaming ip enable 74 streaming settings get 75 network settings get 75 network ping 76 system reboot 76 system factory reset 77 history 78 version 78 help...

Page 5: ...es 92 Restoring Factory Settings from the Web Interface 93 Restoring Factory Default Settings Via Hardware 93 Operation Storage and Care 94 Compliance and Conformity Statements 95 FCC Part 15 Complian...

Page 6: ...I System for Cisco Codecs North America 999 95750 400 black 999 95750 400W white n RoboSHOT 12E HDBT OneLINK HDMI System for Cisco Codecs Europe UK 999 95750 401 black 999 95750 401W white n RoboSHOT...

Page 7: ...w the RTSP stream from the camera using any standards based media viewer n RoboSHOT 12 HDBT Exmor 1 2 8 type image sensor n RoboSHOT 30 HDBT Exmor R back lit 1 2 8 type high speed low noise image sens...

Page 8: ...W white n RoboSHOT 12E HDBT camera black or white n Thin Profile Wall Mount with mounting hardware black or white depending on camera color n Vaddio IR Remote Commander n PoE mid span power injector w...

Page 9: ...ending on camera color n Vaddio IR Remote Commander n 12 VDC 3 0 A switching power supply with AC cord set s n Quick start guide RoboSHOT 12E HDBT OneLINK HDMI System for Cisco Codecs North America 99...

Page 10: ...DBT OneLINK Bridge System for Cisco Codecs North America 999 96750 400 black 999 96750 400W white RoboSHOT 12E HDBTOneLINK Bridge System for Cisco Codecs Europe UK 999 96750 401 black 999 96750 401W w...

Page 11: ...DMI System for Polycom Codecs Europe UK 999 95450 501 black 999 95450 501W white n RoboSHOT 12E HDBT camera n Thin Profile Wall Mount with mounting hardware black or white depending on camera color n...

Page 12: ...Control Adapter n Application Note Using RoboSHOT Series Cameras with Polycom Codecs n Quick start guides RoboSHOT 12 OneLINK Bridge System for Polycom Codecs North America 999 9645 500 silver black...

Page 13: ...e 10x optical zoom in normal mode Recommended for small to medium sized conference rooms n RoboSHOT 12E HDBT 12x optical zoom recommended for small to medium sized conference rooms n RoboSHOT 30 HDBT...

Page 14: ...to the network via PoE injector or OneLINK device for power video streaming and control via the web interface or Telnet session n HDMI HDMI video output connector n HD Video Resolution Select Rotary...

Page 15: ...Connect to the network optionally via PoE injector or to a OneLINK device for streaming and for control via the web interface or Telnet session n HDMI HDMI video output connector n HD Video Resolutio...

Page 16: ...ate this product if it has been dropped damaged or exposed to liquids If any of these things happen return it to Vaddio for safety and functional testing Caution If using a DC power supply with this p...

Page 17: ...ra extension system with the camera attach the EZIM the smaller unit to the camera mount and route the camera cables through the opening before you install the mount You can install the camera wall mo...

Page 18: ...ce Set the desired video output resolution with the rotary switch before installing the camera Note that the video resolutions are mapped differently on the rotary switch for the newer Elite series ca...

Page 19: ...o control them independently Then use the Camera Select buttons at the top of the remote to select the camera you want to control n SW1 and SW2 up IR frequency 1 n SW1 down SW2 up IR frequency 2 n SW1...

Page 20: ...king cables do not use pass through RJ 45 connectors If they are crimped incorrectly they can damage the connectors on the product cause intermittent connections and degrade signal quality Physical da...

Page 21: ...the network administrator to determine how to configure the equipment See Configuring the Camera with a Static IP Address for step by step instructions to configure a static IP address Basic Connectio...

Page 22: ...Connections RoboSHOT 12 HDBT or RoboSHOT 30 HDBT This diagram shows a basic installation for a RoboSHOT 12 HDBT or RoboSHOT 30 HDBT camera 17 Complete Manual for RoboSHOT HDBT High Performance PTZ Ca...

Page 23: ...RoboSHOT 12 HDBT camera connected to a OneLINK HDMI interface to extend power video and control over a single cable The RoboSHOT 12E HDBT RoboSHOT 30 HDBT and RoboSHOT 30E HDBT can be connected in the...

Page 24: ...amera with a OneLINK Bridge interface in a basic conference room installation The RoboSHOT 12E HDBT RoboSHOT 30 HDBT and RoboSHOT 30E HDBT can be connected in the same way Note that the speakers must...

Page 25: ...rovided 12 VDC power supply Network and video output require separate connections Connect the camera to a OneLINK device A single Cat 5e or better cable to the OneLINK HDBaseT connector provides power...

Page 26: ...unt 3 Level the mount and tighten the mounting screws 4 Connect the cables to the camera Caution If using local power rather than connecting to a OneLINK extension module or using PoE use the power su...

Page 27: ...camera receives a command from the remote n Red On air tally signal provided by external device via serial connection n Blinking red Video is muted UC color scheme only n Purple In standby mode or bo...

Page 28: ...ss and hold for 3 seconds Move the camera Arrow buttons and Home button dark red Move the camera to a preset position Position Preset buttons 1 through 6 bottom two rows Focus the camera Auto Focus bu...

Page 29: ...amera Pan Tilt Reset Not used Auto Focus Switch the camera to Auto Focus mode Zoom Speed Select Slow or Fast movements for telephoto and wide angle shots n T slow and T fast Telephoto zoom in n W slow...

Page 30: ...Data Screen button again to dismiss the information If the address is 169 254 1 1 the camera is using its default IP address This usually means one of these things n The network automatically assigns...

Page 31: ...default user password is password but this can be changed Check with the system administrator if the camera s web interface requires you to log in Only the Controls page is available with user level a...

Page 32: ...n System page View firmware version and switch settings reboot restore factory defaults and update firmware n Room Labels page Information to display on the web interface screens including the confere...

Page 33: ...the rear panel DIP switches n IR1 IR2 IR3 Frequency Selection for controlling up to 3 cameras independently with the remote n IR on off for enabling disabling control via the remote n Image Flip for i...

Page 34: ...mask gateway Time zone and NTP server source for system time date Networking Information about the camera location Help desk phone number for end users Room Labels Vaddio Technical Support contact in...

Page 35: ...in the RoboSHOT series For Non DHCP Environments Configuring the Device with a Static IP Address for Initial Installation NETWORKING PAGE Caution Consult your IT department before editing network sett...

Page 36: ...onnect the camera to the network 2 Connect the network port on the camera to the network port on a computer Depending on the computer you may need a crossover cable 3 On the computer open a browser an...

Page 37: ...affer then save your work The camera is now ready to be connected to the network Changing the Camera s Hostname NETWORKING PAGE If your network supports hostname resolution you may find it convenient...

Page 38: ...ssigns IP addresses automatically the camera s IP address may change from time to time To keep this from happening set the IP address to Static Do not change the IP address subnet mask or gateway unle...

Page 39: ...make it easier to match logged events with other actions and external events 1 To make the time zone and NTP server editable enable Automatic NTP Updating 2 Select the desired time zone from the list...

Page 40: ...able access via Telnet by default access via Telnet is enabled n Require HTTPS for web access by default HTTP is also permitted n Allow or deny device discovery allowed by default Note Consult your ne...

Page 41: ...nization s network security professional 1 Select Show Advanced Settings The advanced options open 2 To switch to a secure HTTPS connection select Switch to HTTPS Note Your browser may present message...

Page 42: ...Information to the Camera s Web Interface ROOM LABELS PAGE The information you enter on this page is displayed on every page of the web interface 37 Complete Manual for RoboSHOT HDBT High Performance...

Page 43: ...ure the first camera 2 Export its configuration Export Data button The export downloads to your computer as a dat file The filename is the camera s hostname 3 Import the configuration to the other cam...

Page 44: ...rmware and select it The filename ends with p7m 3 Select Begin Firmware Update 4 Read and understand the information in the Confirm dialog box It s dull but it could save you some time and aggravation...

Page 45: ...g the Camera SYSTEM PAGE FIRMWARE TAB This can help if the camera stops responding as you expect In the System Utilities section select Reboot 40 Complete Manual for RoboSHOT HDBT High Performance PTZ...

Page 46: ...cting Vaddio Technical Support on the Help page The model identifier and the link for support information vary depending on the camera model Accessing the Diagnostic Logs DIAGNOSTICS PAGE When you con...

Page 47: ...cameras all have very similar web interfaces Some of the screen shots in this manual may be from other models in the RoboSHOT series Setting the Custom Home Position and Other Preset Shots CAMERA PAGE...

Page 48: ...s to move simultaneously from other presets to this position 6 Store the preset Note Tri Synchronous Motion works best for on air shots requiring significant movement It is not useful when moving the...

Page 49: ...cent Hi Incandescent Lo Fluorescent Hi Fluorescent Lo and Outdoor The Auto setting allows the camera to determine the appropriate adjustments Adjust the camera for the lighting in use by selecting the...

Page 50: ...t Compensation is only available on the RoboSHOT 12E HDBT and RoboSHOT 30E HDBT cameras It is on the General tab of the System page Note Wide Dynamic Range is not available on RoboSHOT 30 HDBT cameras...

Page 51: ...s Gain Increase Chroma Decrease Gamma The subject is silhouetted against a bright background Enable Backlight Compensation Small sources of bright light point sources make it hard to see details in ar...

Page 52: ...for less green n adjust Blue Gain decrease for less blue increase for less yellow Too much red Not enough red Too much blue Not enough blue Balanced Saving Color and Lighting Settings CAMERA PAGE If...

Page 53: ...near and far buttons I know you already understand this but I m going to say it anyway The and buttons don t work when Auto Focus is selected For users who are not logged in as admin focus control is...

Page 54: ...ayer This is the camera s default protocol for IP streaming n RTMP streaming sends a stream to a content service provider such as YouTube No local preview is available To use RTMP streaming you must h...

Page 55: ...tirely Clear the Enable IP Streaming check box n To stop the video portion of the stream but leave the stream running Mute the video This also stops the video locally so the connected display is blank...

Page 56: ...st settings automatically 1 Select Easy quality mode 2 Select the desired IP streaming resolution This determines the size of the window in which the stream is displayed 3 Select Video Quality 4 Save...

Page 57: ...ct the desired resolution 3 Select the desired frame rate 4 Select Constant or Variable bit rate 5 Constant bit rate only Set Max Bandwidth 6 Variable bit rate only Set the Quality Quantization slider...

Page 58: ...r Path The portion of the streaming URL that appears after the IP address You may wish to change this to help identify the stream source for example demo studio 3 URL The location where the stream can...

Page 59: ...streaming service To configure an RTMP streaming service 1 Select RTMP streaming and select Settings 2 Expand the information box for the service 3 Enter the name of the service 4 Paste in the key and...

Page 60: ...streaming is selected and a service is configured the camera streams to that service until you stop the stream Advanced Changing MTU STREAMING PAGE The default packet size for streaming is 1400 Do not...

Page 61: ...ts begin together and arrive at the same time It ensures smooth on air movements when making large changes in position particularly when the zoom also changes Tri Synchronous Motion is only available...

Page 62: ...presets at several points in the room at different zoom levels saving them without selecting the Tri Sync option 2 Move among the presets using the preset buttons 3 Use the Global Preset Non Tri Sync...

Page 63: ...third of the way along the scale 2 Move the camera to a different pan tilt and zoom position and save this position as another preset Again check Save with Tri Sync but set the speed slider to about...

Page 64: ...ooking the same direction as the camera If a person facing the camera is controlling it with the remote using the right arrow pans the camera to the person s left To make the arrow buttons indicate ca...

Page 65: ...switch es on the back of the camera if you need to change them This tab only controls the soft DIP switches This screen shot shows the DIP Switches tab for theRoboSHOT 30E HDBT camera On the older Ro...

Page 66: ...ect the camera you want to control This allows the IR Remote Commander to control them independently n Left and right IR switches up IR frequency 1 n Left IR switch down right IR switch up IR frequenc...

Page 67: ...era s IP stream may include audio with the video n LED on off When the LED is set to OFF it remains off even when the camera is sending video n Standard Control Mode Codec Control Mode Select Codec Co...

Page 68: ...state n Select a custom lighting adjustment if any have been stored Since the web interface is specific to the camera you are working with it does not offer camera selection Switching the Camera Off o...

Page 69: ...e color and speed information as well If no presets are defined the Controls page does not present the Presets section Use the Preset buttons to move the camera to any of its preset positions Adjustin...

Page 70: ...arameter will bring up a list of available subcommands or parameters Example camera focus camera focus near Focus the camera near far Focus the camera far stop Stop the camera focus mode Camera focus...

Page 71: ...value between approximately 150 00 left and 150 00 right set position Sets the camera s absolute pan position in degrees as a floating point value between approximately 150 00 and 150 00 This is the...

Page 72: ...is selected set position Sets the camera s absolute tilt position in degrees as a floating point value between approximately 30 00 and 90 00 90 to 30 if the camera is configured for inverted operation...

Page 73: ...el as a floating point value The value of n maximum zoom depends on the camera s capabilities For example the range is 1 00 to 12 00 for a 12x camera If the value is out of range the camera returns an...

Page 74: ...nual mode speed 1 8 Optional integer 1 to 8 specifies the focus speed stop Stops the camera s focus movement mode get auto manual Returns the current focus mode or specifies automatic or manual focus...

Page 75: ...amera position as the specified preset tri sync 1 24 Optional Specifies that the camera uses Tri Synchronous Motion to move to this position using the specified speed save ccu Optional Saves the curre...

Page 76: ...alue as an integer 0 to 11 gain Returns gain as an integer 0 to 11 detail Returns detail as an integer 0 to 15 chroma Returns chroma as an integer 0 to 14 gamma Returns gamma as an integer 64 to 64 wi...

Page 77: ...is 0 11 Sets the iris value as an integer 0 to 11 Can only be used when auto iris is off auto_iris on off Sets the auto iris state on or off Auto iris disables manual iris and gain when it is on gain...

Page 78: ...era to use factory CCU scene 2 camera ccu scene store custom 1 OK Saves the current CCU scene as custom CCU scene 1 camera led Set or change the behavior of the indicator light Synopsis camera led get...

Page 79: ...get standby on OK Returns the current standby state streaming ip enable Set or change the state of IP streaming Synopsis streaming ip enable get on off toggle Parameters get Returns the current state...

Page 80: ...IP URL URL where the RTSP stream is available IP Video_Mode Video quality mode selected preset or custom Example streaming settings get IP Custom_Frame_Rate 30 IP Custom_Resolution 1080p IP Enabled t...

Page 81: ...kets transmitted 5 packets received 0 packet loss round trip min avg max 0 410 0 964 3 112 ms Sends five ECHO_REQUEST packets of 56 bytes each to the host at 192 168 1 66 network ping count 10 size 10...

Page 82: ...reset software off factory reset hardware off OK Returns the factory reset status This evaluates the most recent system factory reset on or off command if one has been received then reads the rear pan...

Page 83: ...expansion functionality from which previous commands can be recalled from within a single session History expansion is performed immediately after a complete line is read Examples of history expansion...

Page 84: ...ays an overview of the CLI syntax Synopsis help Example help exit Ends the command session and then closes the socket Synopsis exit Example exit 79 Complete Manual for RoboSHOT HDBT High Performance P...

Page 85: ...and RoboSHOT 30E HDBT Camera Movement Zoom and Focus Commands Command Set Command Command Packet Comments CAM_Zoom Stop 8x 01 04 07 00 FF Variable speed p 0 low to 7 high Direct pqrs zoom position 0h...

Page 86: ...sition 90E2h 6BD8h 0Z0Z0Z0Z Tilt position EB99h 3D59h Pan Tilt ZoomDrive Up 8x 01 06 0A vv ww rr 03 01 03 FF vv Pan speed 01h 18h ww Tilt speed 01h 14h rr Zoom speed 00h 07h Down 8x 01 06 0A vv ww rr...

Page 87: ...0z 0z 0z 0z FF wwww Pan position zzzz Tilt Position CAM_ZoomPosInq 8x 09 04 47 FF y0 50 0p 0q 0r 0s FF pqrs Zoom position CAM_FocusPosInq 8x 09 04 48 FF y0 50 0p 0q 0r 0s FF pqrs Focus position CAM_F...

Page 88: ...to_iris in Telnet API CAM_Shutter Reset 8x 01 04 0A 00 FF Shutter setting pq shutter position 00h 15h See Shutter Speed Values CAM_Shutter Command Up 8x 01 04 0A 02 FF Down 8x 01 04 0A 03FF Direct 8x...

Page 89: ...tion 0h 0fh Up 8x 01 04 02 01 FF Down 8x 01 04 02 02 FF Direct 8x 01 04 42 00 00 0p 0q FF Corresponds to camera ccu set detail in Telnet API CAM_Chroma Direct 8x 01 7E 55 00 00 0p 0q FF pq 00h 14h Cor...

Page 90: ...11 1 2000 1 1750 0x10 1 1500 1 1250 0x0F 1 1000 1 1000 0x0E 1 725 1 600 0x0D 1 500 1 425 0x0C 1 350 1 300 0x0B 1 250 1 215 0x0A 1 180 1 150 0x09 1 125 1 120 0x08 1 100 1 100 0x07 1 90 1 75 0x06 1 60 1...

Page 91: ...ps Gain in dB Value Steps Gain in dB 0x0F 28 77 8 0x0F 28 77 8 0x0E 26 44 4 0x0E 26 44 4 0x0D 24 41 0 0x0D 24 41 0 0x0C 22 37 5 0x0C 22 37 5 0x0B 20 34 1 0x0B 20 34 1 0x0A 18 30 7 0x0A 18 30 7 0x09 16...

Page 92: ...FF y0 50 02 FF On y0 50 03 FF Off CAM_ApertureInq 8x 09 04 42 FF y0 50 00 00 0p 0q FF pq Aperture gain CAM_ChromaInq 8x 09 7E 55 FF y0 50 05 00 00 00 0p FF p 0 Eh CAM_GammaOffsetInq 8x 09 04 1E FF y0...

Page 93: ...0r 0r 0r 0s 0s 0s FF IP address ppp qqq rrr sss CAM_TallyInq 8x 09 7E 01 0A FF y0 50 02 FF On y0 50 03 FF Off CAM_NRInq 8x 09 04 53 FF y0 50 0p FF Noise reduction p 00h to 05h CAM_MuteModeInq 8x 09 04...

Page 94: ...o 3 1 tele f 4 4mm wide end to 88 4mm tele end F2 to F3 8 Min working distance RoboSHOT 12 HDBT 8 in 0 2 m wide 30 in 0 8 m tele RoboSHOT 30 HDBT 10 in 0 25 m wide 48 in 1 2 m tele RoboSHOT 12E and 30...

Page 95: ...camera via its web interface or Telnet If so the status light is disabled Check the Cables Next If the equipment behaves in a way that suggests even a remote possibility of a bad cable please try a kn...

Page 96: ...ect the camera to the 48 VDC OneLINK power pack This will damage the camera and void its warranty Insufficient power using a PoE injector Use a PoE power injector PoE does not deliver enough power At...

Page 97: ...ehavior Settings older RoboSHOT cameras or Basic Camera Settings for RoboSHOT 12E HDBT and RoboSHOT 30E HDBT The remote s batteries are dead Put new batteries in the remote The camera responds to the...

Page 98: ...r Restoring Importing a Configuration Restoring Factory Default Settings Via Hardware If the camera s administrative controls are not accessible you can restore factory defaults using the switches on...

Page 99: ...F or below 0 C 32 F n High humidity condensing or wet environments n Inclement weather n Severe vibration n Inside a cement mixer n Dry environments with an excess of static discharge Do not attempt...

Page 100: ...o radio communications Operation of this equipment in a residential area is likely to cause harmful interference in which case the user will be required to correct the interference at his her own expe...

Page 101: ...diated Immunity EN 61000 4 4 2004 Corrigendum 2006 Electrical Fast Transients EN 61000 4 5 2006 Surge Immunity EN 61000 4 6 2009 Conducted Immunity EN 61000 4 8 2010 Power Frequency Magnetic Field EN...

Page 102: ...ort can be contacted by email at support vaddio com or by phone at one of the phone numbers listed on support vaddio com Return Material Authorization RMA number Before returning a product for repair...

Page 103: ...e subject to restocking charges n The Dealer has up to 60 days from the date of purchase to return Vaddio product for credit for future purchases of Vaddio product only n The Dealer has 61 to 90 days...

Page 104: ...riod will be repaired under the non warranty terms if o The equipment has been damaged by negligence accident act of God mishandling used with the incorrect modified or extended power supply or has no...

Page 105: ...unit n Customers requesting an estimate on repair charges must do so up front when they call in for an RMA The RMA team will call or email with the estimate after evaluating the unit and before procee...

Page 106: ...sa2explore 16166230844 Public Domain https commons wikimedia org w index php curid 38931301 European Space Agency astronaut Luca Parmitano Expedition 36 flight engineer outside the International Space...

Page 107: ...g and image quality 46 Vaddio IR Remote Commander 23 web interface 28 chroma setting 45 47 71 72 cleaning 94 Codec Control Mode setting 62 color codes for status light 22 90 color settings 44 45 47 71...

Page 108: ...f colors 22 90 LED Color Scheme setting 62 LED On Off setting 62 light status indicator 8 22 62 73 90 color scheme 62 enabling disabling 73 location 8 meaning of colors 22 90 lighting settings 44 45 6...

Page 109: ...85 86 RS 232 connector 15 RTMP streaming 49 54 RTSP streaming 49 51 53 S safety requirements 11 saving a configuration 38 scenes CCU 43 44 64 naming 43 storing 47 Scott 44 Security page web 35 36 sess...

Page 110: ...SP streaming 53 USB streaming 49 user login 26 35 changing 35 default 26 V Vaddio IR Remote Commander 23 variable bit rate IP streaming setting 52 version firmware 78 video mute 63 video resolution 13...

Page 111: ...ecifications drawings manuals technical support information and more 2019 Legrand AV Inc Vaddio is a registered trademark of Legrand AV Inc All other brand names or marks are used for identification p...

Reviews: