background image

WallVIEW CCU HD-18 HD-SDI 


WallVIEW CCU HD-18 HD-SDI Manual 341-988 Rev. A 


               Page 21 of 26 


Other General Information: 


Care and Cleaning 


Do not attempt to take any of these products apart at any time. There are no user-serviceable 
components inside.   


Do not spill liquids or liquid type substances onto the HD-SDI Slot Card, the CCU or in the HD-18 
Camera.  


Keep this device away from food or liquid or other immeasurably bad sticky or oily things. 


For smears or smudges on the products, wipe with a clean, soft cloth but do not attempt to clean the 
exposed parts, ICs or connectors on the HD-SDI Slot Card.   


Do not use any abrasive chemicals at any time on any product. 


Operating and Storage Conditions: 

Do not store or operate the HD-SDI Slot Card under the following conditions: 


Temperatures above 40°C (104°F) or temperatures below 0°C (32°F)  


High humidity, condensing or wet environments or if left out in the lawn overnight 


In inclement weather, especially when it is bad  


Dusty and explosive environments with more than a pile of dust in the air 


Dry environments with an excess of static discharge  


Under severe vibration  


Restatement of Important Safeguards: 

Read and understand all instructions before using.  Do not operate any device if it has been dropped or 
damaged. In this case, a Vaddio technician must examine the product before operating.  To reduce the 
risk of electric shock, do not immerse in water or other liquids and avoid extremely humid conditions. 


Use only the approved power supplies provided with the system.    
Use of any unauthorized power supply will void any and all warranties.


Do not use RJ-45 “pass-thru” connectors - they are gnarly and bad, 
and should never be used on important, permanent installations.    
Use standard RJ-45 connectors for best and consistent results.  


Do not insert or remove the EZIM HD-SDI Slot Card into an HD-18 
Camera when the camera is powered ON.  Detach all power 
connectors before installing or removing the HD-SDI Slot Card.  The 
EZIM HD-SDI Slot Card is not hot swappable.

FIRMWARE VERSIONS:

The firmware version V01.02.01 for the HD-18 camera that enables the HD-SDI Slot 
Card to operate properly (dated May 20

th

, 2010).  If you have purchased an HD-18 

PTZ camera before this date, a firmware update is required.  The updates and 
directions are on the Vaddio website (vaddio.com) and if assistance with the 
download and update is needed, please contact Vaddio Technical Support at 800-
572-2011. 

Summary of Contents for WallVIEW CCU HD-18 HD-SDI

Page 1: ...HD 18 PTZ Camera featuring the EZIM HD SDI Slot Card and Quick Connect CCU Cameras and Electronic Product for Integrators Model Number 999 6908 000 North America Model Number 999 6908 001 International Model Number 999 6908 000W North America Model Number 999 6908 001W International Arctic White Version EZIM HD SDI Card for HD 18 Quick Connect CCU for HD 18 ...

Page 2: ...I signal with 3Gb s compatible transmitter are returned over a single coax cable To summarize the wiring out to this camera system is two 2 CAT 5e cables and one coax The WallVIEW CCU HD 18 HD SDI is an exceptional camera system for integration projects since no power supply is required at the camera location Use the WallVIEW CCU HD 18 HD SDI for high definition camera applications such as houses ...

Page 3: ...nuals THE COMPONENTS The Camera 1 Camera A 1 3 1 3 megapixel HD image sensor is combined with an 18x optical zoom lens for capturing high quality video 2 Tally Light A tally light is illuminated when the camera receives a VISCA command or from the CCU tally port on the back of the Quick Connect CCU 3 IR Sensors Dual IR sensors are built into the front of the WallVIEW CCU HD 18 HD SDI to receive IR...

Page 4: ...age 6 for additional information on switch settings 8 12 VDC Input NOTE The power input is not used with the WallVIEW HD 18 system This is only used on the standard ClearVIEW HD 18 camera 9 YPbPr Video Output Component HD video is fed through the DB 15 connector 10 SD Video Output Standard definition video is fed through the BNC connector 11 EZ Camera Port This port is not used in the CCU HD SDI C...

Page 5: ...frame Red Blue Gain Controls The Red and Blue Gain encoders adjust the red and blue gain of the signal when AWB is disengaged AWB The Automatic White Balance controls adjusts the color levels automatically when engaged Turn off AWB to manually adjust the Red and Blue levels as well as Red Green and Blue Enhance SHIFT Pressing Shift illuminates the button and changes the Pedestal adjustment knob to...

Page 6: ...mera CCU installation A tally command will also be sent to the camera to illuminate the LED on the camera G L Input on BNC F This option is not supported on the HD 18 camera Camera Feature Switches The CCU interface has an 8 position dip switch on the rear panel to allow certain functionality as it relates to other Vaddio products and for future use Y Gain The Y Gain adjustment is not supported wi...

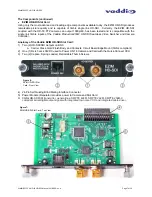
Page 7: ...r and Camera Controller Anatomy of the Vaddio EZIM HD SDI Slot Card 1 Two 2 HD SDI SDI Outputs on BNC a Carrier Class Gold Finish Body and Contacts Circuit Board Edge Mount 3Gb s compliant 2 One 1 RJ 45 Jack 36VDC used to Power HD 18 Camera and Card with the Quick Connect CCU 3 Two 2 Captive Spring Loaded Retractable Thumb Screws 4 24 Pin Self Guiding Blind Mating Interface Connector 5 Power Modul...

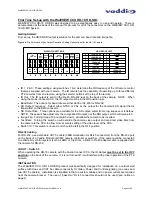
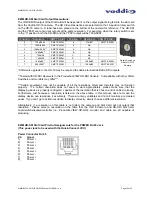
Page 8: ...low the camera to be inverted Test Bars Turning this switch on will override the camera video output and send test video bars from the camera to the CCU to allow more accurate setting of the video level at the CCU Switch 10 This switch is unused and should be left in the OFF position RS 232 Cabling For RS 232 use a standard CAT 5e cable 568B termination for RJ 45 connectors from the RS 232 port on...

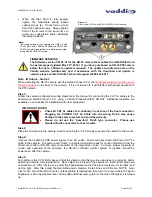
Page 9: ...racket is to be mounted on a 2 gang wall box use the screws supplied with the wall box cover plate to attach the Thin Profile Wall Mount If mounting to the drywall with wall anchors use the four 4 quality wall anchors The mounting holes are slotted and are 90 opposing to provide easy leveling Level the mount and tighten down the mounting screws Step 2 Installing the EZIM HD SDI Slot Card Remove al...

Page 10: ...bsite for installation with other equipment IMPORTANT NOTES Check all CAT 5e cables for continuity in advance of the final connection Plugging the POWER CAT 5e Cable into the wrong RJ 45 may cause damage to the camera system and void the warranty Please do not use the pass thru RJ 45 type connector Please use standard RJ 45 connectors for best results Step 4 Place the camera onto the camera mount ...

Page 11: ...543 ft 230m 1080i 1080p 29 97 25 Hz SMPTE 292M Max Length 754 543 ft 230m 1080p SMPTE 424M Max Length 459 287 ft 140m 1080p 60 59 94 50Hz 3Gb s compliant 480i SMPTE 259M Max Length 820 179 ft 250m 576i SMPTE 259M Max Length 820 179 ft 250m Distances are approximate and based on using Belden 1694A coax cable Results may vary according to the quality of cable used and with the ability of individual ...

Page 12: ...he ProductionVIEW HD SDI Console Compatibility with other 3Gb s Switchers and monitors may differ Certain equipment may not be capable of all the resolutions listed and therefore may not function properly If a certain resolution does not seem to work appropriately please make sure that the displaying device is properly configured capable of the resolution that is chosen and is cabled correctly Fur...

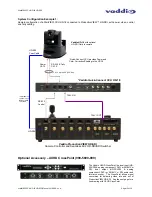
Page 13: ... camera RS 232 Control TALLY IN HD SDI Coax Cable Power CAT 5 RS 232 Tally CAT 5 TALLY OUT Vaddio Quick Connect CCU HD 18 HD SDI The Vaddio UXHD CrossPoint is a dual input HD SDI SDI analog component YPbPr or RGBHV or SD dual output HD SDI SDI analog component YPbPr or RGBHV or SD scaler and format converter The CrossPoint allows signal conversion for delivering video into and out of ProductionVIE...

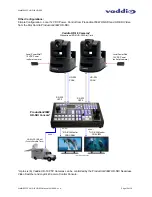
Page 14: ...nd at the same time the UXHD CrossPoint can convert one of the two HD SDI Program Outputs to use with an existing RGBHV or HD video projector Vaddio UXHD CrossPoint RGBHV RGBHV HD SDI PROG PC RGBHV Projector IN PC IN Conv to HD SDI HD SDI PROGRAM Monitor OUT HD SDI PC Vaddio HD 18 Cameras With optional HD SDI Slot Card HD SDI PROG OUT HD SDI PROG OUT HD SDI CAM 1 IN HD SDI CAM 2 IN HD SDI PREV OUT...

Page 15: ...Z Cameras can be controlled by the ProductionVIEW HD SDI Seamless Video Switcher and Joystick Camera Control Console RS 232 CAT 5 HD SDI COAX HD SDI ProductionVIEW HD SDI Console Vaddio HD 18 Cameras With optional EZIM HD SDI Slot Card HD SDI Monitor PROGRAM RS 232 CAT 5 HD SDI COAX Local PowerRite 12 VDC Power outlet at camera Local PowerRite 12 VDC Power outlet at camera Simulated Video Feeds HD...

Page 16: ...D 18 Video Outputs Unused Video RJ 45 Unused Camera Select Switch For Future Use All switches should be in the down position Video Adjustments Detail Red and Blue Gain White Balance Auto Manual Iris Auto Manual Pedestal Knee Chroma and Gamma with 3 scenes of storage CAT 5e Cable Distance Up to 500 152 4m Control and Power Only SDI Distance See page 4 of manual for distances Power Supply 36 VDC 2 7...

Page 17: ...nce This digital apparatus does not exceed the Class A limits for radio noise emissions from digital apparatus set out in the Radio Interference Regulations of the Canadian Department of Communications Le présent appareil numérique n emet pas de bruits radioélectriques dépassant les limites applicables aux appareils numeriques de la classe A préscrites dans le Règlement sur le brouillage radioélec...

Page 18: ... the Class A limits for radio noise emissions from digital apparatus set out in the Radio Interference Regulations of the Canadian Department of Communications Le présent appareil numérique n emet pas de bruits radioélectriques dépassant les limites applicables aux appareils numeriques de la classe A préscrites dans le Règlement sur le brouillage radioélectrique édicte par le ministère des Communi...

Page 19: ... authority to operate this equipment ICES 003 Compliance This digital apparatus does not exceed the Class A limits for radio noise emissions from digital apparatus set out in the Radio Interference Regulations of the Canadian Department of Communications Le présent appareil numérique n emet pas de bruits radioélectriques dépassant les limites applicables aux appareils numeriques de la classe A pré...

Page 20: ...ne of the following resources e mail support at support vaddio com or online at www vaddio com Return Material Authorization RMA number Before returning a product for repair or replacement request an RMA from Vaddio s technical support Provide a technician with a return phone number e mail address shipping address and product serial numbers and describe the reason for repairs or returns as well as...

Page 21: ...tion Restatement of Important Safeguards Read and understand all instructions before using Do not operate any device if it has been dropped or damaged In this case a Vaddio technician must examine the product before operating To reduce the risk of electric shock do not immerse in water or other liquids and avoid extremely humid conditions Use only the approved power supplies provided with the syst...

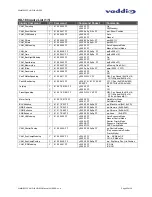
Page 22: ...A Page 22 of 26 Appendix 1 Video Pin out Table for WallVIEW HD 18 Appendix 2 Camera Dimensions Pin YPbPr 1 Pr 2 Y 3 Pb 4 5 6 Pr GND 7 Y GND 8 Pb GND 9 10 11 12 13 14 15 NOTE This output on the back of the camera is still active even with the EZIM HD SDI slot card installed ...

Page 23: ...d Near Standard Far Variable Near Variable AutoFocus ManualFocus Auto Manual 81 01 04 08 00 FF 81 01 04 08 02 FF 81 01 04 08 03 FF 81 01 04 08 2p FF 81 01 04 08 3p FF 81 01 04 38 02 FF 81 01 04 38 03 FF 81 01 04 38 10 FF Supported as Standard Supported as Standard CAM_WB Y Y Auto Manual 81 01 04 35 00 FF 81 01 04 35 05 FF CAM_RGain Y Y Y Y Reset Up Down Direct 81 01 04 03 00 FF 81 01 04 03 02 FF 8...

Page 24: ... 0Y 0Y 0Z 0Z 0Z 0Z FF 81 01 06 04 FF 81 01 06 05 FF WW Pan Speed 0x01 0x18 VV Tilt Speed 0x01 0x14 YYYY Pan Position ZZZZ Tilt Position Tally Y Y On Off 81 01 7E 01 0A 00 02 FF 81 01 7E 01 0A 00 03 FF Preset Pan Speed Y Pan Tilt Speed 81 01 7E 01 0B WW VV ZZ FF WW Pan Speed 0x01 0x18 VV Tilt Speed 0x01 0x14 ZZ Zoom Speed 0 7 Motor Config Y Y Hard Motor Stops Soft Motor Stops 81 01 7E 01 70 00 00 F...

Page 25: ...V FF WW Pan Speed 0x01 0x18 VV Tilt Speed 0x01 0x14 Pan tiltPositionInq Y 81 09 06 12 FF y0 50 0Y 0Y 0Y 0Y 0Z 0Z 0Z 0Z FF YYYY Pan 0x0100 0x1800 ZZZZ Tilt 0x0100 0x1400 TallyInq Y Y 81 09 7E 01 0A FF y0 50 02 FF y0 50 03 FF On Off PresetSpeedInq Y 81 09 7E 01 0B FF y0 50 WW VV ZZ FF WW Pan Speed 0x01 0x18 VV Tilt Speed 0x01 0x14 ZZ Zoom Speed 0 7 Motor Config Y 81 09 7E 01 70 FF y0 50 00 FF y0 50 ...

Page 26: ...w vaddio com 2010 Vaddio All Rights Reserved Reproduction in whole or in part without written permission is prohibited Specifications and pricing are subject to change without notice Vaddio ClearVIEW ProductionVIEW Quick Connect UXHD WallVIEW EZCamera EZIM and PowerRite are registered trademarks of Vaddio All other trademarks are property of their respective owners Document Number 341 988 Rev A ...

Reviews: