6
7
Please Note:
before installing the rail
you will need to prepare the wall with a
½" flush connector (not supplied). at the
position of the bottom bracket.
Bear in mind the different heights of
people likely to use the shower.
Connect the water supply from the valve.
Check for leaks, and finish off the wall.
Warning!
Please check for any
hidden cables and pipes before drilling
holes in the wall.
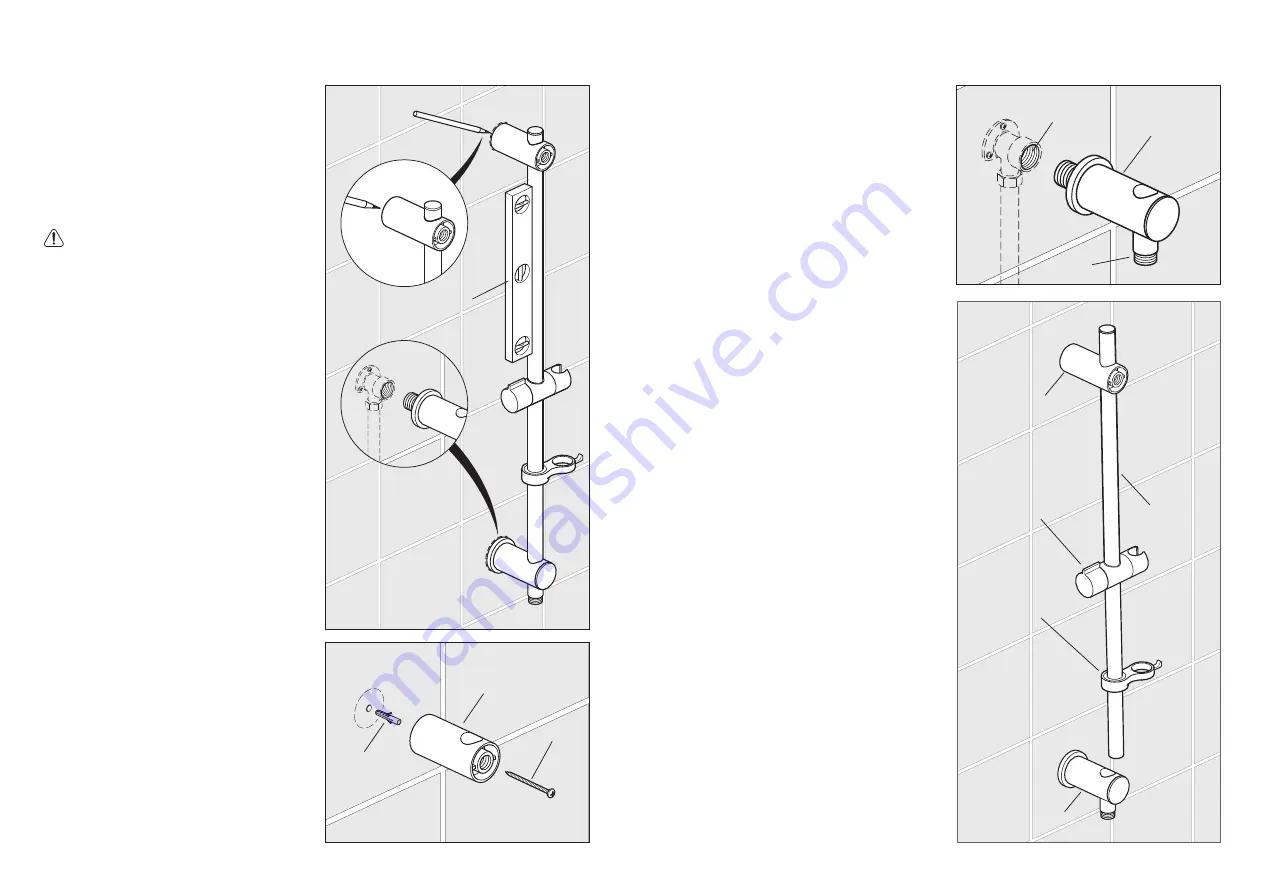
Screw the bottom bracket temporarily
into the flush connector with the outlet
pointing downwards.
Slide the top bracket onto the rail leaving
20mm of rail sticking through the bracket.
Place the bottom of the rail into the hole
on in the top of the bottom bracket.
Make sure that the rail is vertical using
a level. Mark the wall to indicate the
position of the top bracket.
Installation
Installation
Slide the rail up through the top bracket
(the bracket will need to be rotated
slightly) until if fits on the top of the
bottom bracket. Then push the rail down
into the bottom bracket.
Top bracket
Using a 6mm drill bit for the wall plug,
drill the wall at the centre of the marked
position.
Note:
If fixing through tiles use masking
tape to stop the drill from slipping and
push the head of the plug in through pass
the tile.
Fix in position using the supplied wall
plugs and screws.
Level
Top bracket
Bottom bracket
Bracket
Outlet
Connector
Top bracket
Handset holder
Hose retainer
Bottom bracket
Rail
Using PTFE tape on the thread of the
bracket screw into the connector.
Make sure that the outlet is pointing
downwards.
Bracket
Screw
Wall plug


